Since CrashPlan for Home is about to close down, I had to swith to a new solution. I opted for staying with CrashPlan since it works pretty darn well and I can still run it directly on my NAS. As always, I rely on other peoples work and in this case I’ve chosen the well maintained solution by Jocelyn who also maintains other interesting Docker packages.
This Dockerized version means running both the server and the client inside the Docker container. This means the installation process is much simpler than when they are split, as in my previous versions. Instead the UI is exposed using VNC and can be used directly from a browser or by connecting a VNC client.
Whenever the base CrashPlan is updated, I expect Jocelyn to release an updated image for me to install. At least quicker than I would do myself.
This guide assumes some basic knowledge of Crashplan and the service. Prior to this I initiated my migration request from Home to Pro on their website. It did fail for some reason but I managed to get help via their chat to quickly resolve that issue. As a Home subscriber, they have an offer of 1 client for $3/month for one year and then up to $10 after that. Regardless it is a very good price for unlimited storage as my Home subscription had over 6TB before I switched.

Creating the docker-compose.yml file
Read up on the different features of the image on the GitHub project linked above.
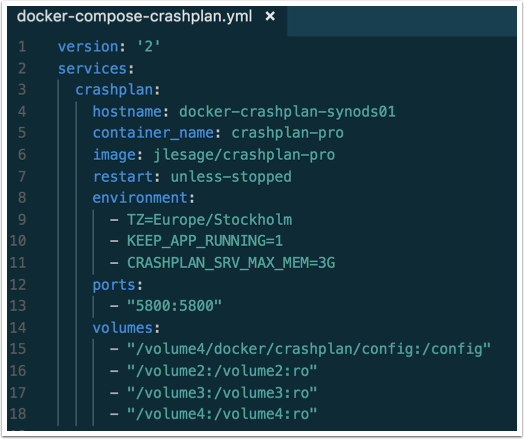
As I install this on an older Synology (DSM 6.1), my version of docker and docker-compose support to version 2 of the compose file format, not that it matters in this case.
I create a service named “crashplan” but naming the actual container instance “crashplan-pro”. Other important settings are the Volume mappings and the Memory allocation for the Java runtime which is set to 3 Gigabytes in my case. I am redirecting the configuration path to outside the container as well, which will make container upgrades easier and also backup-able.
The hostname is used to get a display friendly name within CrashPlan device list.
Note that I’m mounting my volumes as read-only, which will fail a possible future restore process. Either mount the volumes are rw directly (by omitting the “:ro”) or change whenever you do a restore. In that case, remember to destroy and re-create the container first, as the compose settings are maintainted by instance. This is easiest done by “sudo docker-compose down” followed by a “sudo docker-compose up -d”.
version: '2' |
Since I use my Synology as a Docker host, I’ve created the local folder structure as this:
In the root folder for the Docker, remember to pre-create any mapped folders first, such as the local mapped “config” folder. I’m placing my compose file and upgrade script (lazy version) in the same folder.
Whenever the configuration is done, start the container by: “sudo docker-compose up -d” from the terminal. You can watch any logs from the Synology Docker UI, it will show up as “crashplan-pro” in the list of running containers.

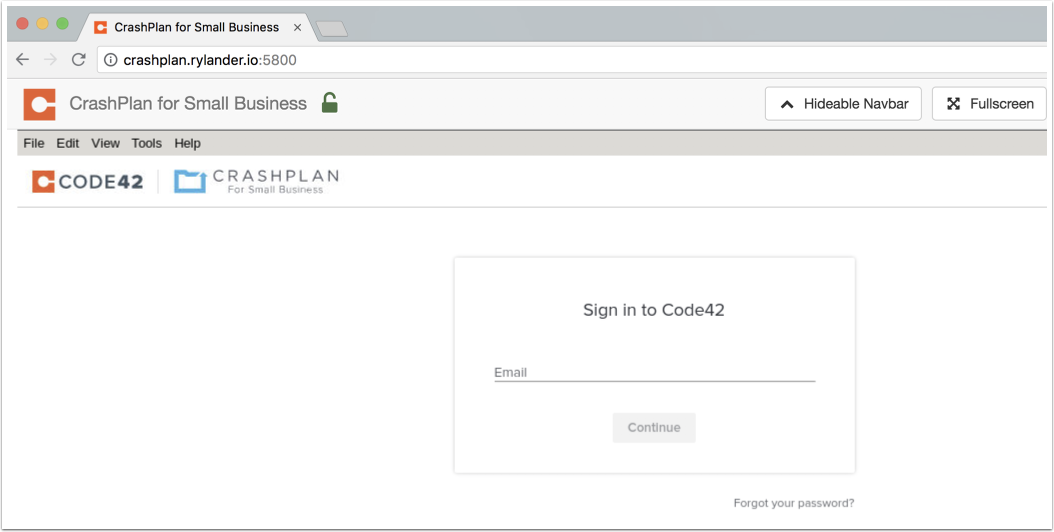
Navigate to the host ip on port 5800 which will utilize the built-in VNC over HTTP service in the container.
Log in using your CrashPla Pro credentials.
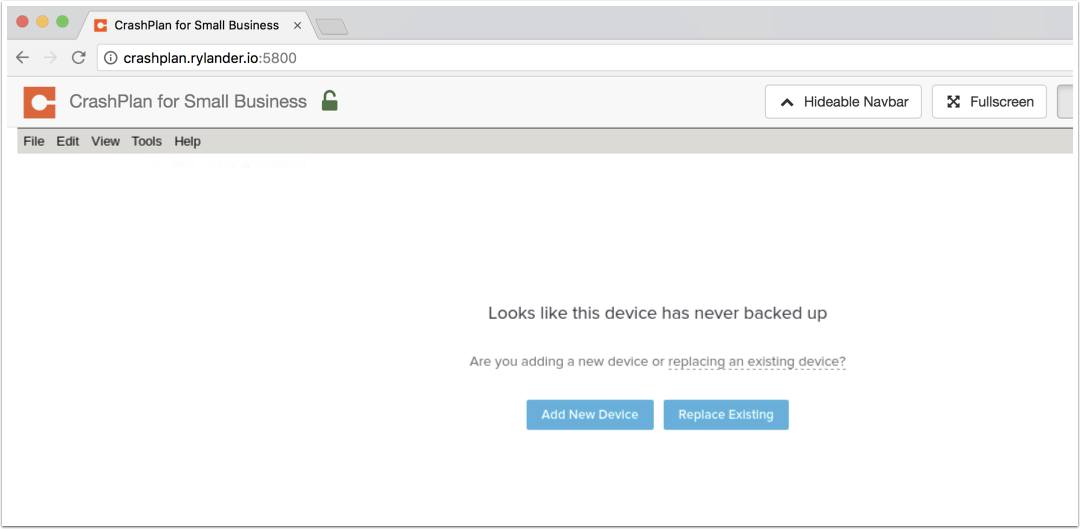
If you haven’t any existing backups defined, this is the welcome screen. Since my existing solution exceeds the migration limit of 1TB, I’m opting for the Add New button.
I’m reusing my existing key
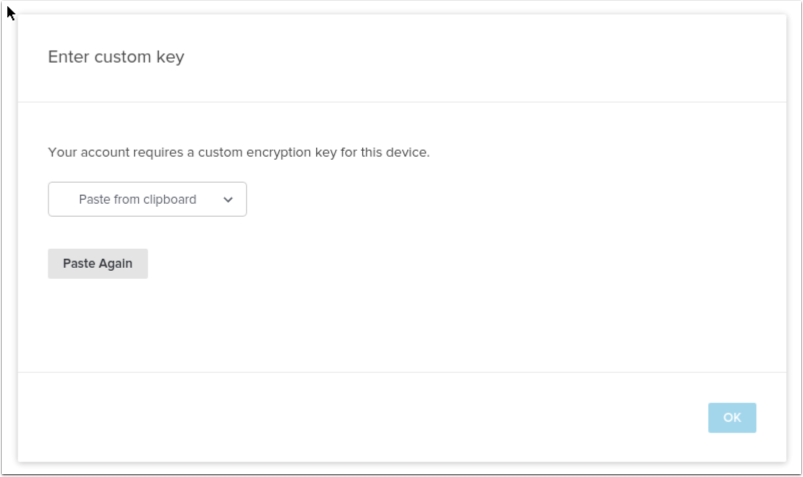
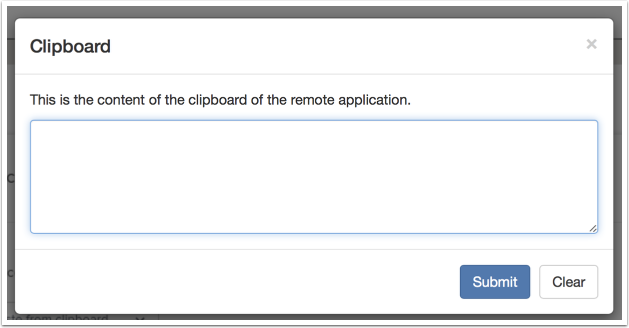
Which I copy via the clipboard feature, which means clicking the button in the right-most corner.
When all set, I click OK

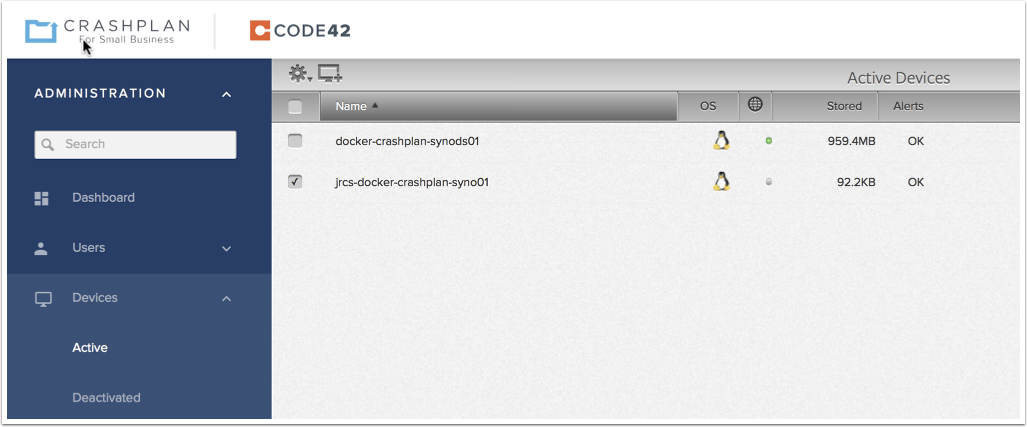
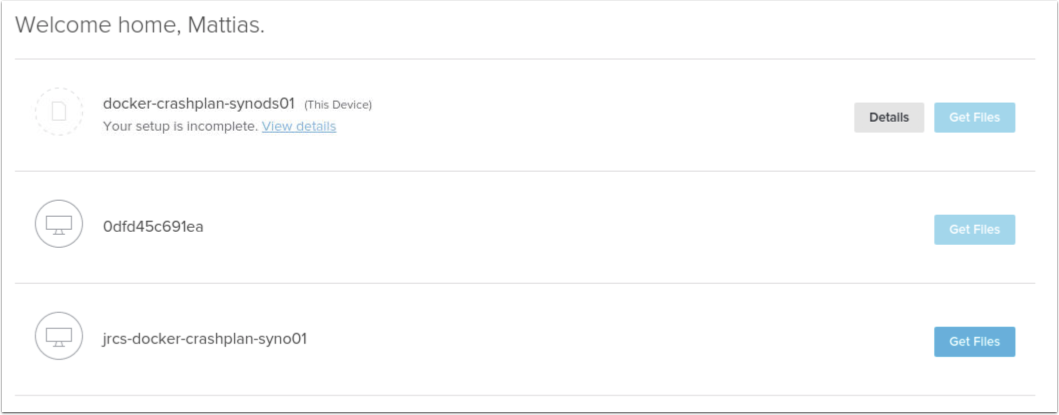
I’m greeted with my existing devices from my previous Home account. I need to make sure to delete these when I’m finished as each device incurs a cost.
Make sure to specify the hostname for the container as this is used by the Crashplan client for the device list.
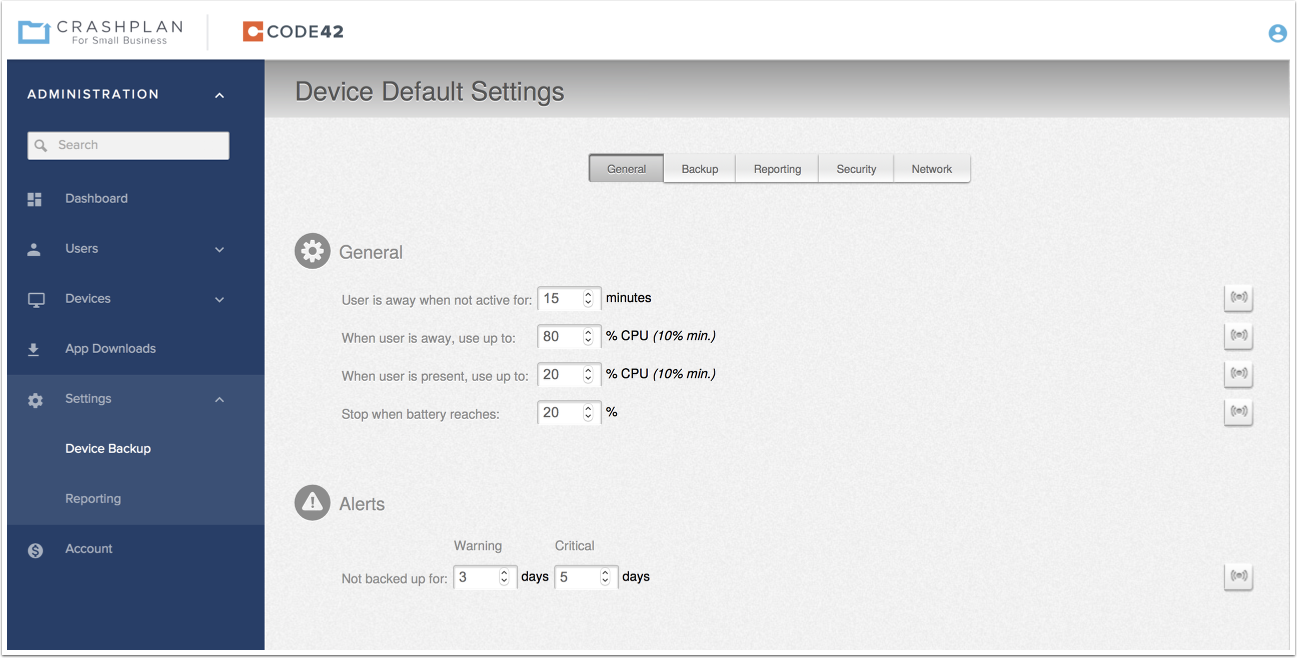
Setting global defaults
To save some time, ensure to set default values before configuring. Make sure to hit the “Save” button at the very low end of the window, also ensure to push the configuration to the clients.
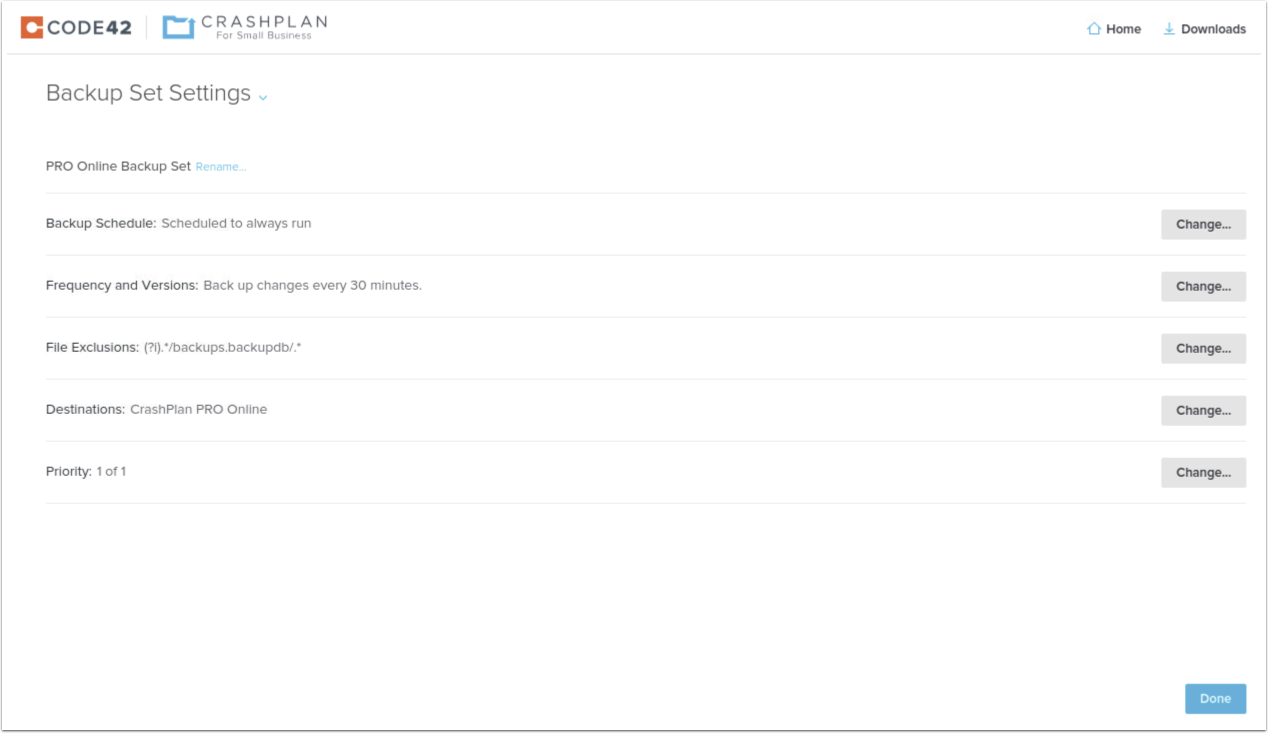
File exclusions

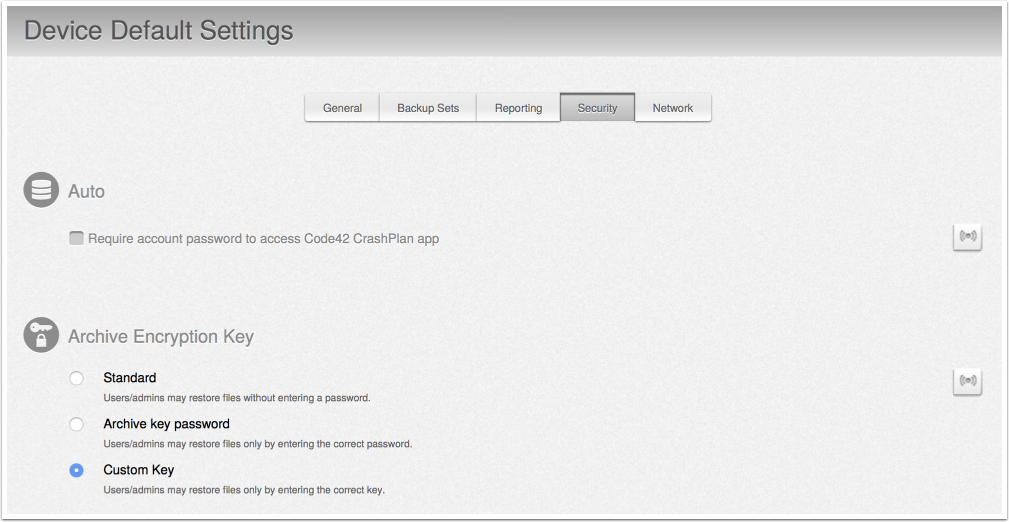
Custom archive encryption key
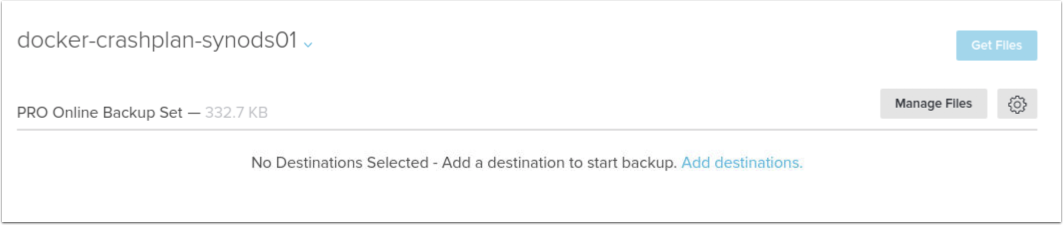
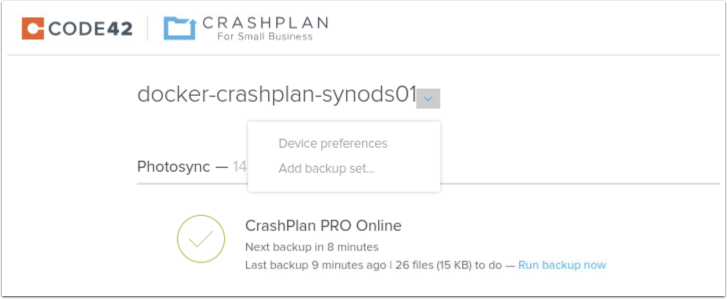
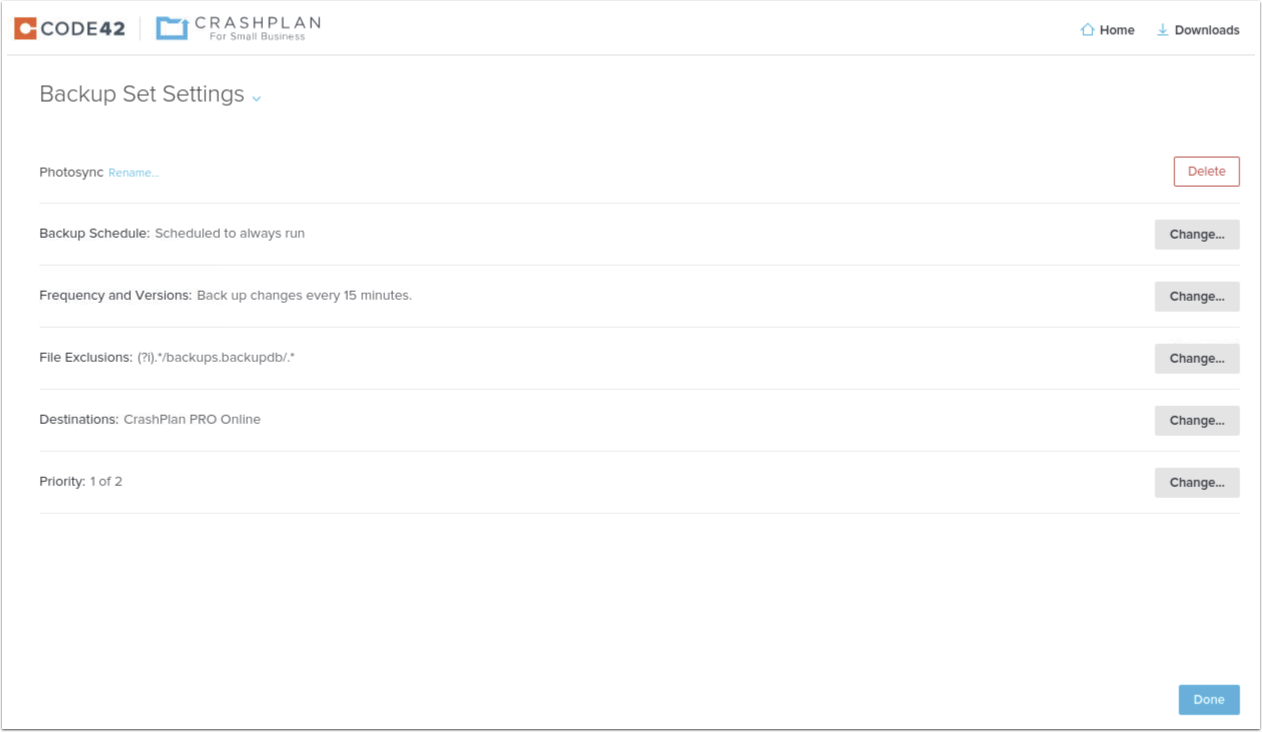
Backup Sets
This is the view for creating backup sets. By default only one is listed here.

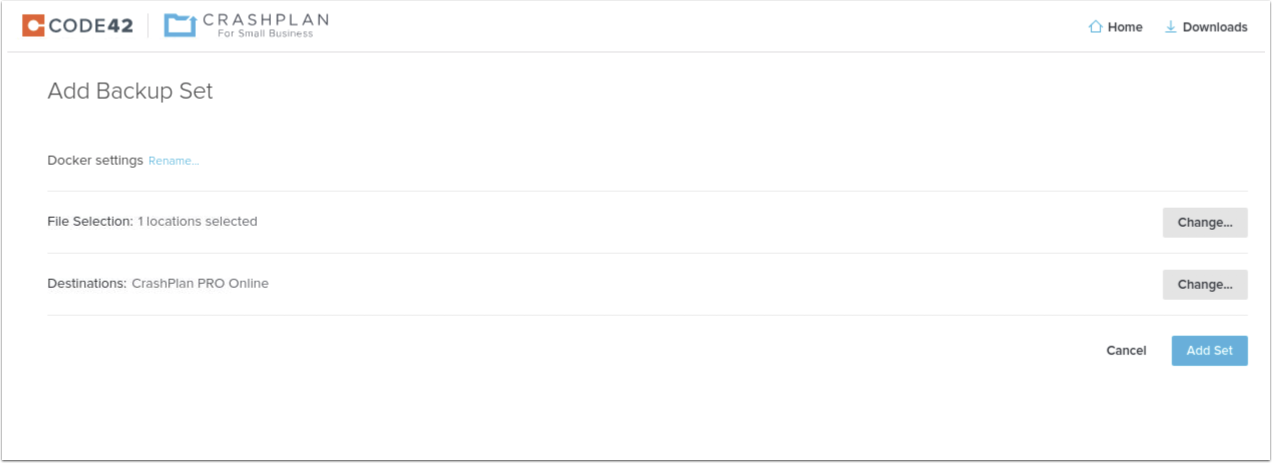
Adding Backup sets
I was a bit worried before finding this feature.
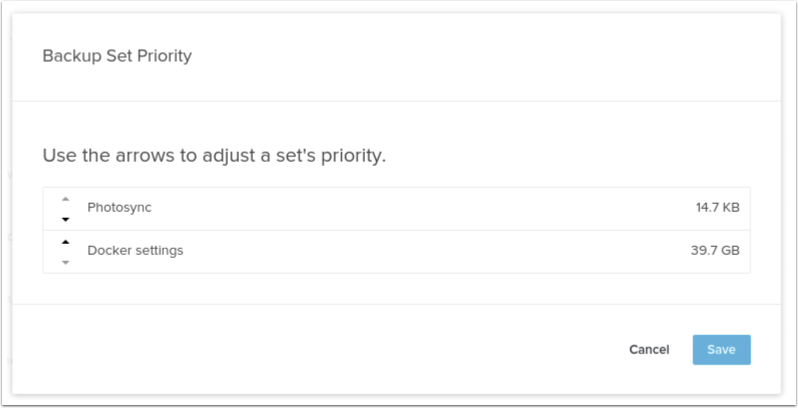
Setting priority
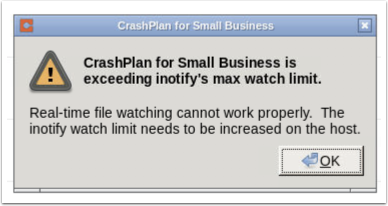
Exceeding inotify’s max watch limit
This error is bound to pop-up if you backup a significant amount of files. Fix by editing a configuration file as described below.
ERROR: CrashPlan for Small Business is exceeding inotify's max watch limit. Real-time file watching cannot work properly. The inotify watch limit needs to be increased on the host. stdout |
To read up on the cause and mitigation, please read here: https://support.code42.com/CrashPlan/4/Troubleshooting/Linux_real-time_file_watching_errors
On a Synology, add the setting to the /etc.defaults/sysctl.conf file. Press “i” to enter edit mode and when finished press “esc” and then type “:wq” for “write” and “quit” respectively.
sudo vi /etc.defaults/sysctl.conf |
The number is just taken from the example, I don’t know what the proper number is yet.
fs.inotify.max_user_watches=1048576 |

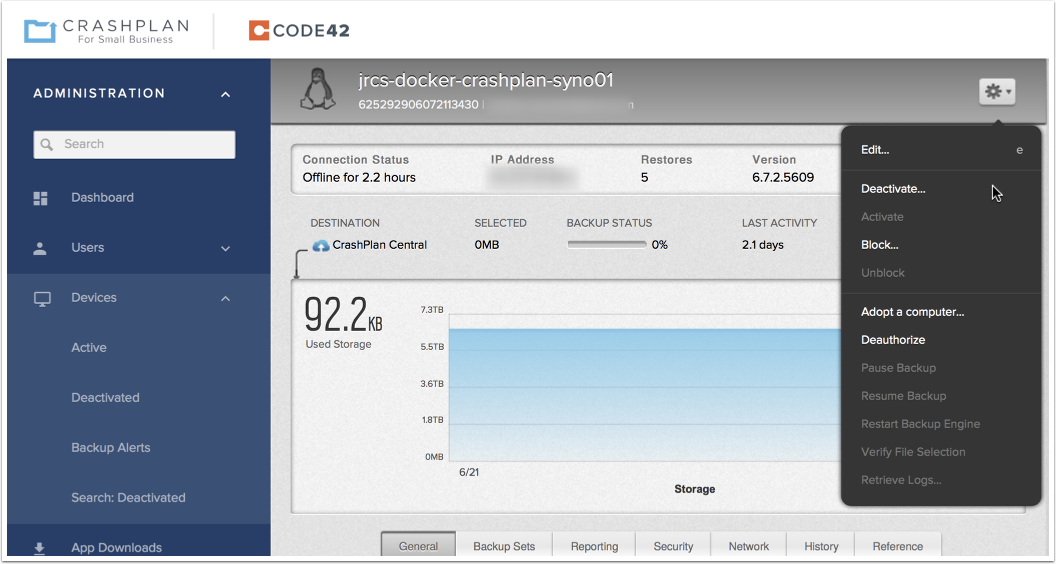
Deactivate a device