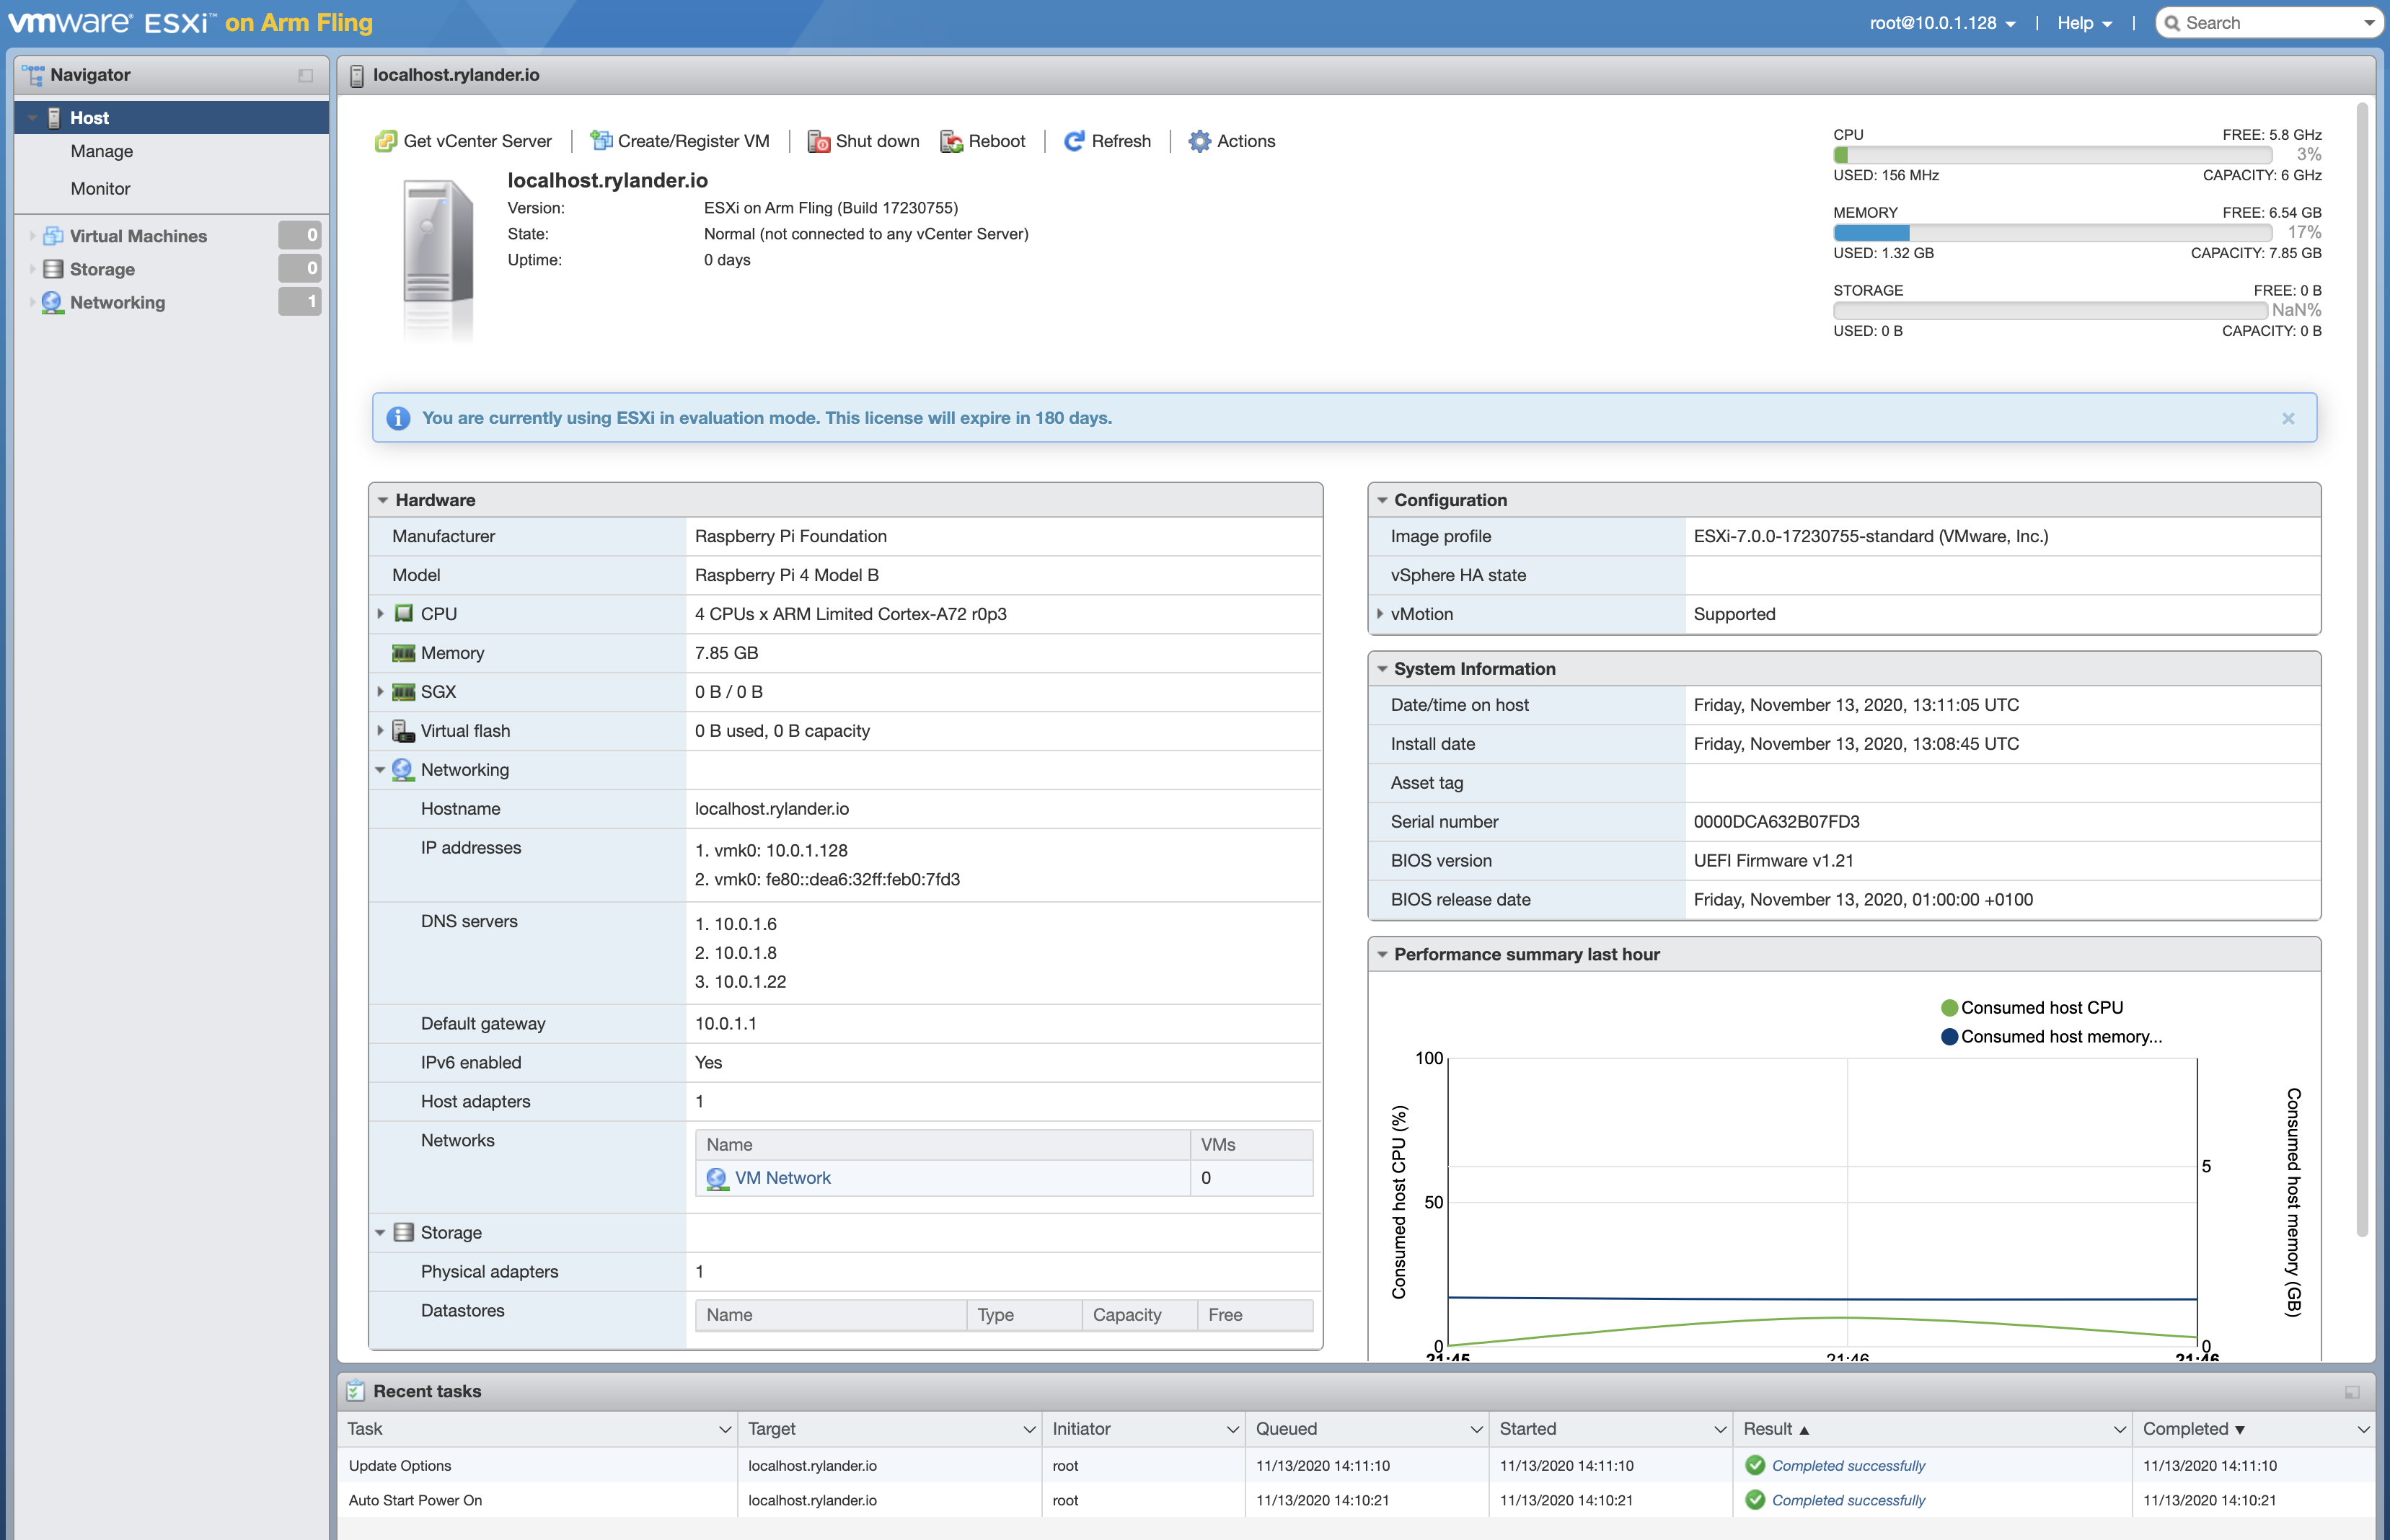
It is really neat that you can treat your Pi to some remote storage that is stable and fast and even boot from it. I followed these steps to setup my Pis to boot ESXi-Arm, my goto hypervisor, and then spawn virtual Pi instances, just because reasons.
As always, check out this original post as well as the included guides for installation.
Prerequisites
- SD for each Pi (yes an SD is needed for UEFI booting)
- One USB flashdrive or equivalent to use for ESXi-Arm installation media
- Monitor and Keyboard (for sanity, though you can automate using kickstart)
ISCSI Provider
As an ISCSI provider, I use a Synology NAS. It can also provide NFS storage and TFTP services.
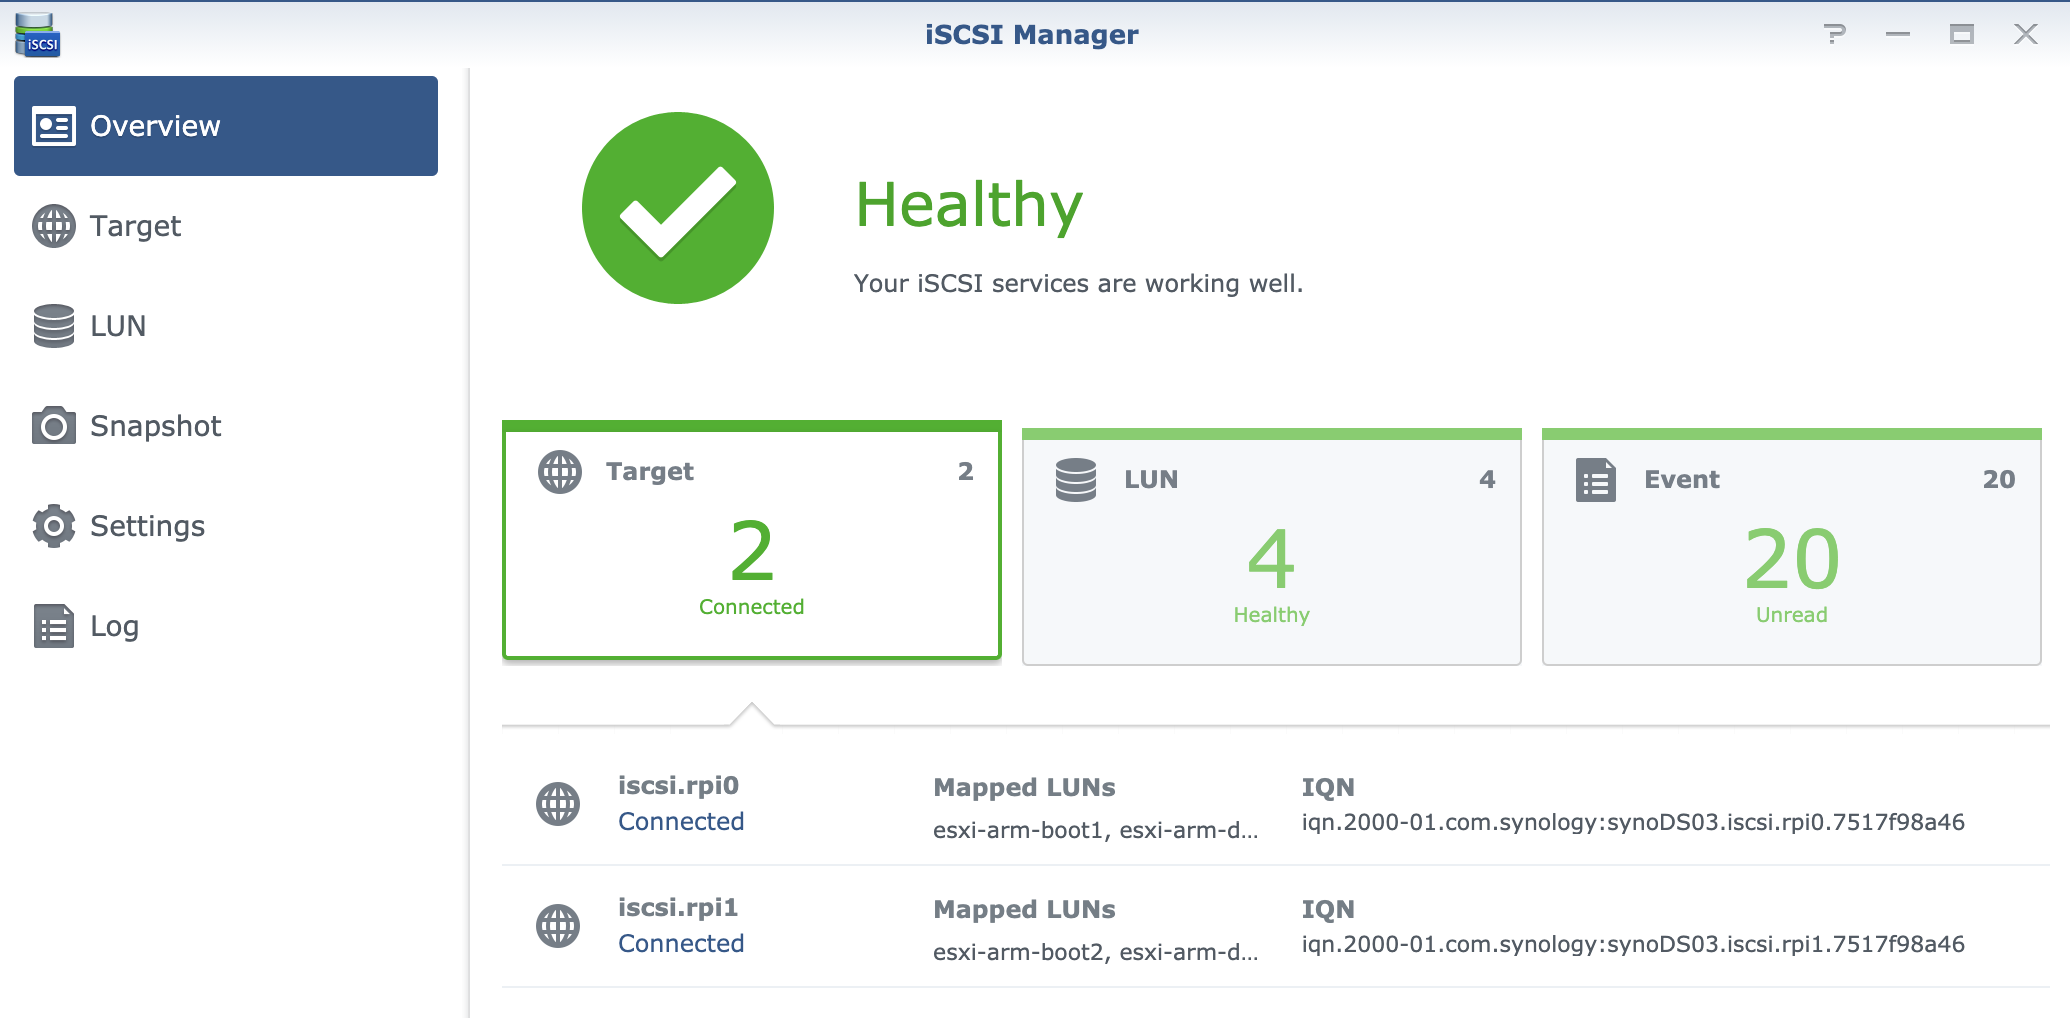
I have setup two targets, one for each physical Pi, with two LUNs respectively. One for boot (where ESXi-Arm is installed to) and the other for VMs.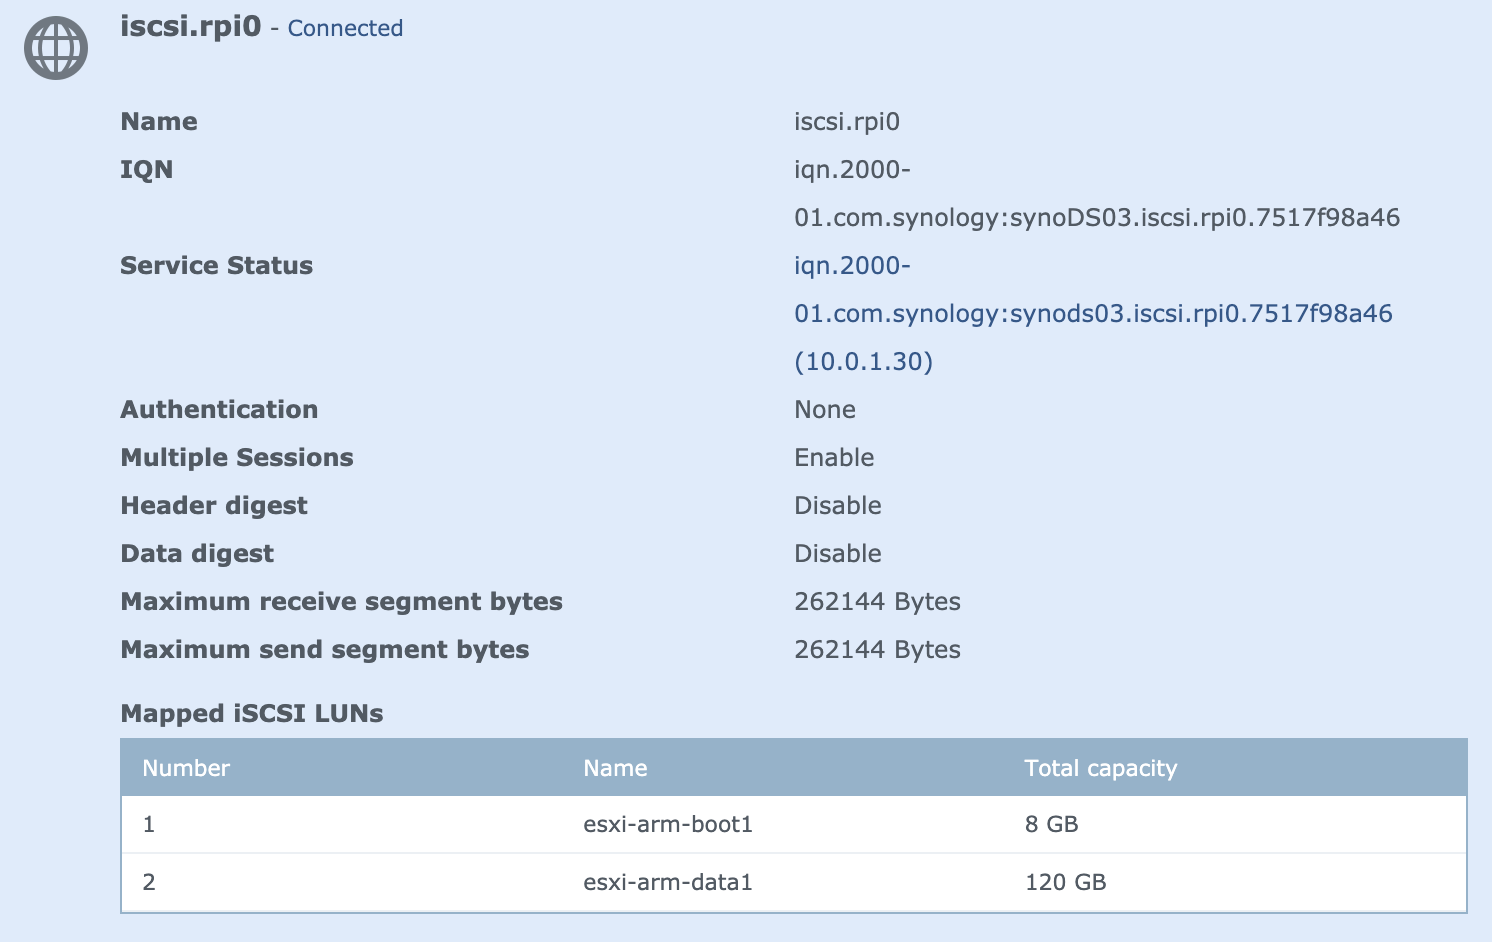
Initially I’ve turned off all fancy stuff to avoid issues such as CHAP authentication.
The most important is getting the typing right, with the awful iqn format, mistyping is easy. Keep em short is a pro tip.
The IQN string is entered into the Pi configuration, along with the NAS IP adress and the LUN number. The rest is not important for the setup.
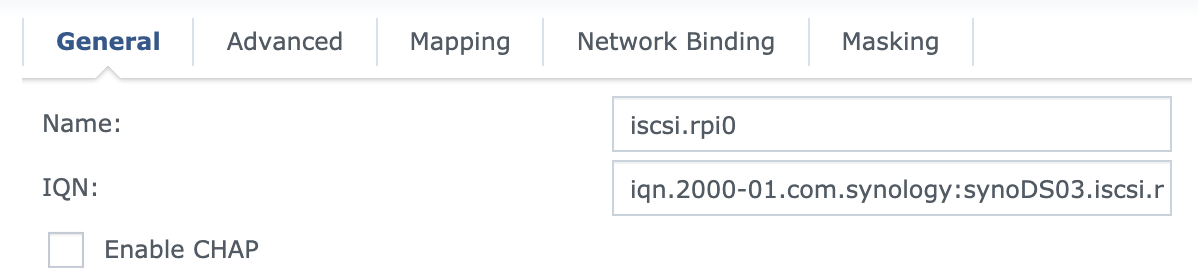
I used the proposed IQN and inserted the Target name to make the string unique
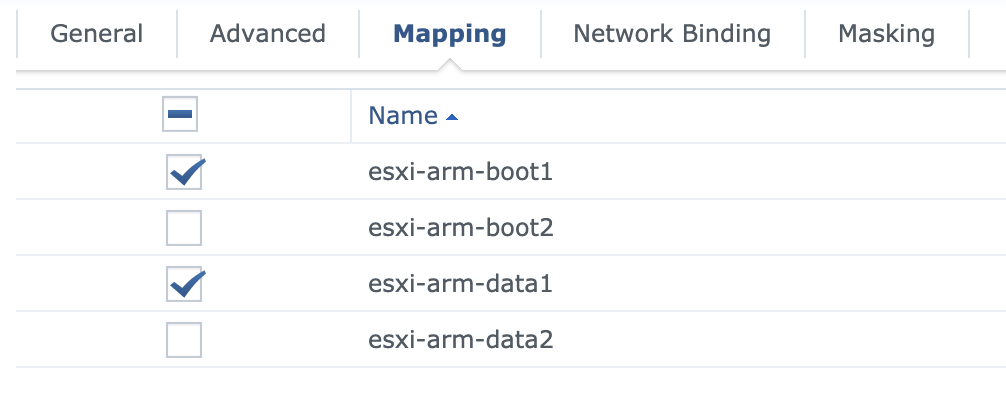
This Target has these LUNs mapped
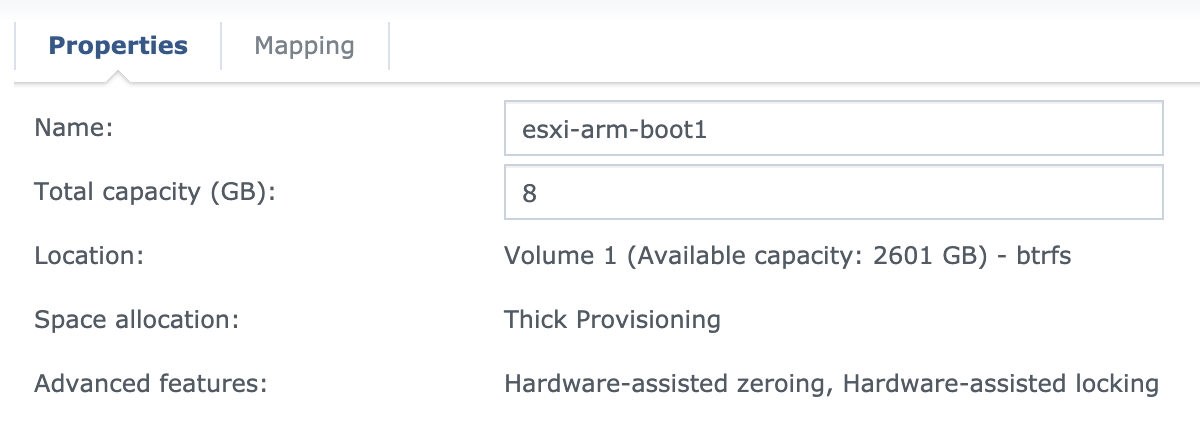
The LUN used to booting are 8GB and uses Thick Provisioning. These are targets for the ESXi-Arm installation.
You can create Targets and LUNs separately and then map them together. Create one target per RPi. The boot LUN is 8GB (pre-allocated) and the datastore was given 120GB (thin provisioning). These will be selectable installing the ESXi-Arm on the Pi. You can add more LUNs later to a target, and these will be usable within ESXi-Arm to create additional ISCSI based datastores.
Ok, all done on the NAS side of things!
Configuring the Raspberry Pi
The most important is to update the Pi to allow for remote boot using ISCSI. This is actually an update to the UEFI component. You can download a standard RPi OS image but that will take longer and require you to type stuff.
Update EEPROM

The fastest way in terms of time, is to flash the EEPROM boot image on an SD card and boot the Pi to ensure the Pi is updated. This can be done without a monitor.
I used to the handy GUI tool Raspberry Pi Imager since it allows me to download and flash the full range of Pi stuff.
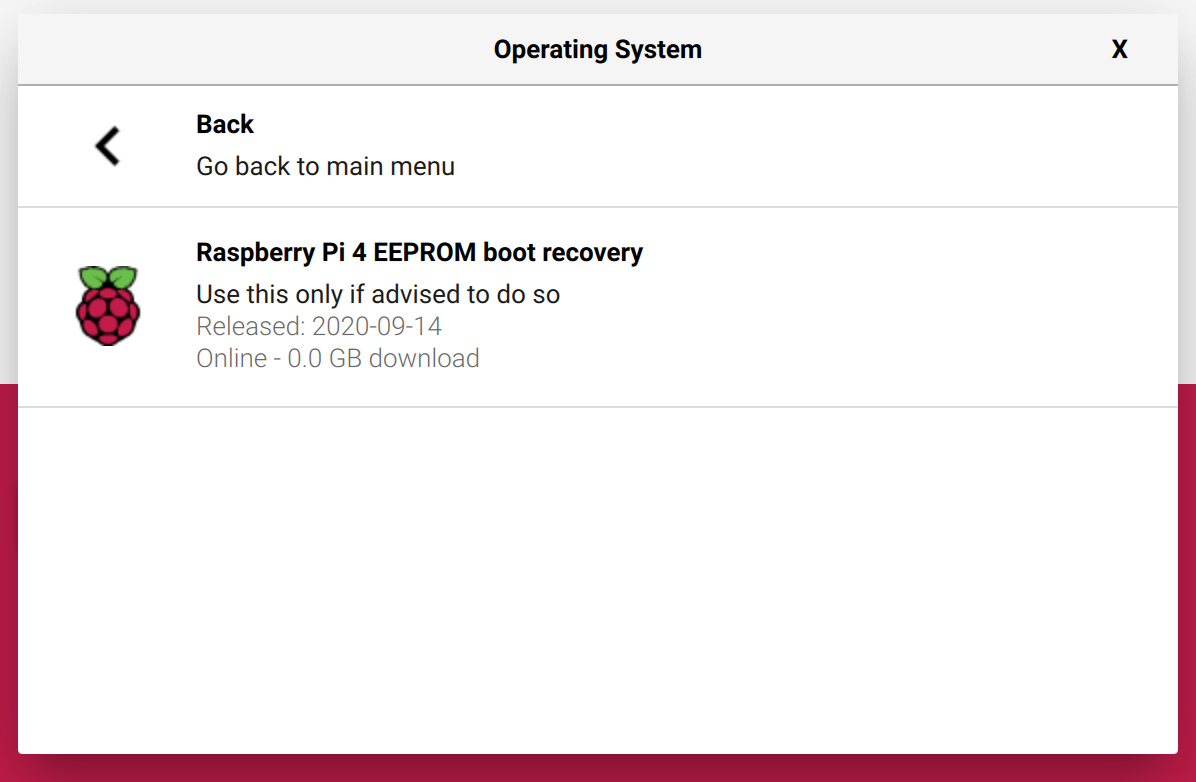
The utility allows you to select and flash the EEPROM image to an SD card.
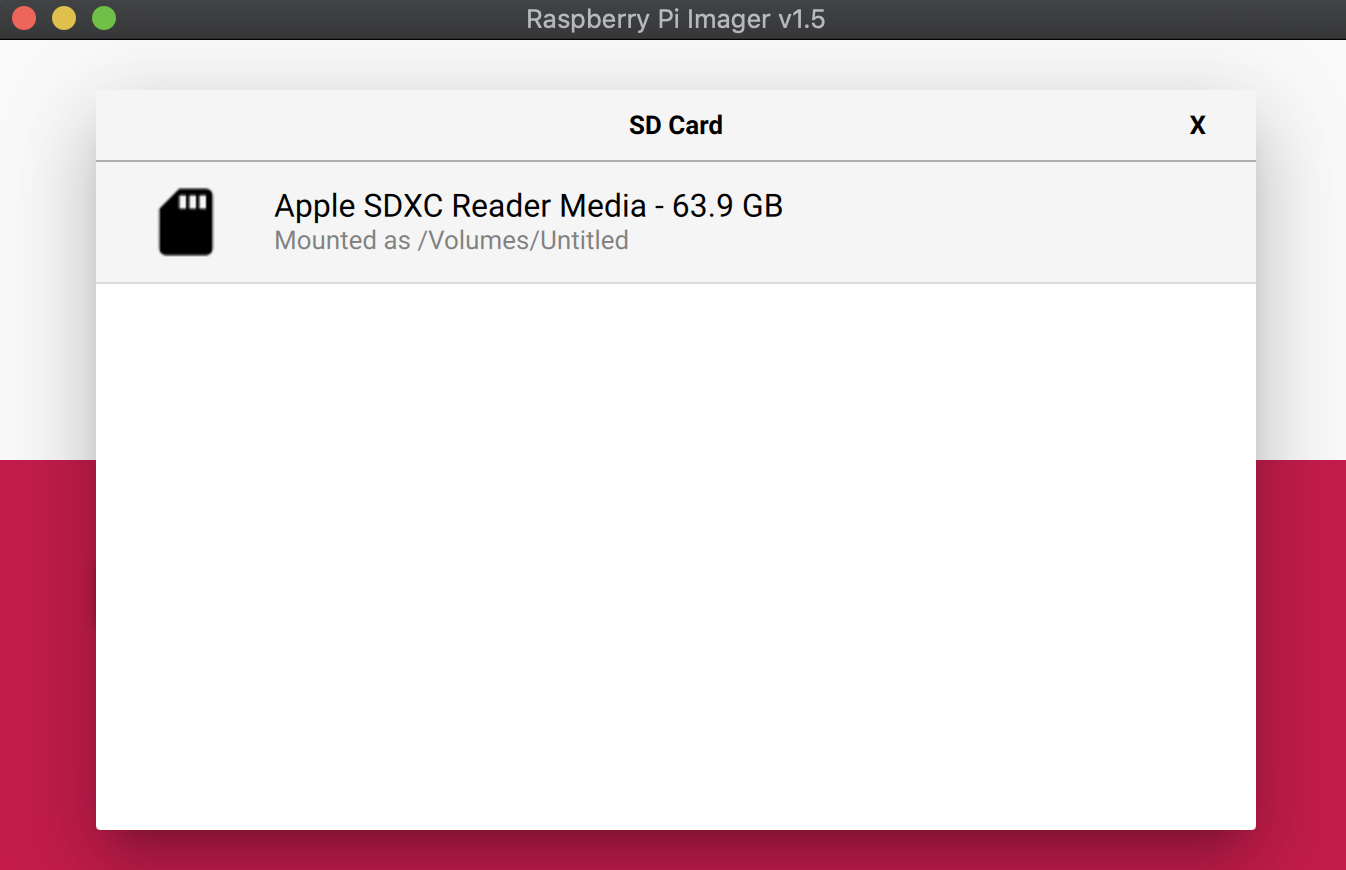
Flashing is really fast and the SD card is now ready to use and is fully automated.
When booting you Pi using this SD card, the screen will turn green if successful. Now your Pi EEPROM has been updated (it only requires the update from September).
Reuse the same SD card to be used as a UEFI boot device. This can be replaced with a PXE based solution to load the same firmware using remote image.
Setup UEFI on SD Card
The SD card will be only used for UEFI firmware, so don’t bother with a big card. It will hold the ISCSI configuration.
Download the necessary bits
Download the latest official Raspberry Pi Firmware and extract the contents to your computer, you should have a folder called firmware-master. Downlod the released source code you want.
This corresponds to the microcode necessary to initialize the Raspberry Pi.
Download the latest community Raspberry Pi 4 UEFI firmware and extract the contents to your computer, you should have a folder called RPi4_UEFI_Firmware_v1.21. This is the firmware necessary to boot ESXi-Arm.
The v1.21 release is currently required for iSCSI booting. New EDK2 releases do not default to enable iSCSI due to weak security. However v1.21 contains a serious bug where a boot file is prone to get corrupted. I’ve temporarily released a bugfix based on v1.22 with iSCSI re-enabled. Get it here (but remember it is only temporary). View other future releases.
Prepare SD card
Just delete the previous files from the SD card. It must be a FAT32 format, which it is.
You can easily do this using click and play in the GUI.
diskutil list |
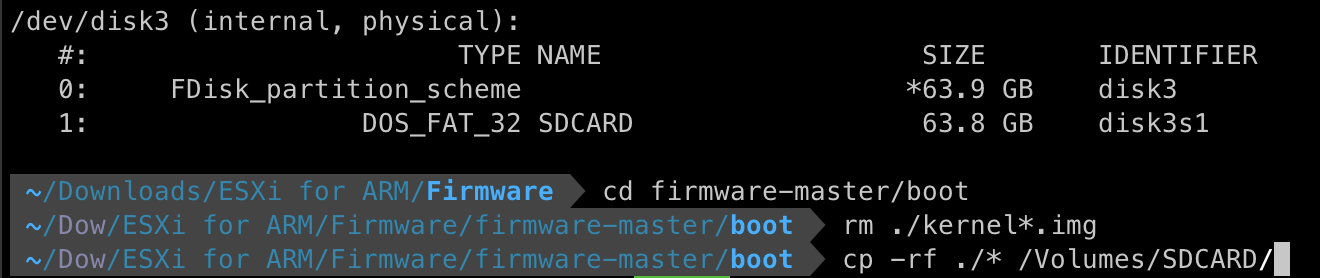
cd firmware-master/boot |
UEFI firmware configuration
Press ESC key to enter UEFI configuration screen.
With an HDMI screen, this is when you see the Raspberry Pi logo.

If you see the progress bar, you’ve hit ESC too late. Hitting it once will suffice, but it will take some time load.
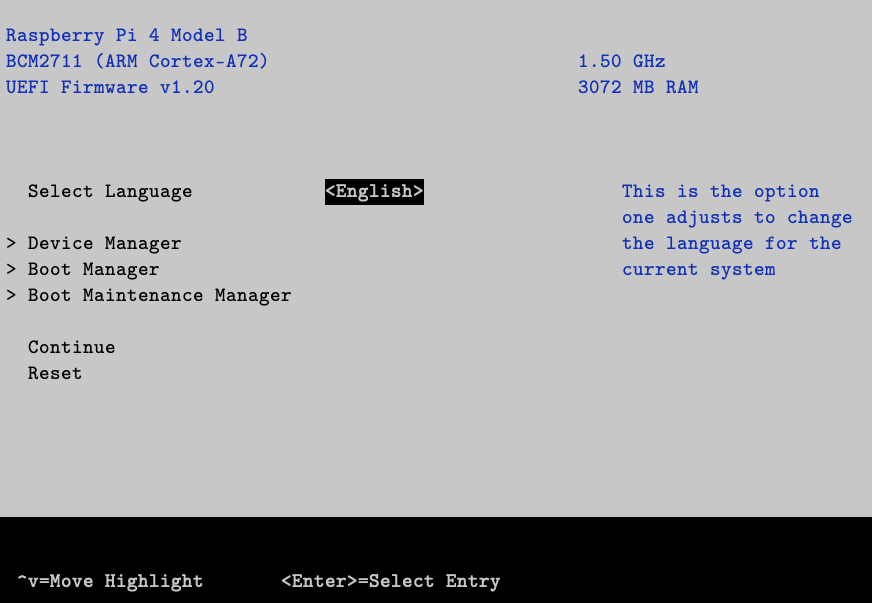
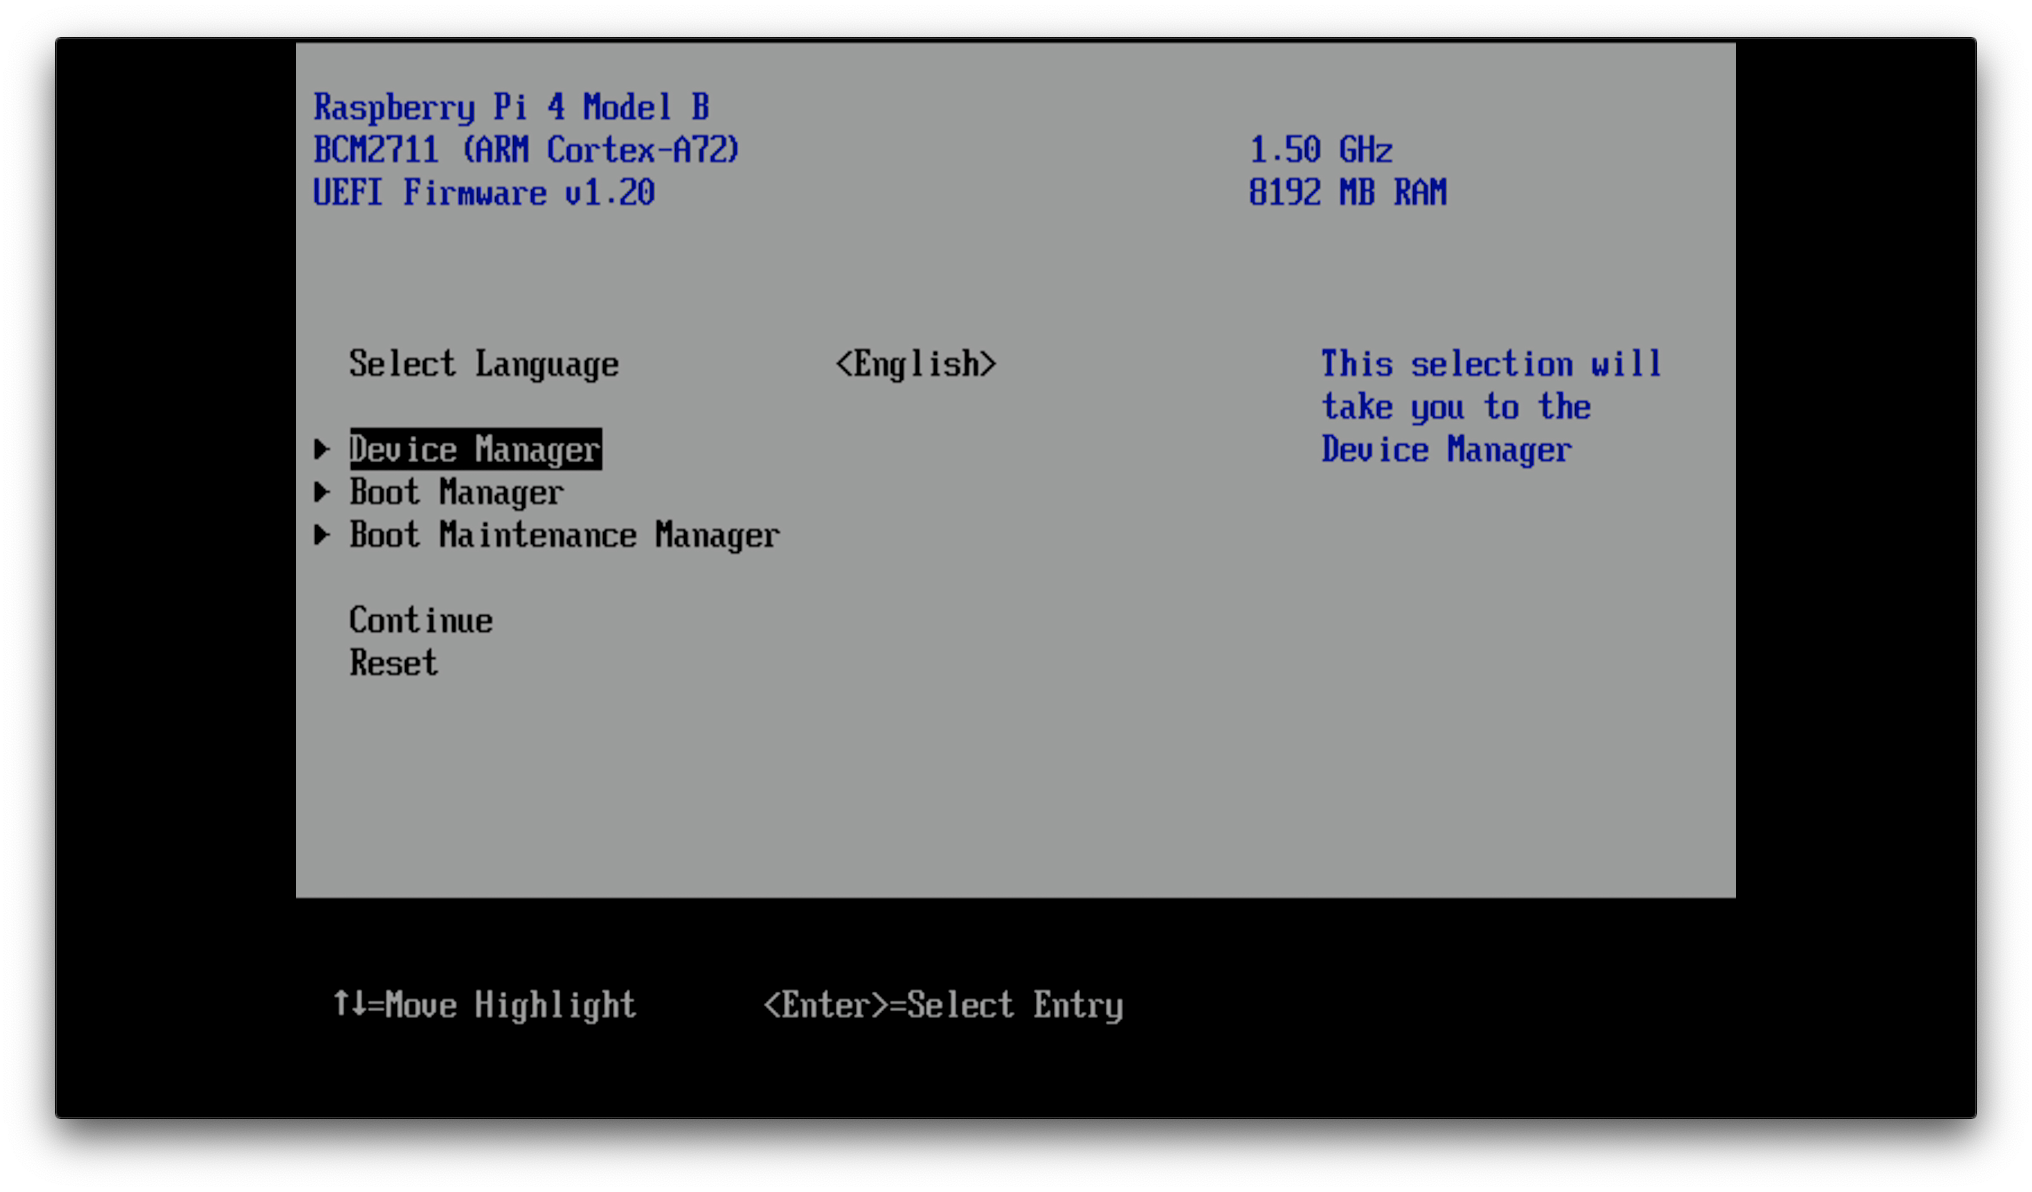
Initial screen and we will use all three options in due course.
Disable 3GiB memory limit
The Raspberry Pi 4 UEFI is configured with a default limit of 3GiB of memory for OS compatibility purposes. This will prevent the ESXi installer from proceeding, and needs to be disabled.

Using arrow keys, first navigate to Device Manager

Press ENTER and navigate to Raspberry Pi Configuration
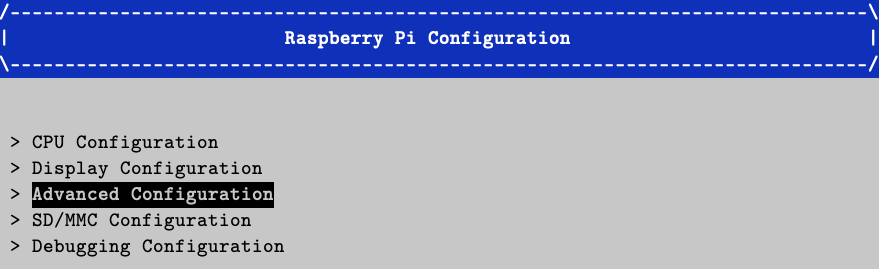
Press ENTER and navigate to Advanced Configuration
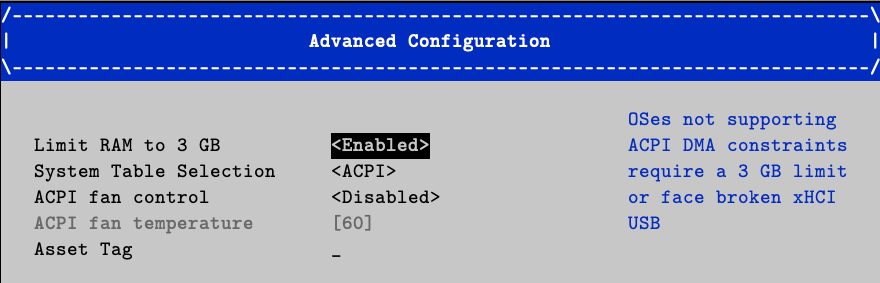
Hit ENTER to change setting


Configure ISCSI
Install ESXi-Arm
Enter UEFI configuration screen
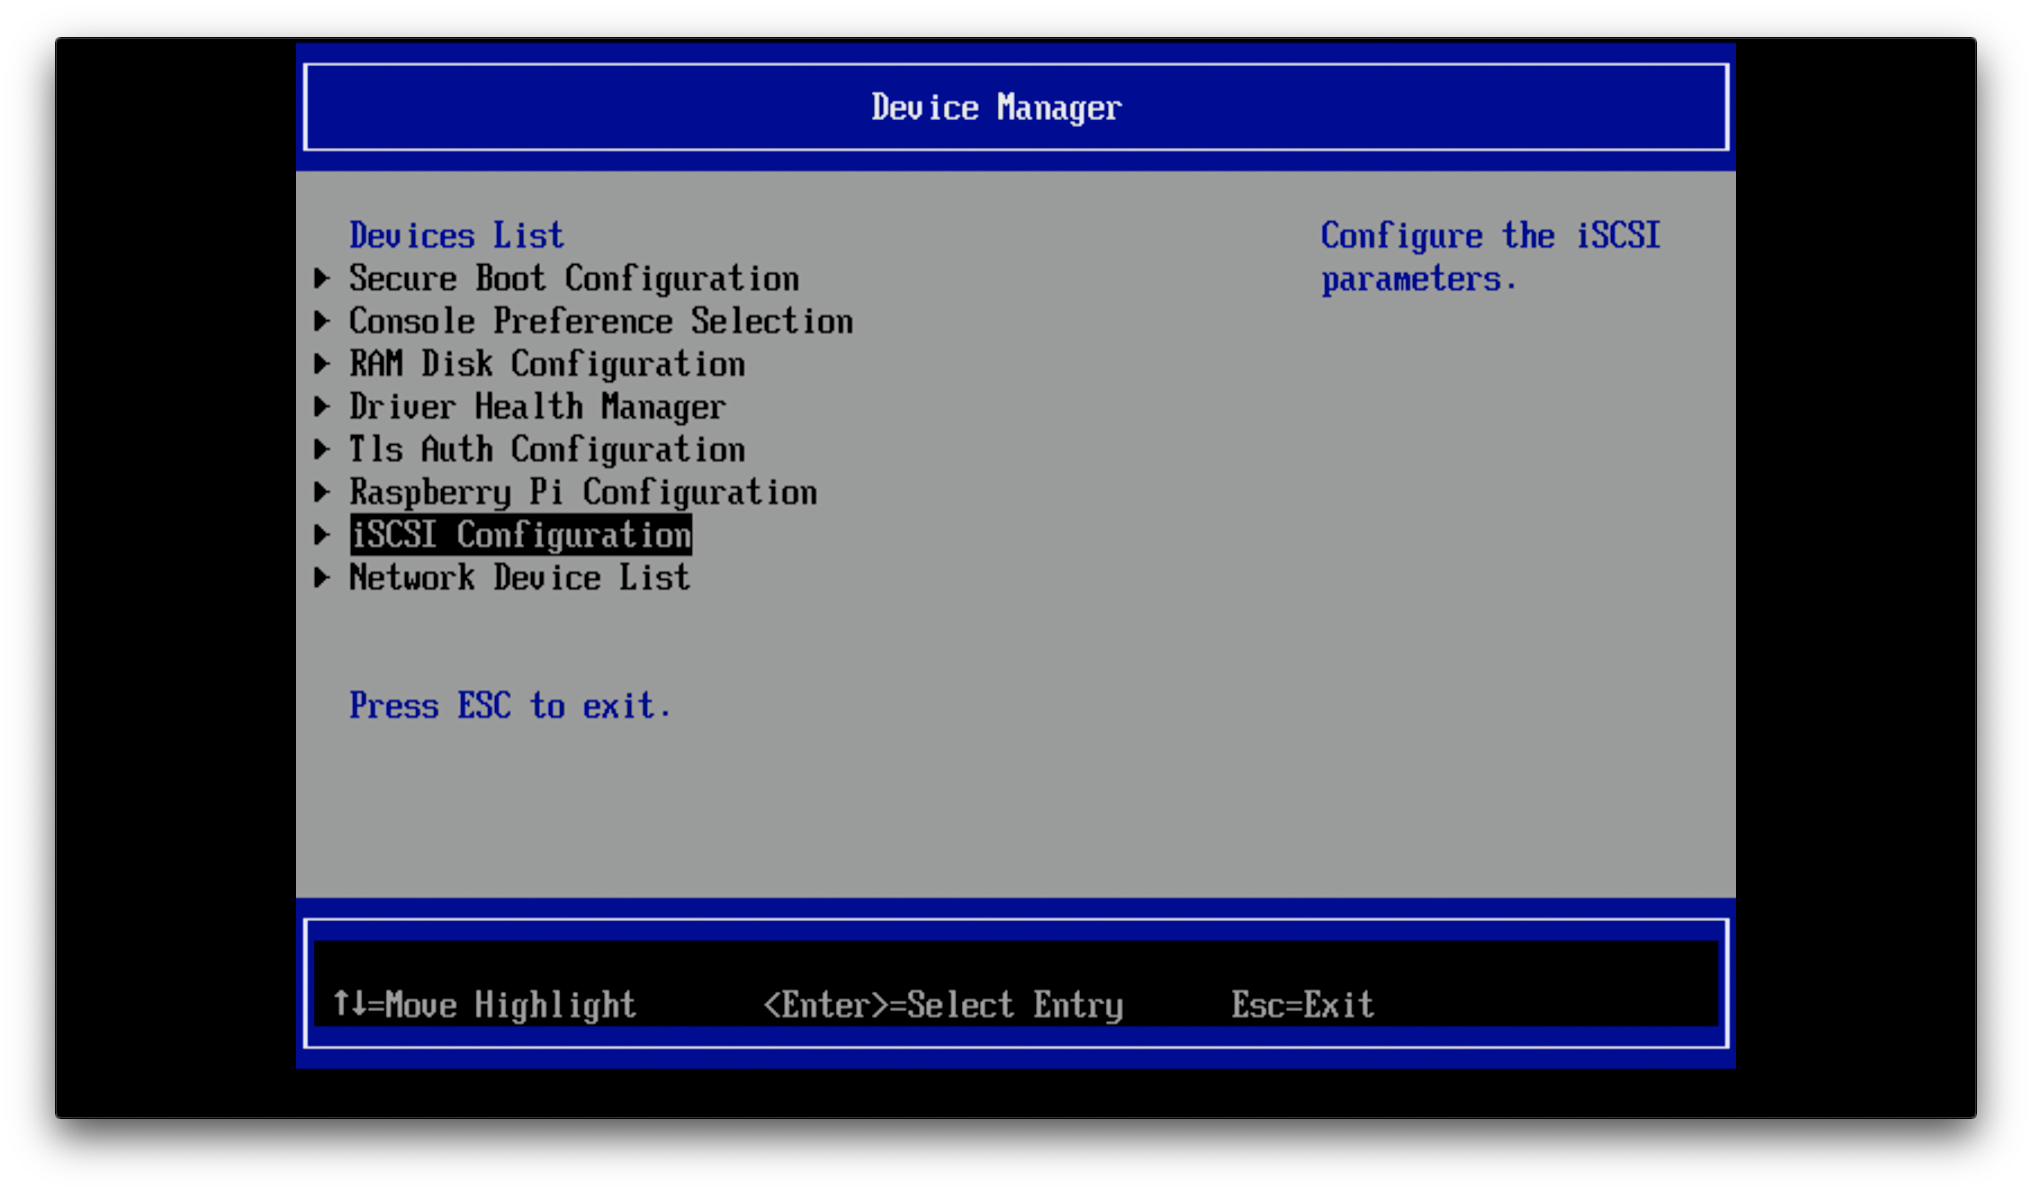
Select the ISCSI Configuration
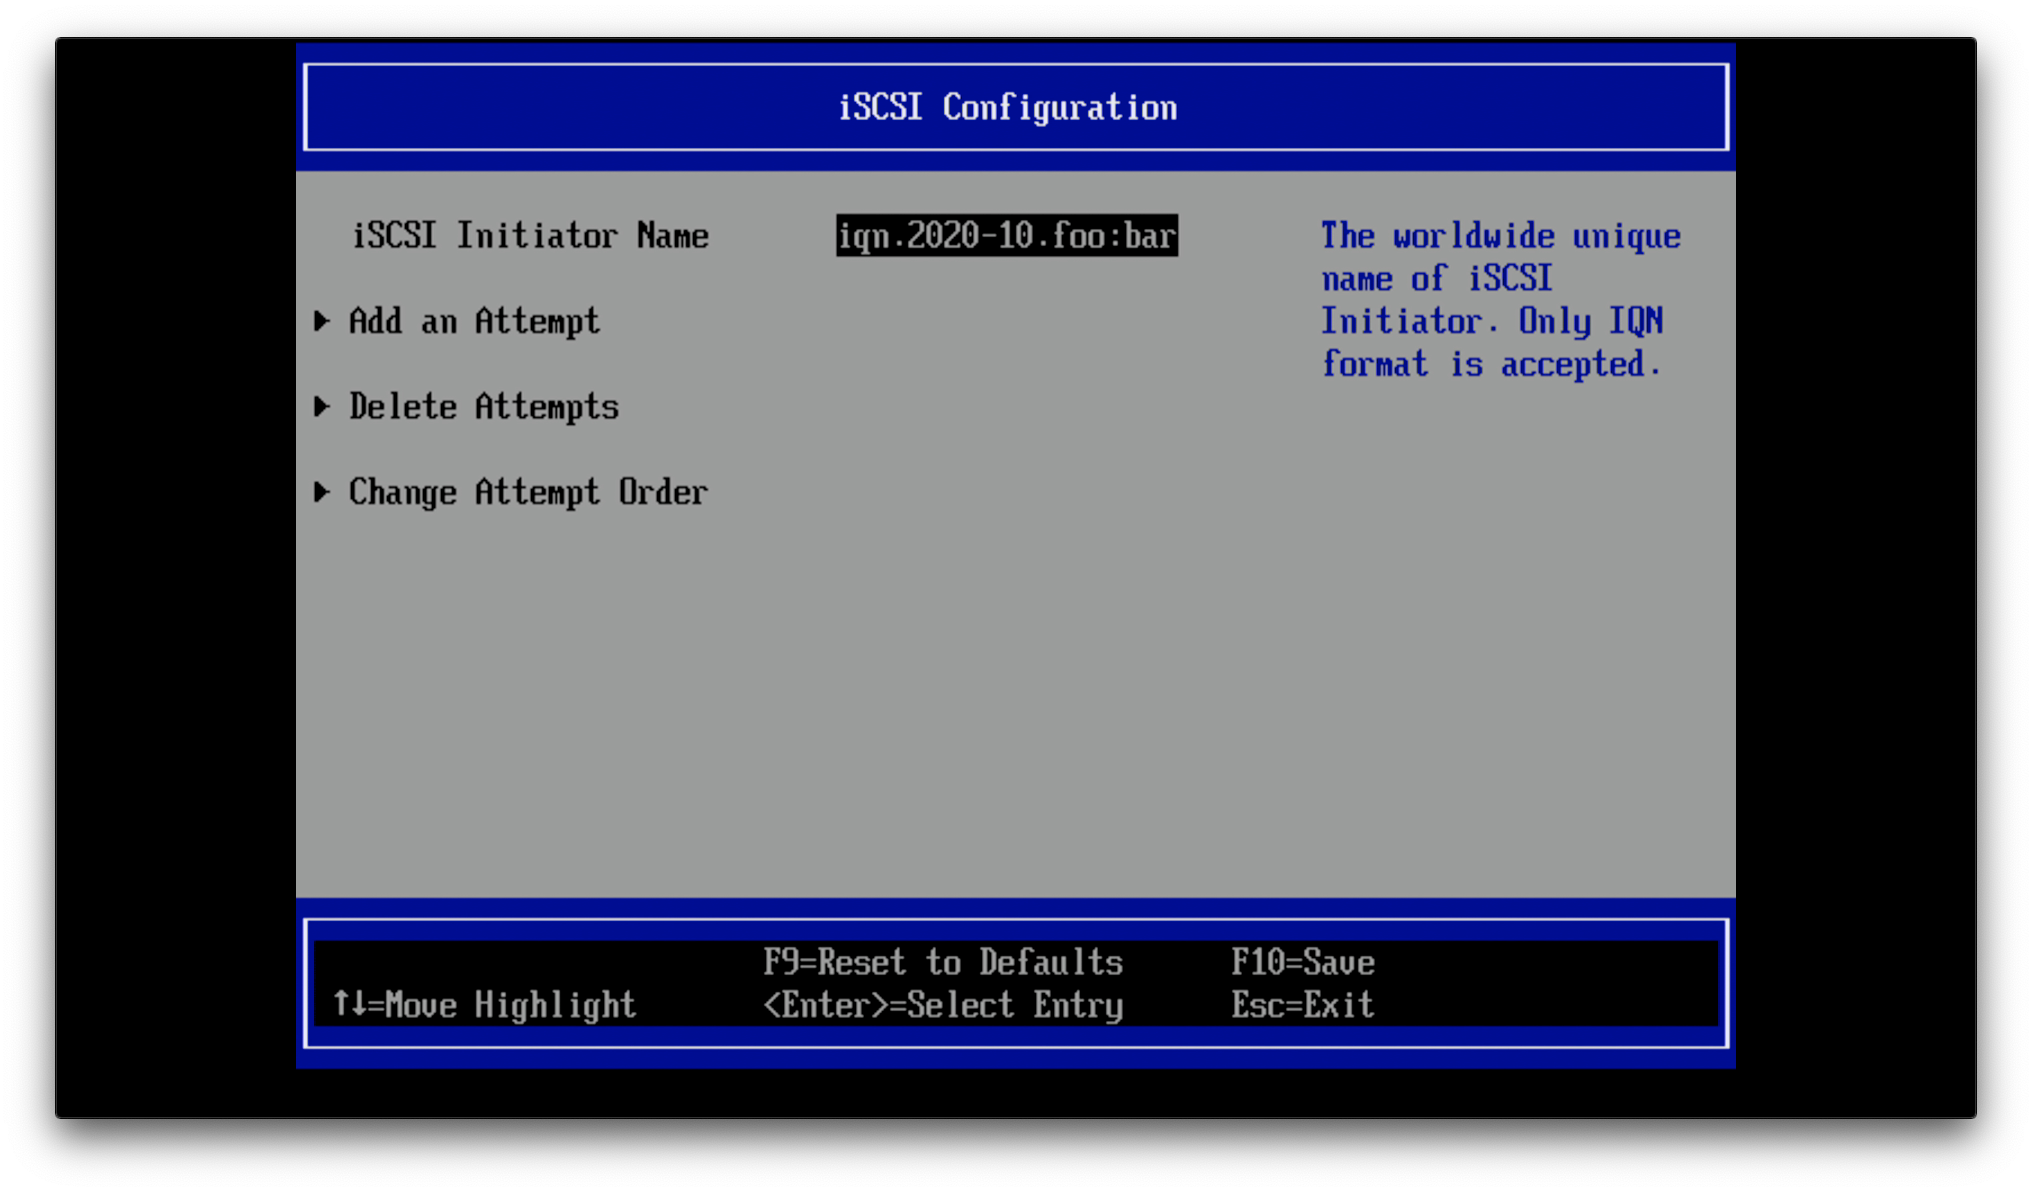
Give it a name, it’s just for information so keep it short
Add an Attempt and select the NIC

Set it to Enabled
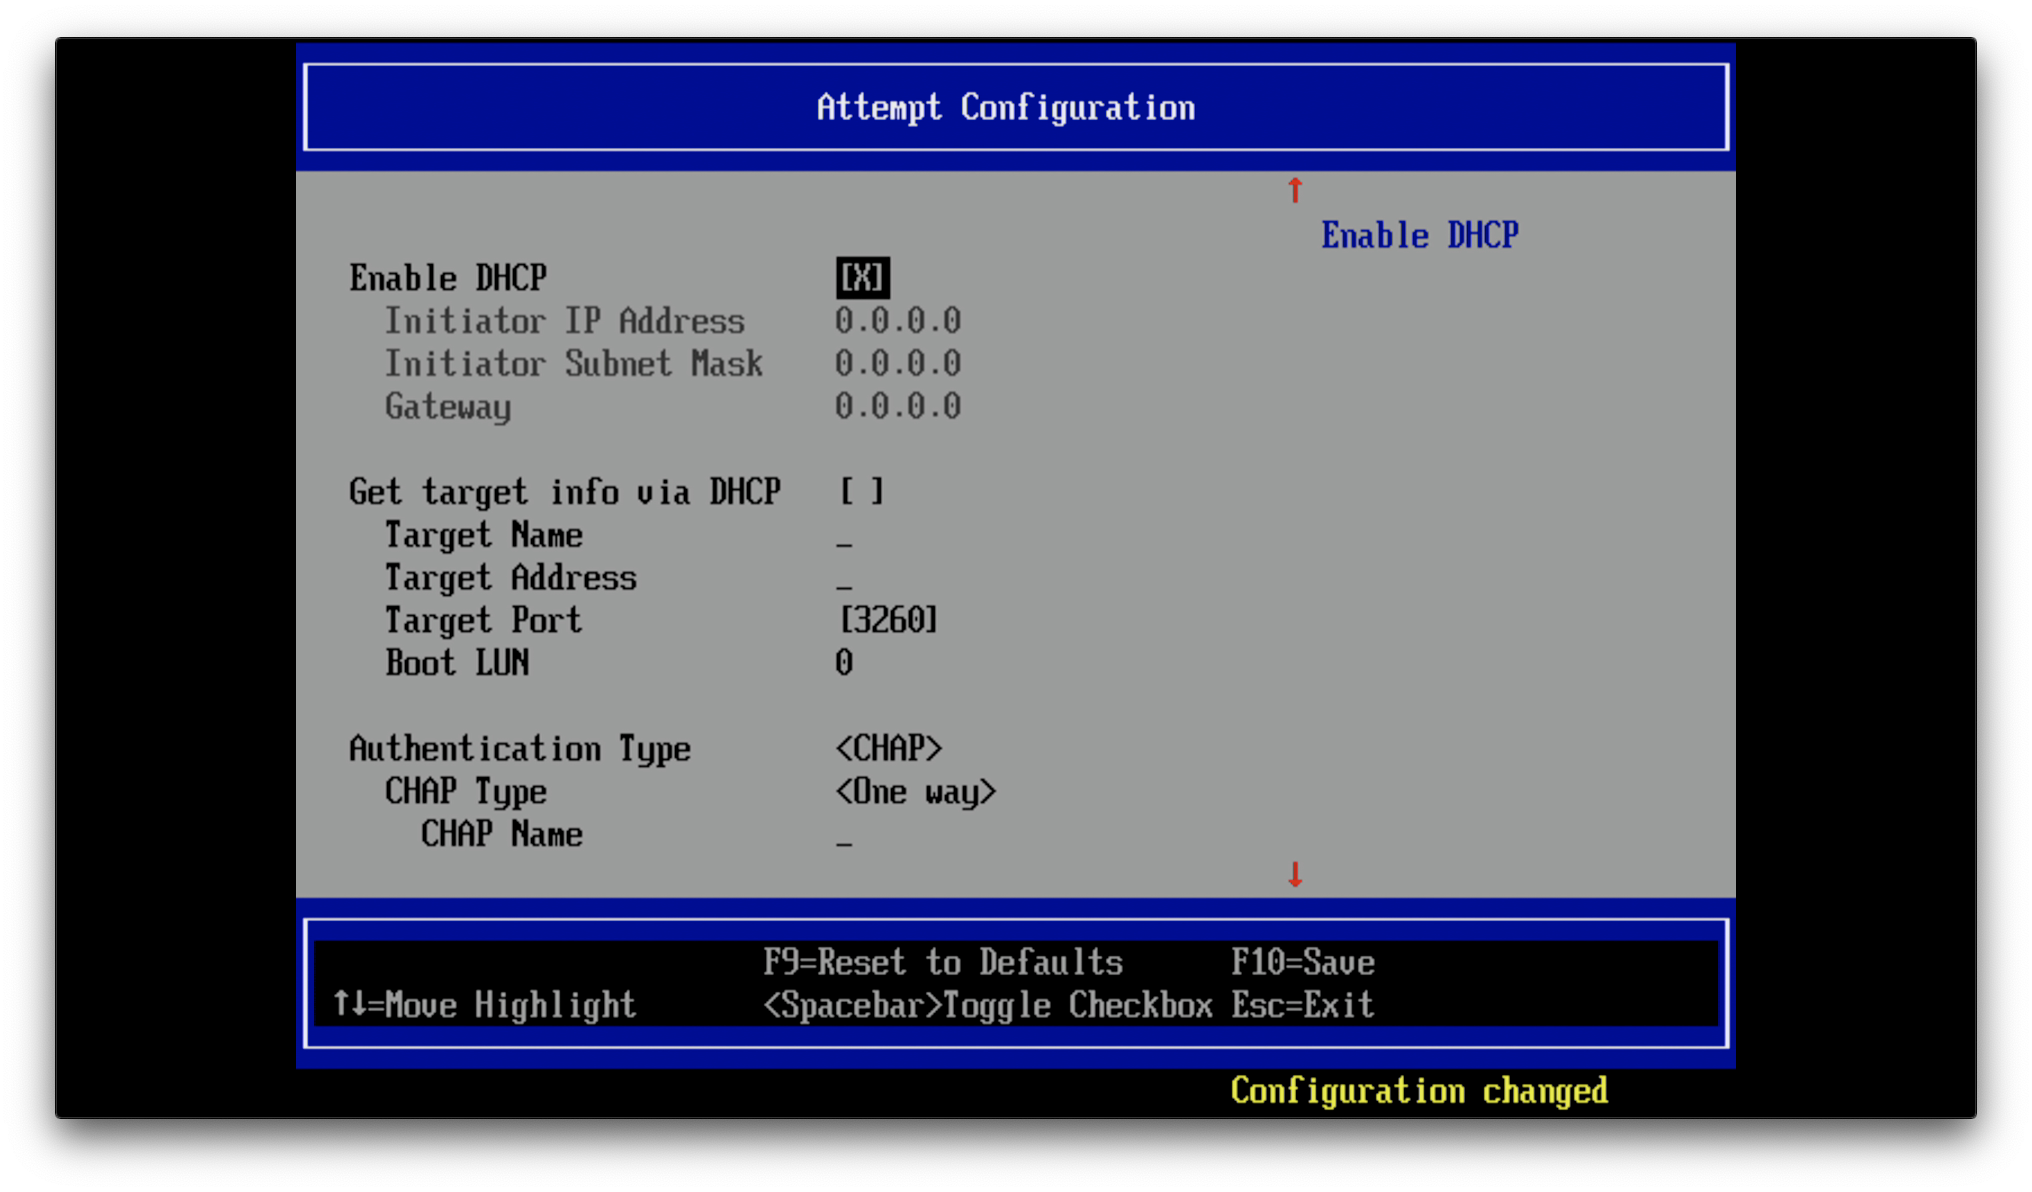
Enable DHCP for IP settings, or opt for static IP settings
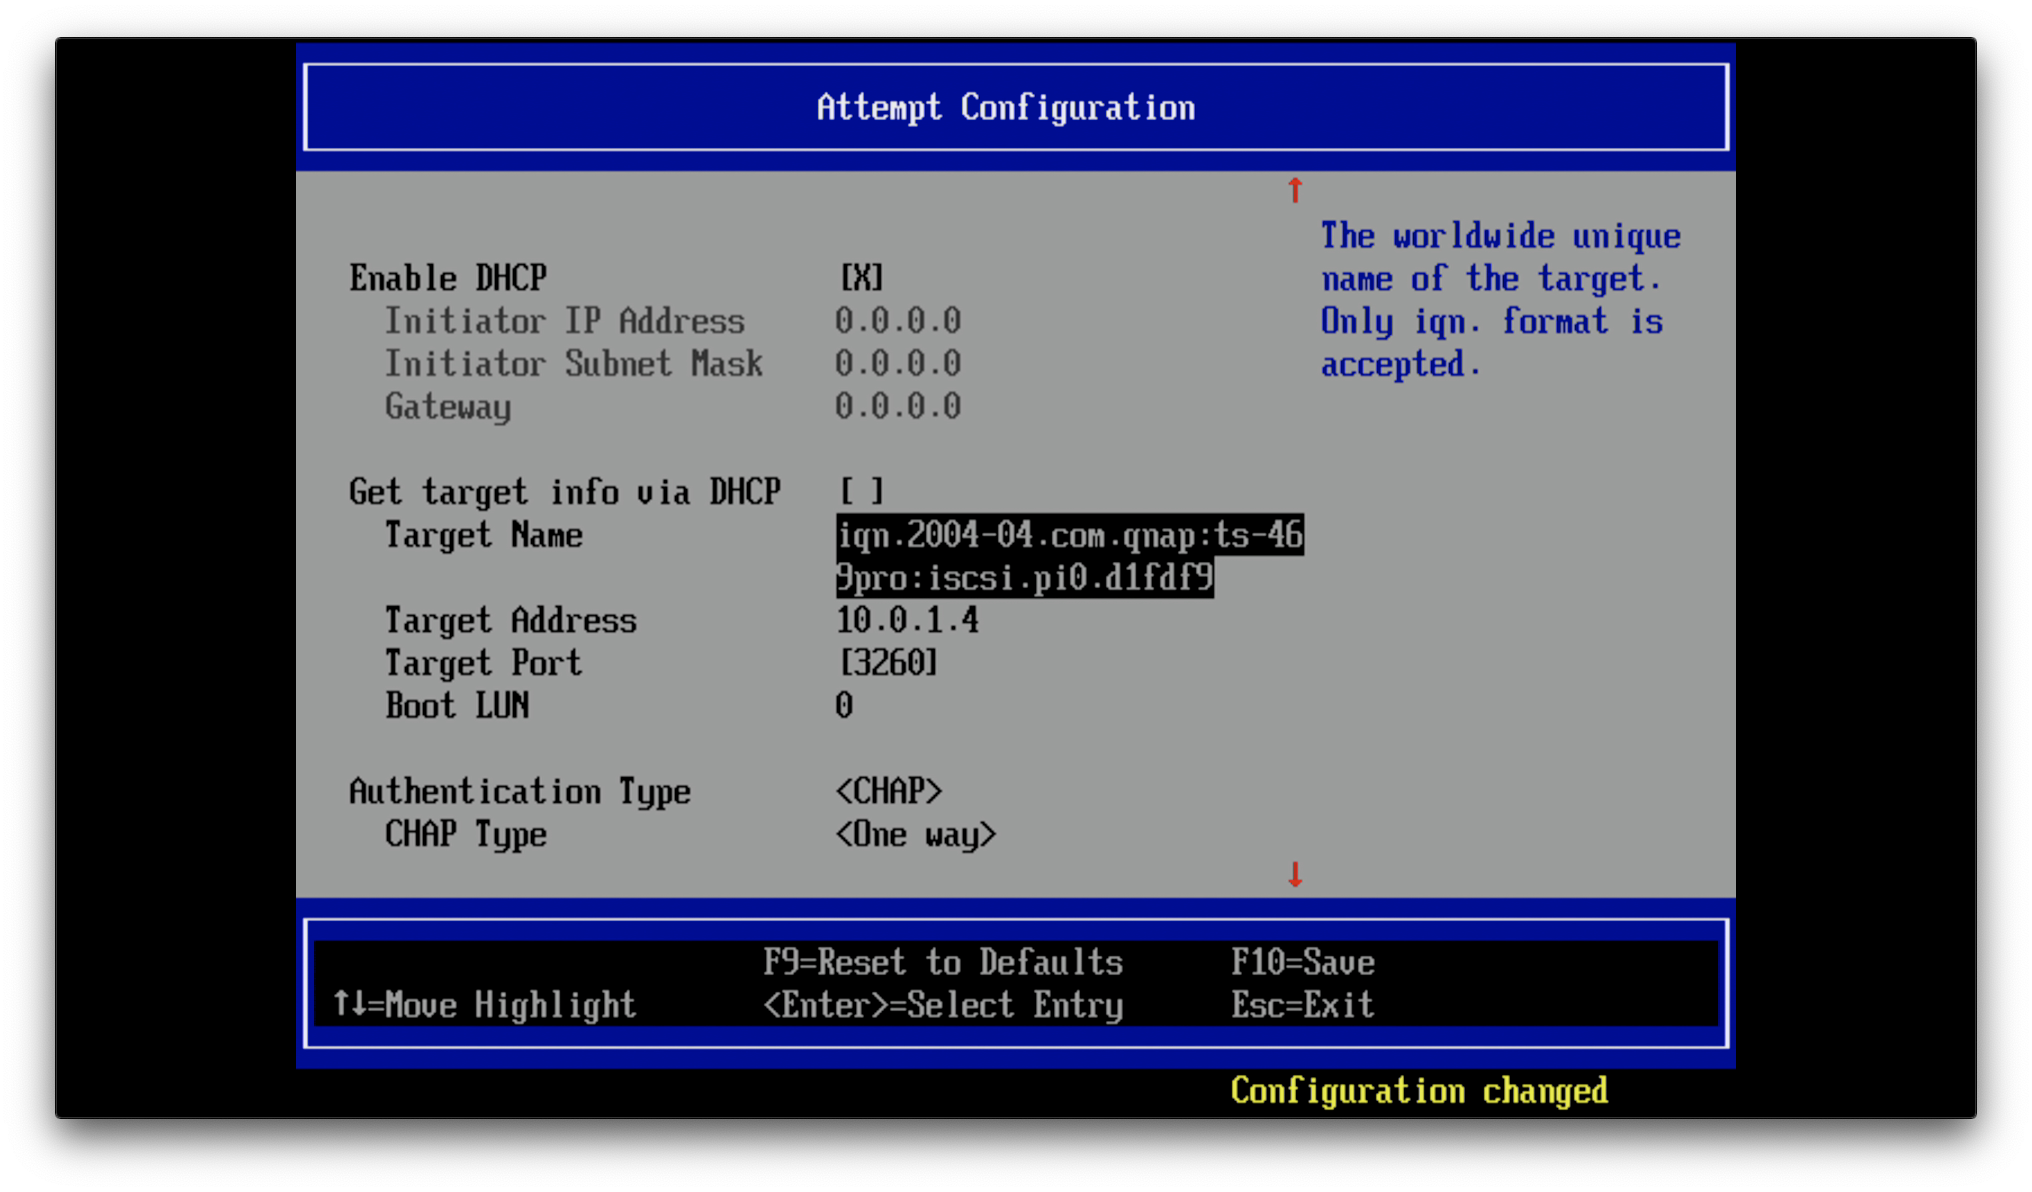
Enter the IQN created on the NAS, double check it is entered correctly.
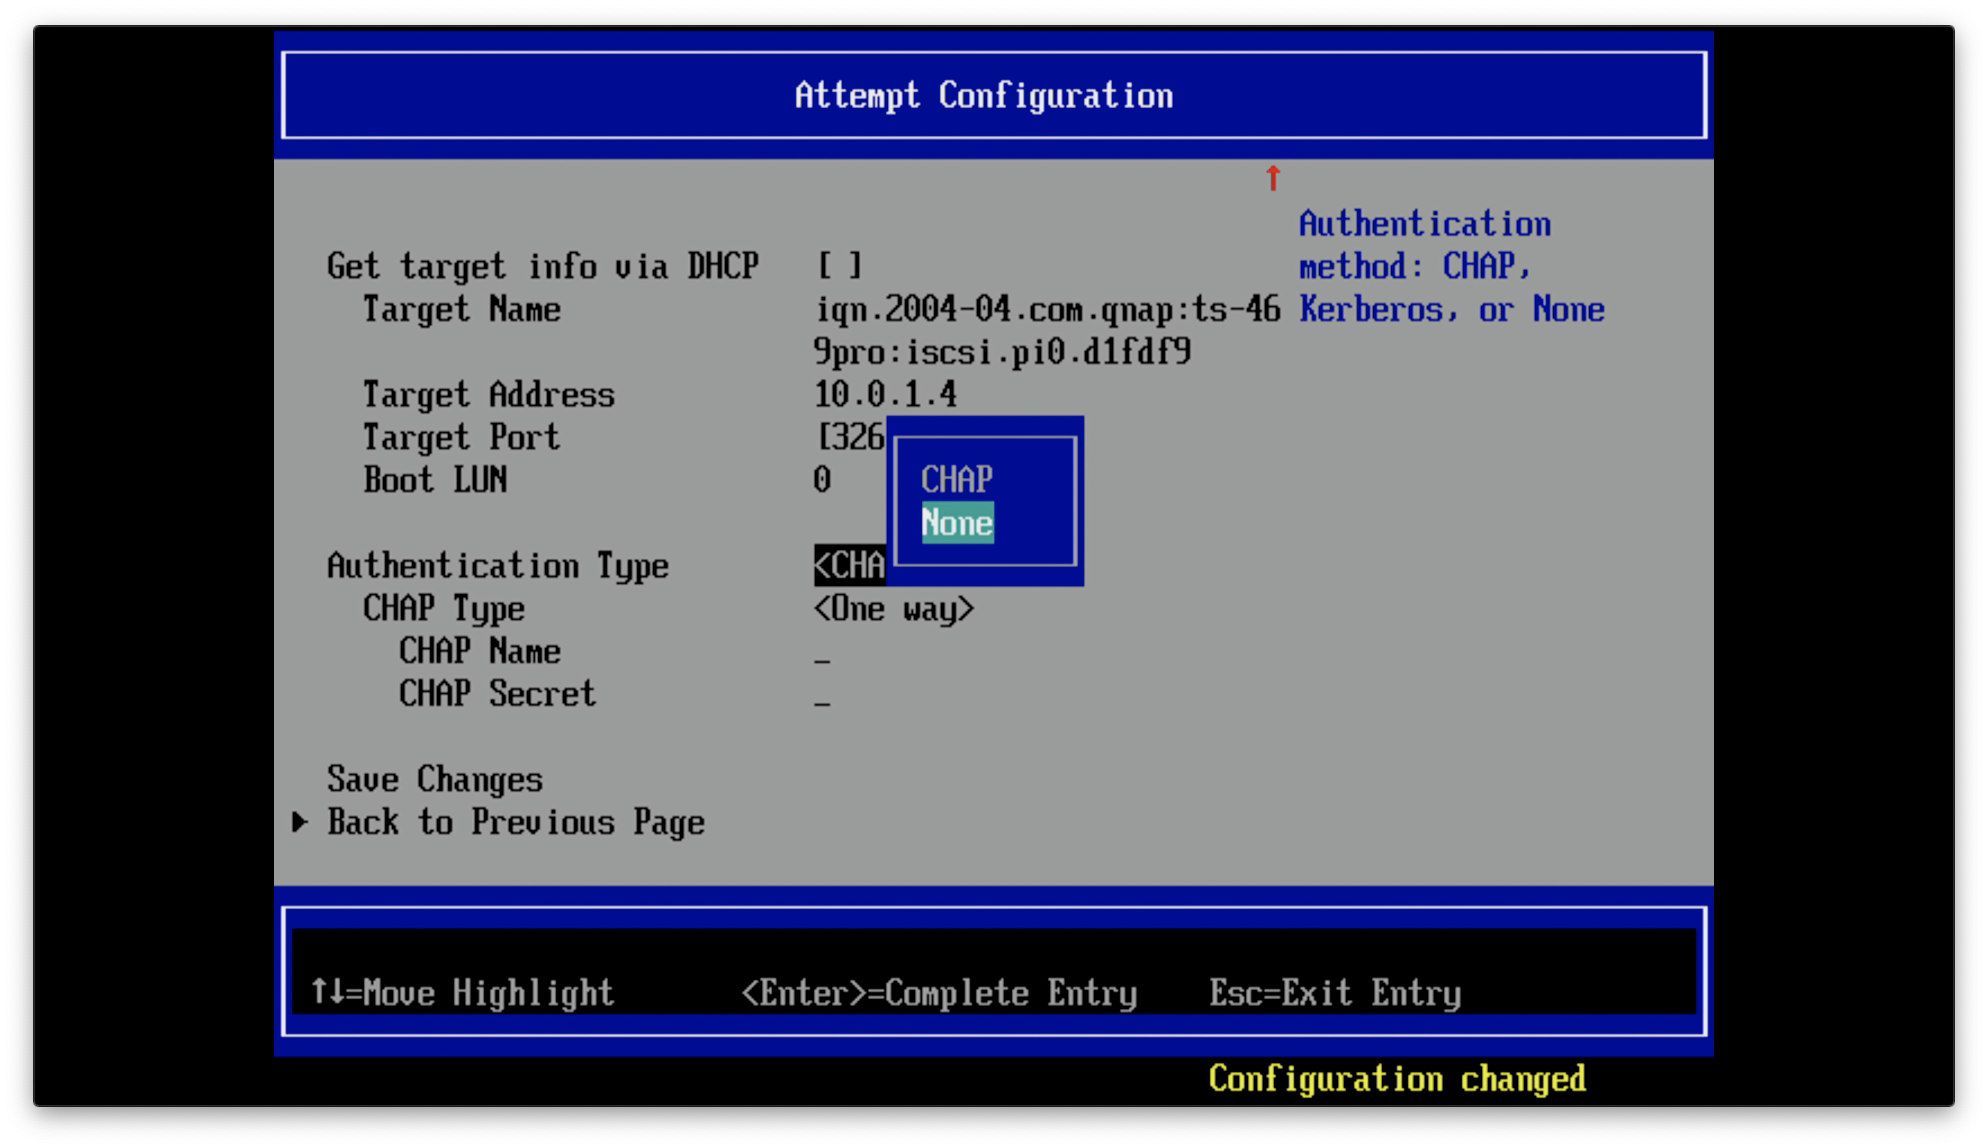
I opted for no authentication for this setup
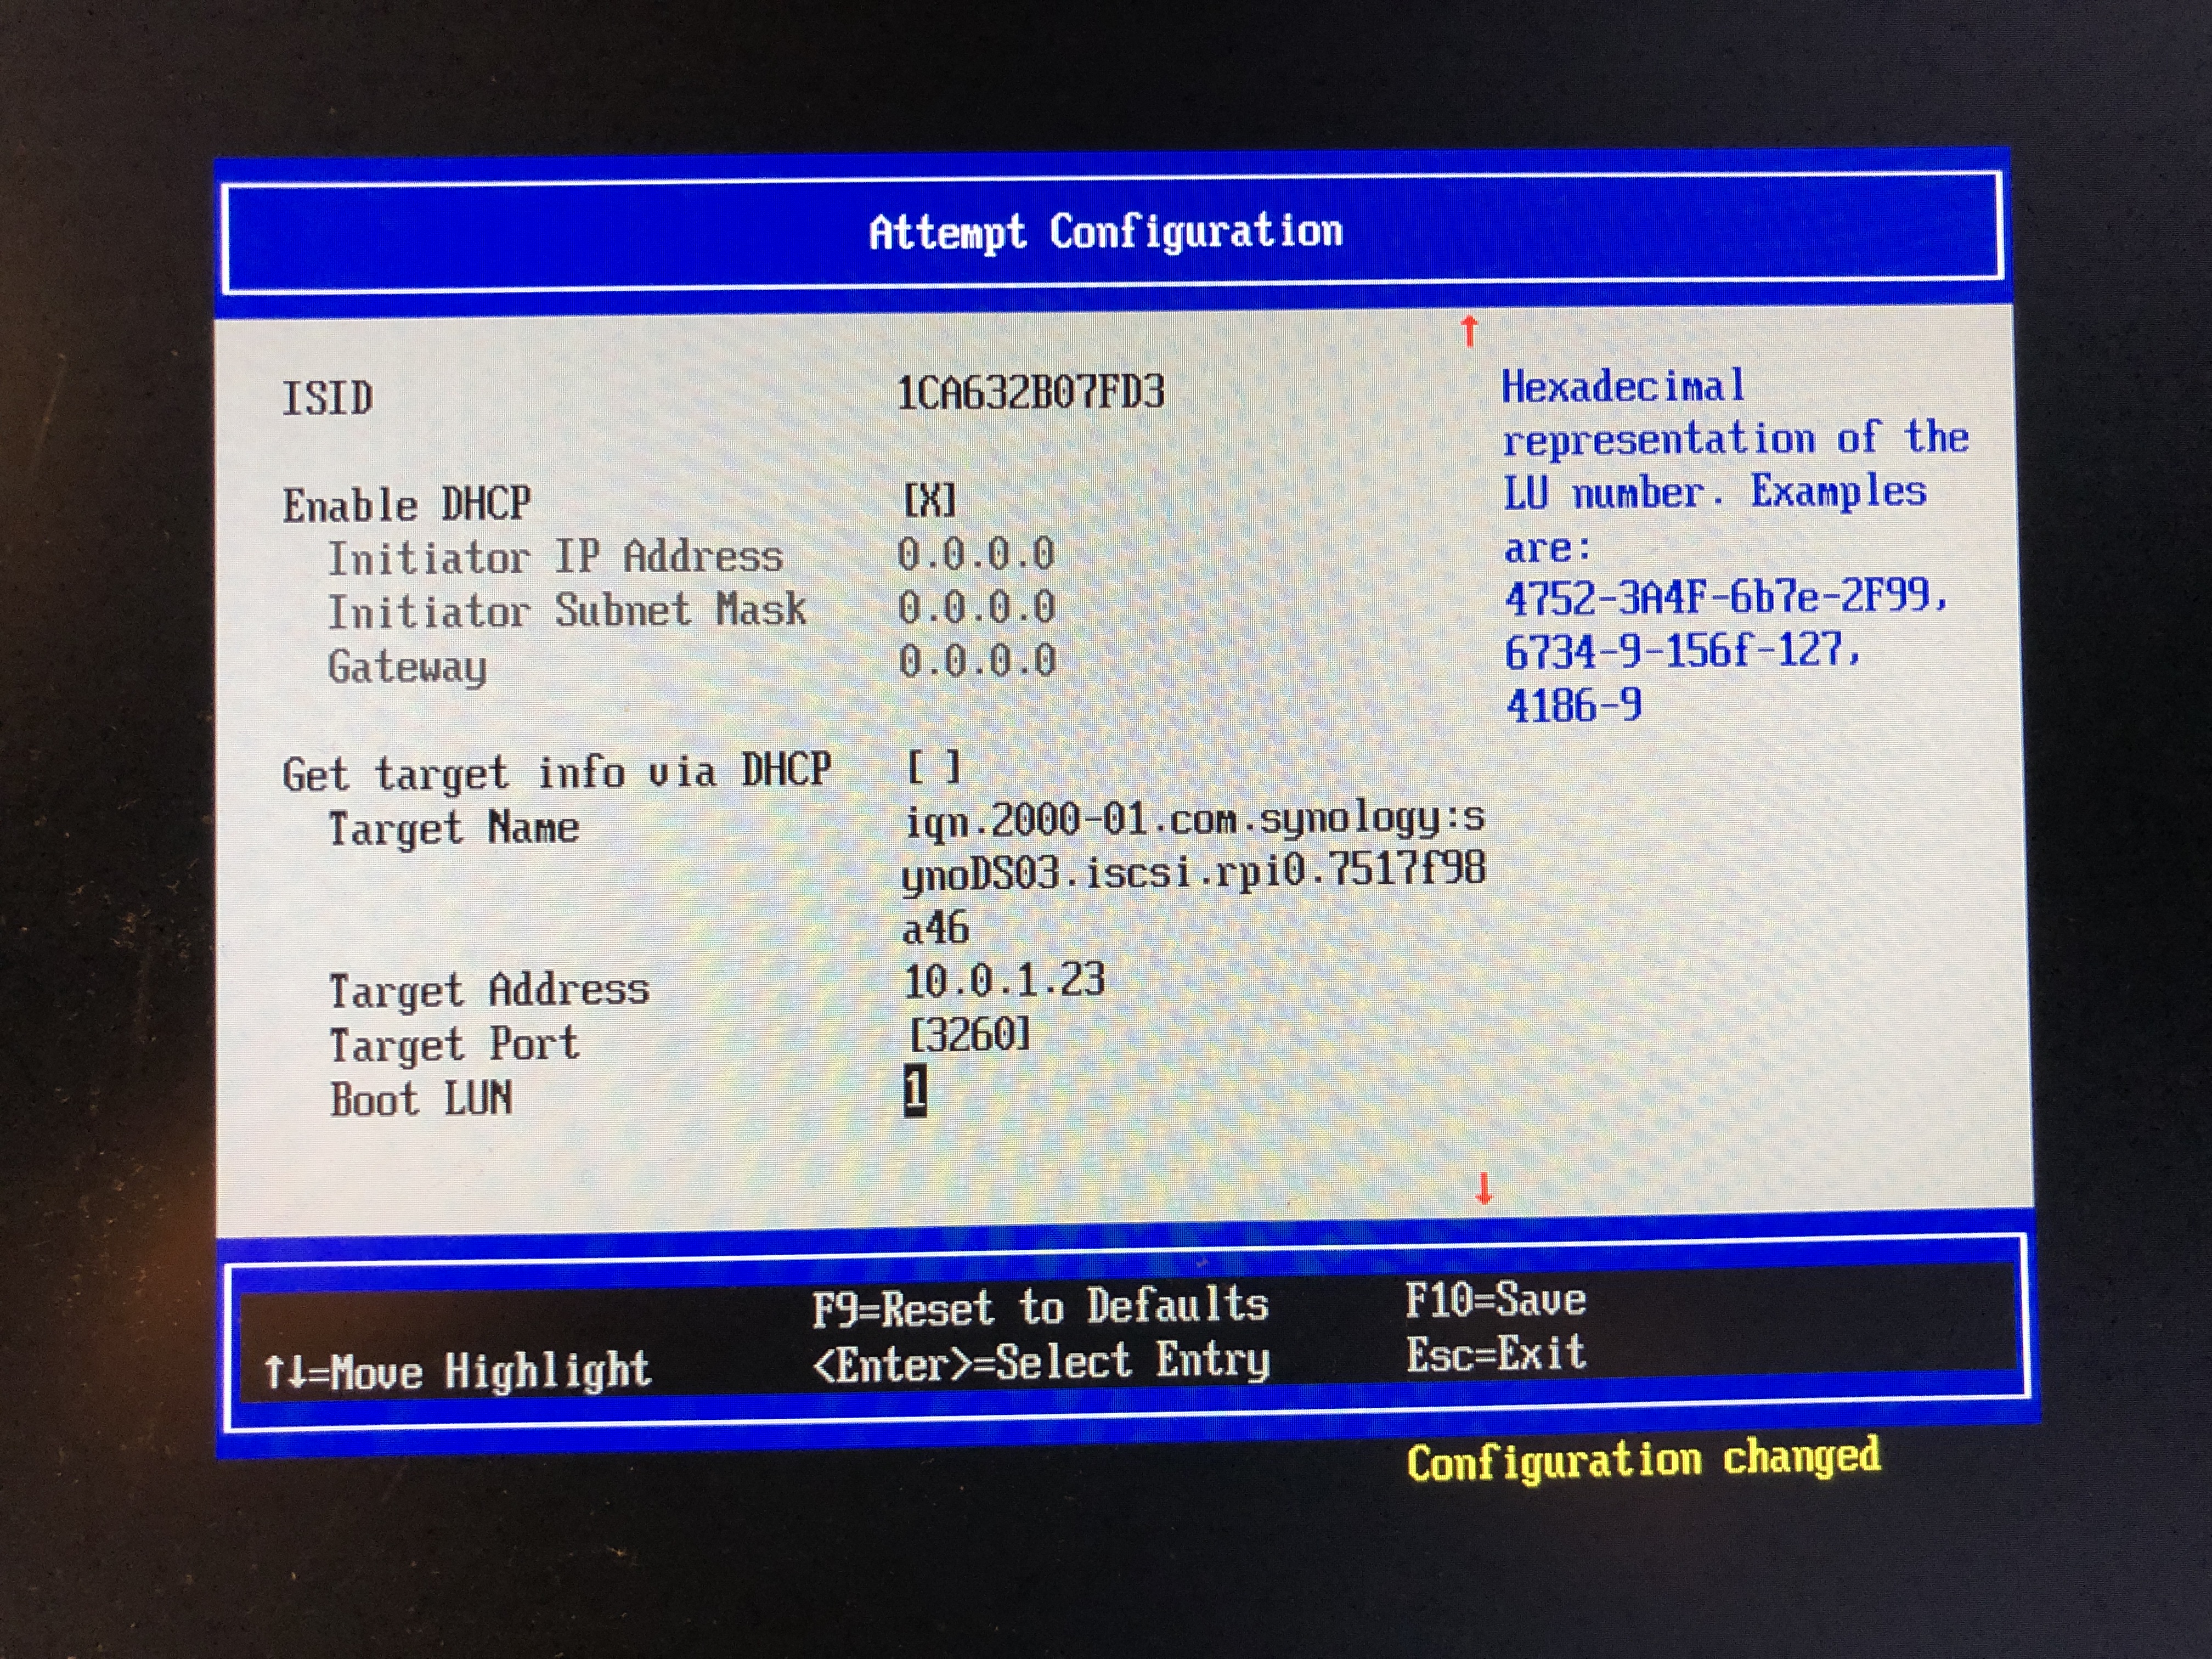
Set the LUN number from your NAS settings as well as IP address.

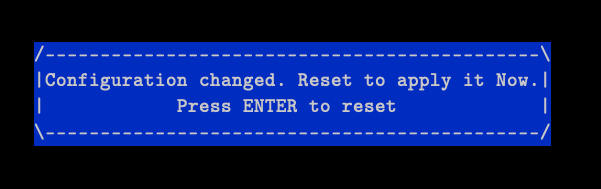
All done, Save and ESC out
Reset (restart) and jump into the settings again.
This time, we set boot order and optimize a bit and also verify the settings.
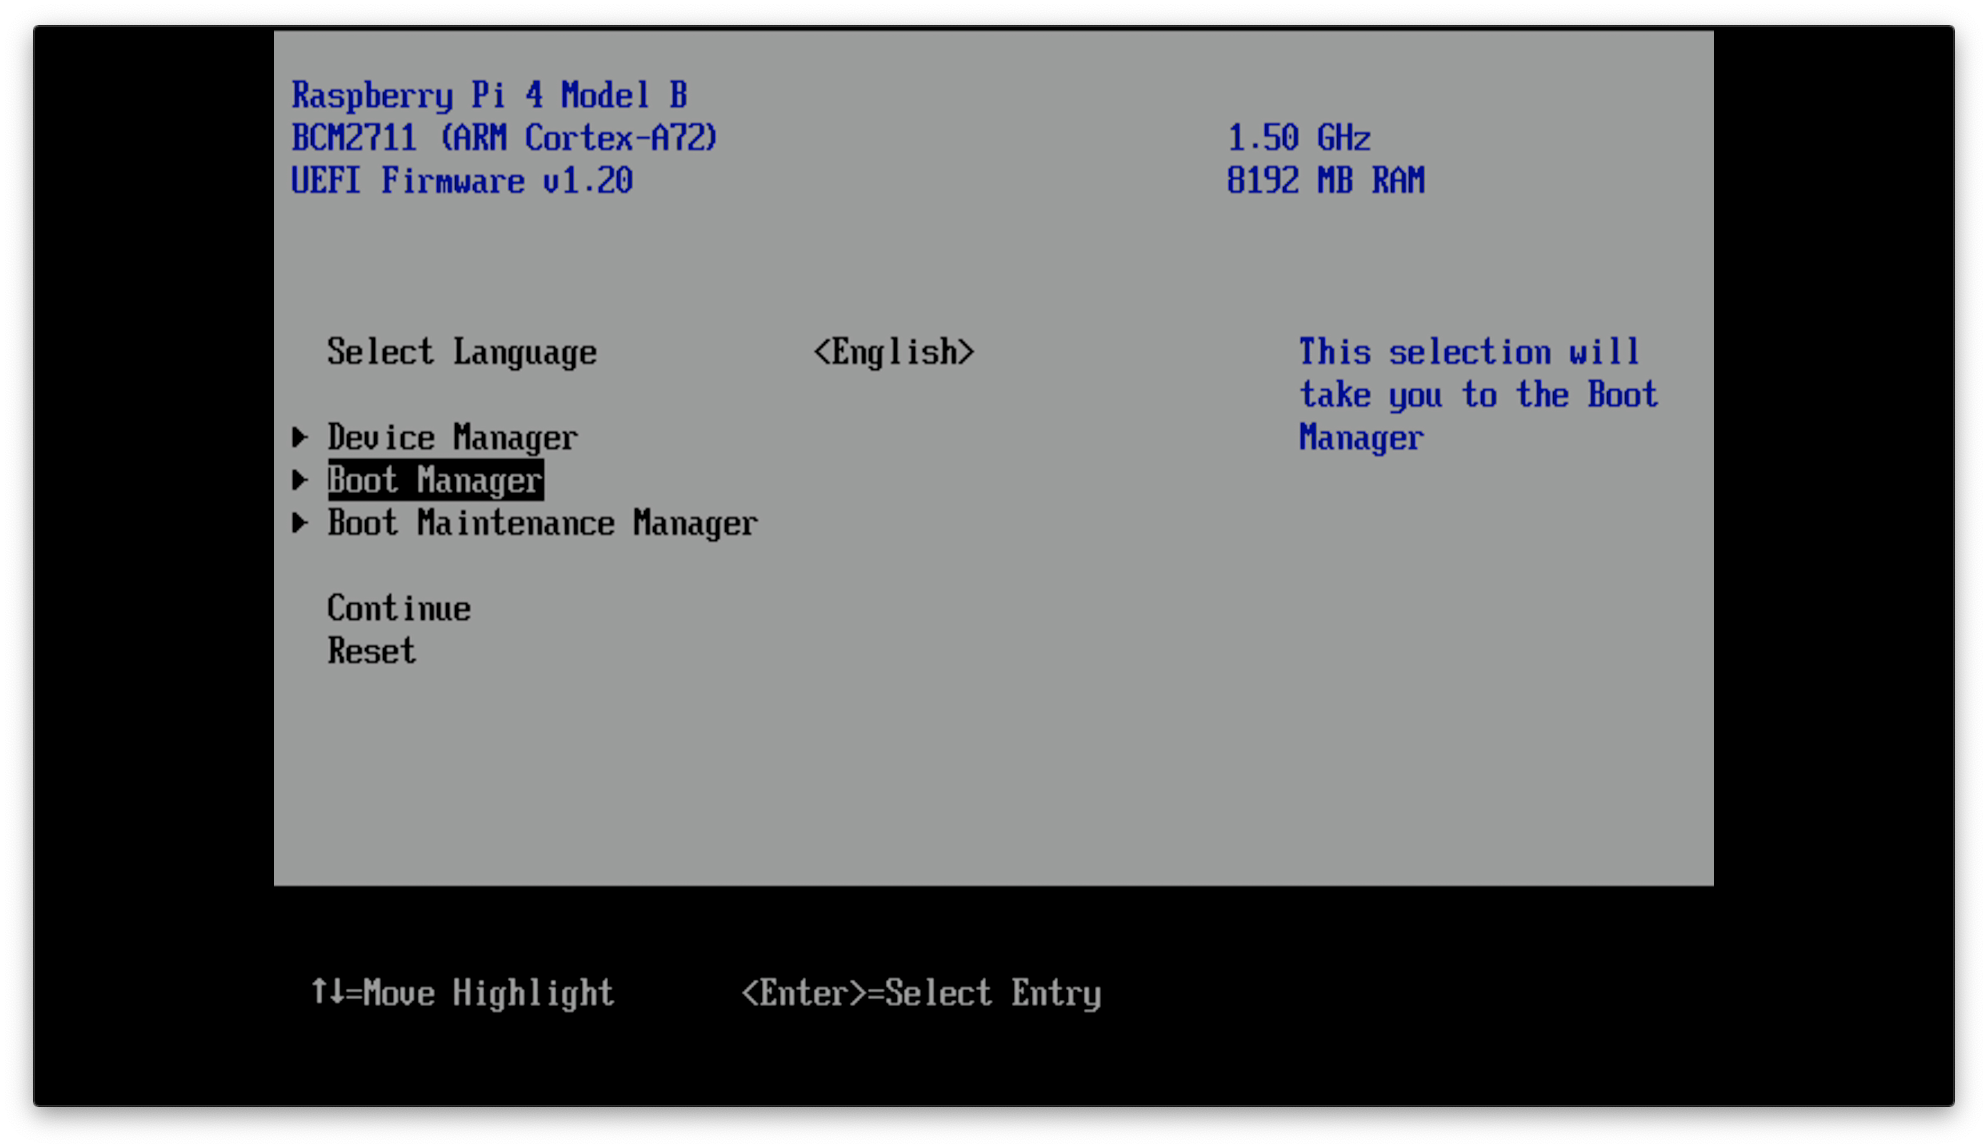
Select the “Boot Manager” option
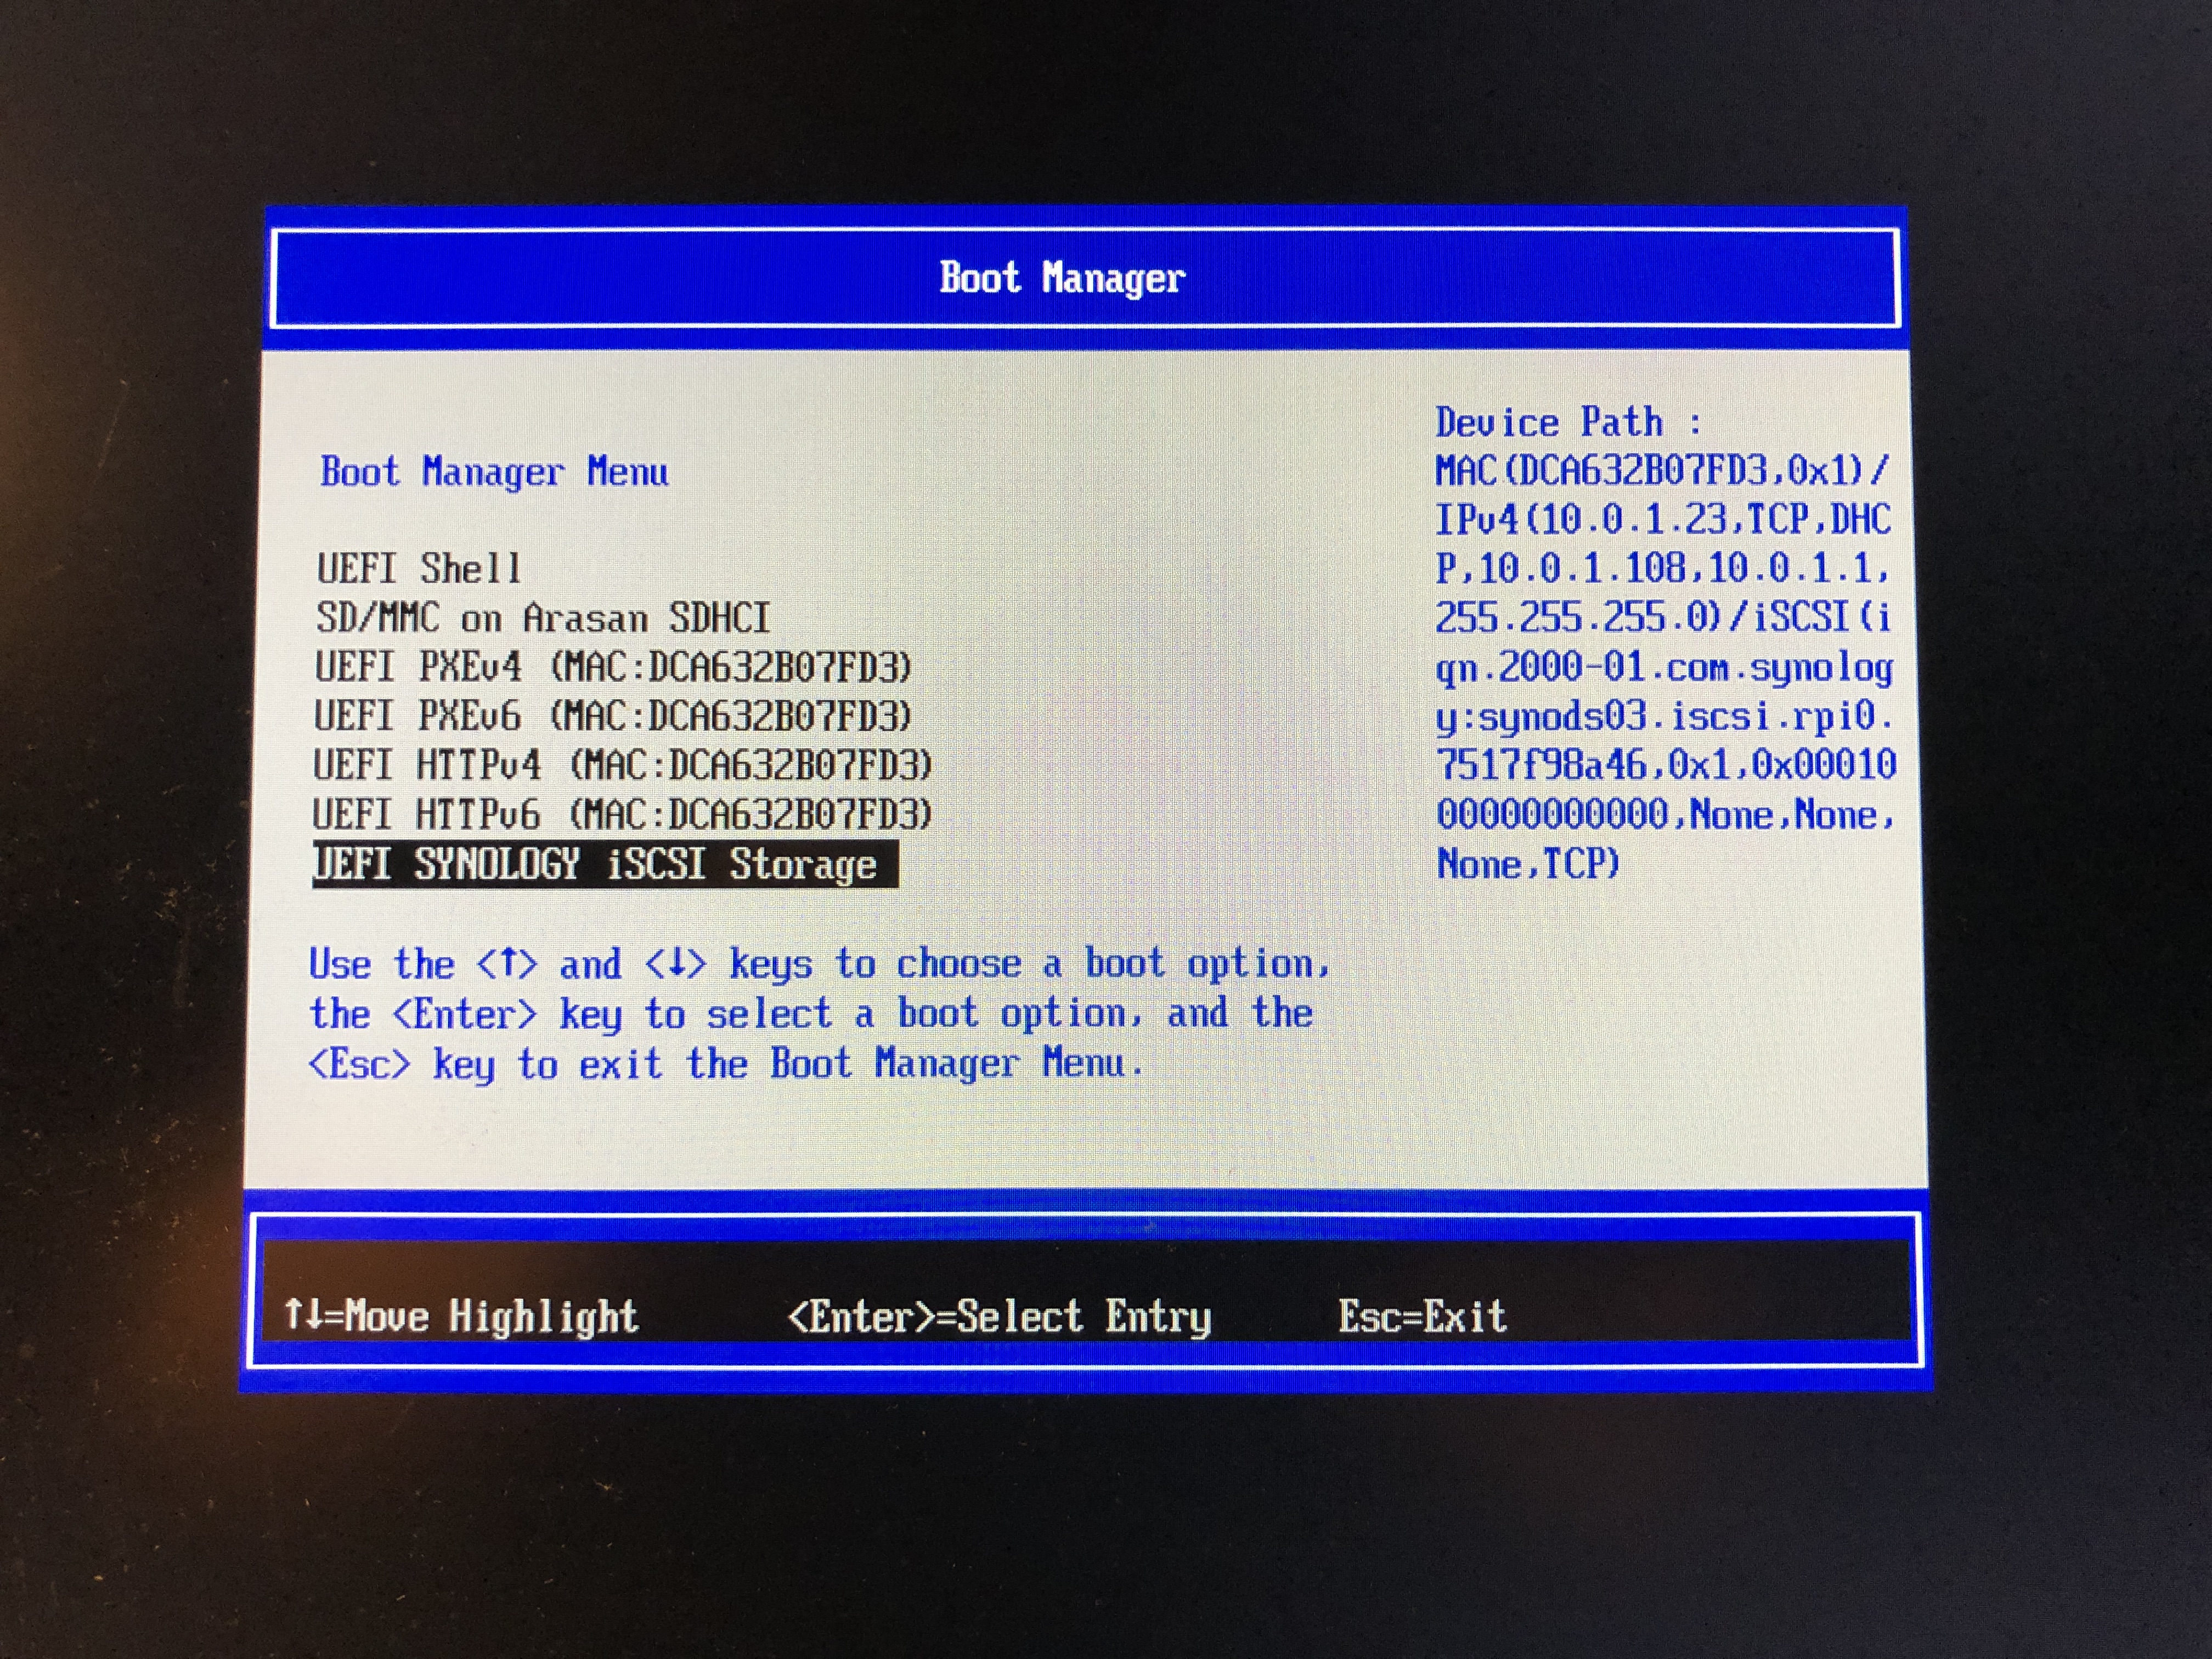
If the applied settings are correct the and the RPi has a connection to the ISCSI provider, it will show up in the list. If you don’t see it, there is most likely a misconfiguration on your end. Delete and start over within the RPi.
ESC out after verifying the ISCSI target has been found.
Change Boot order
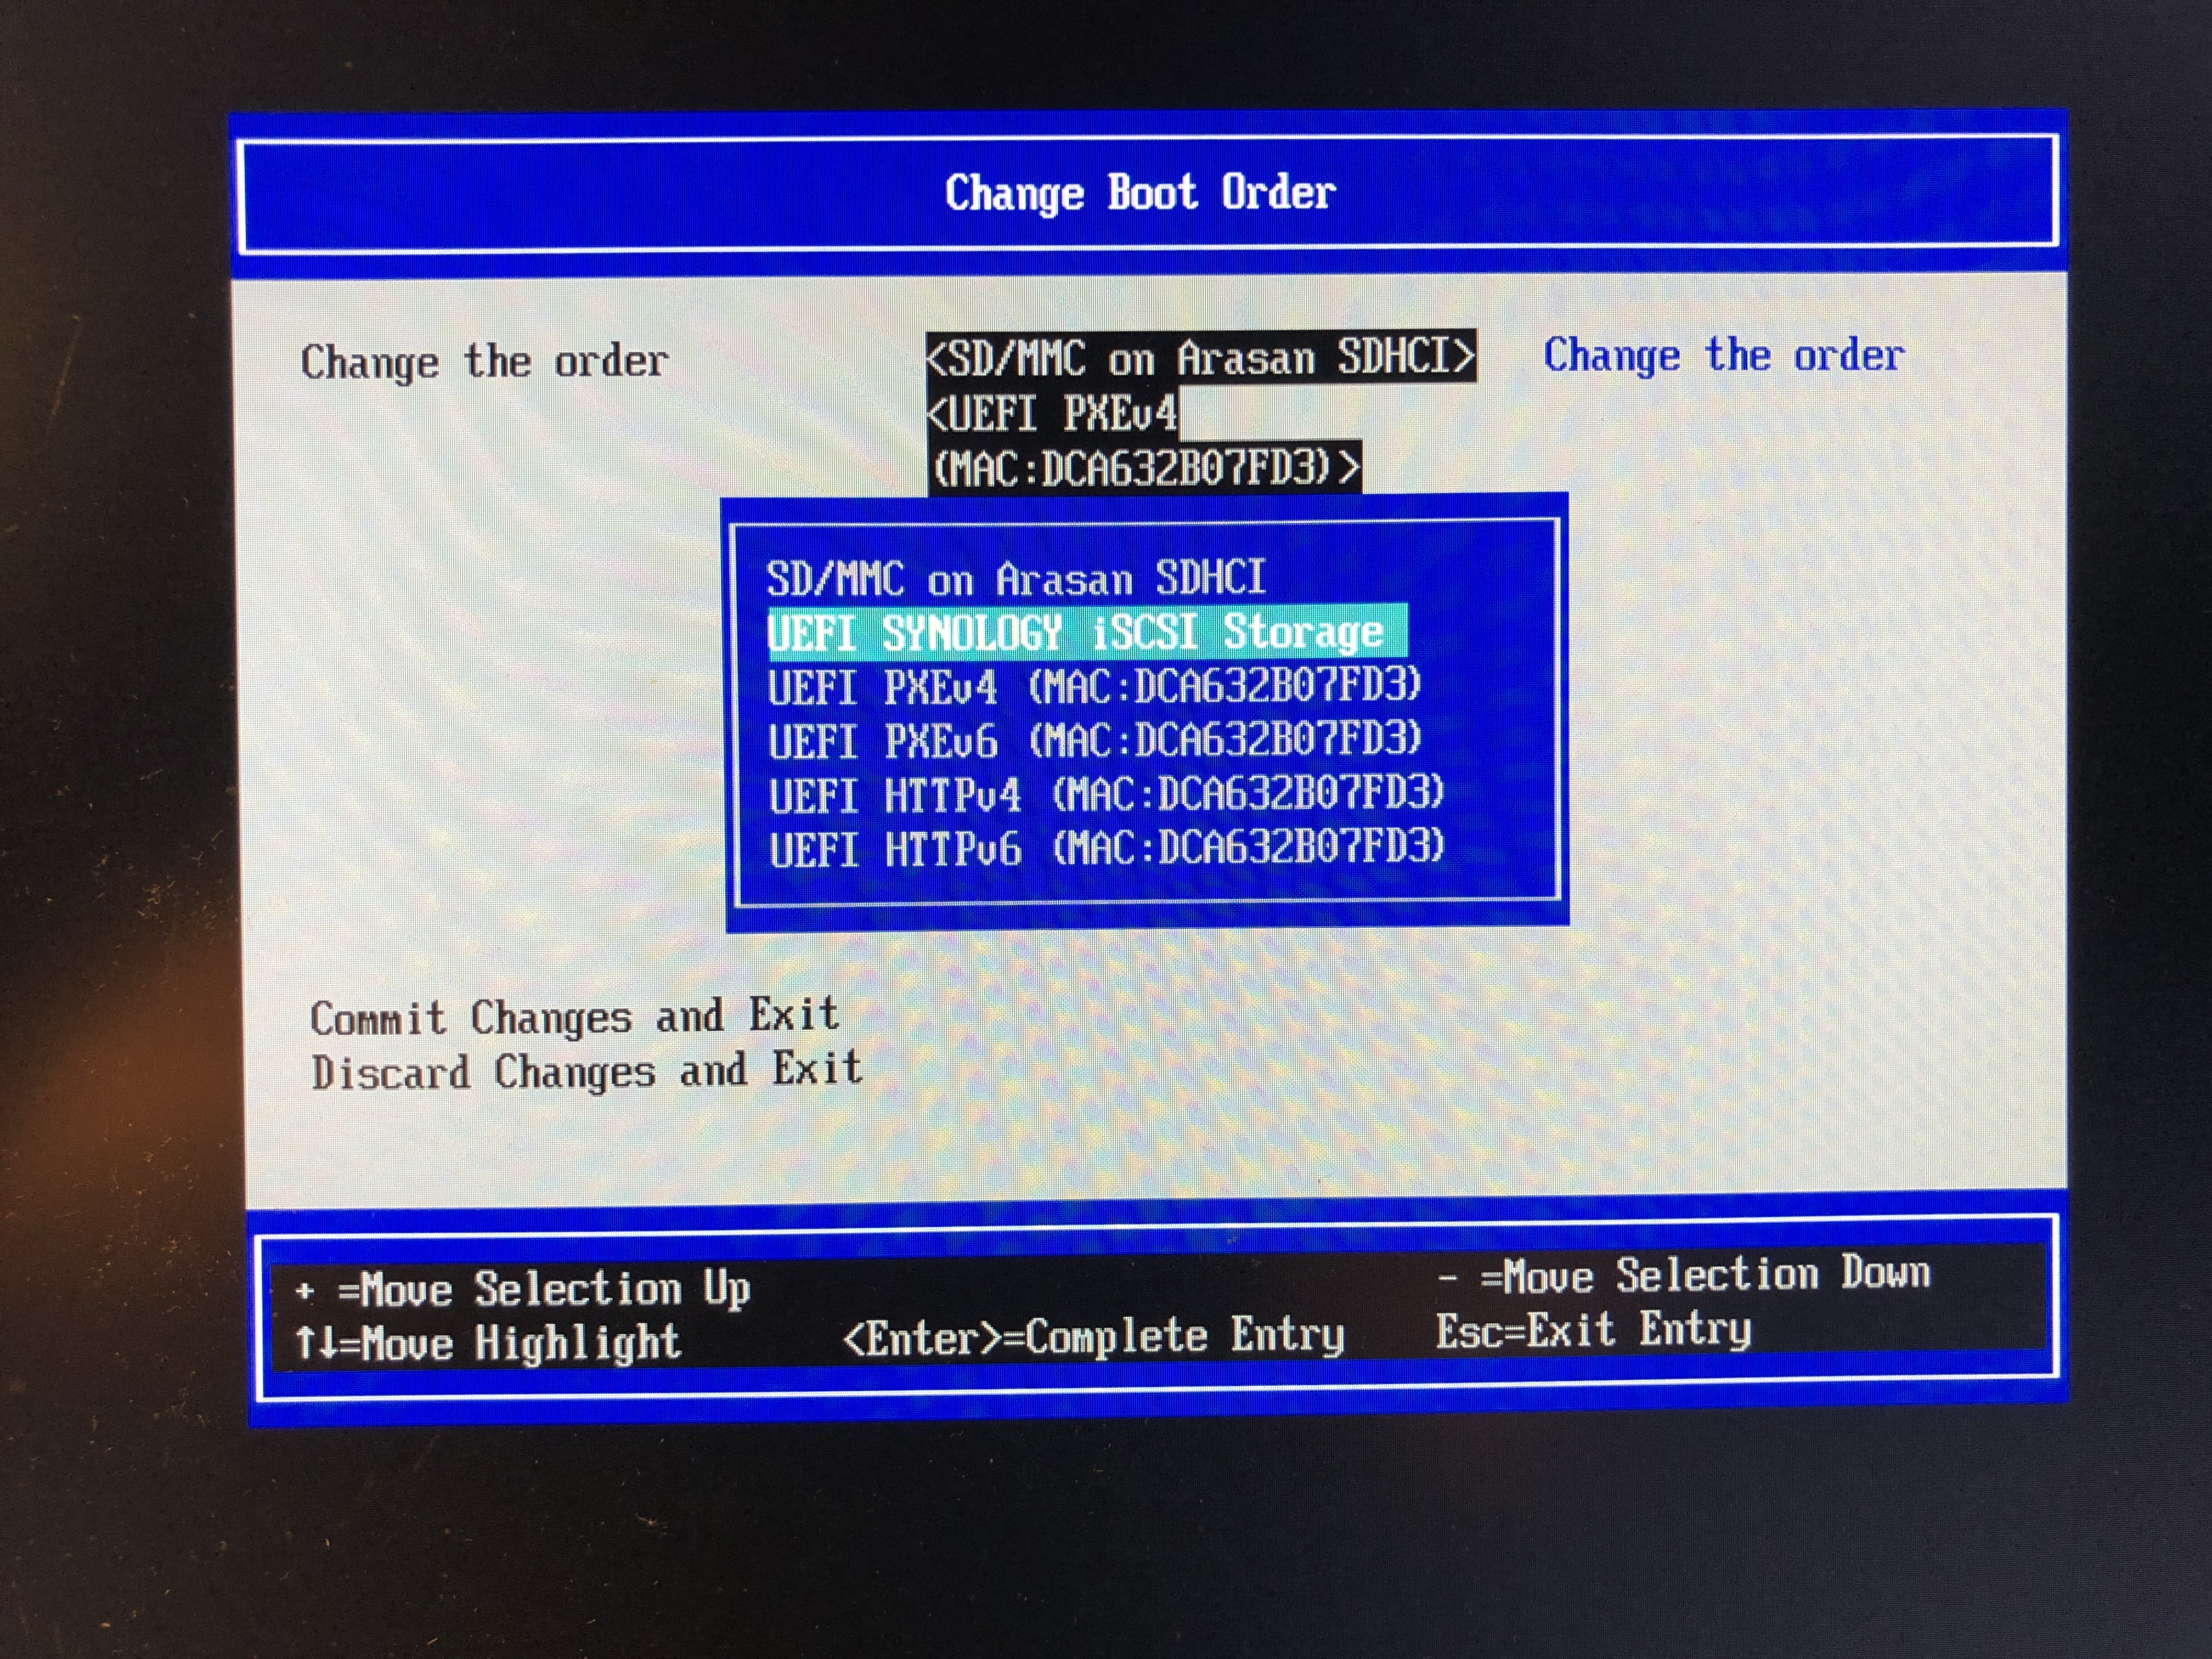
Use the Boot Maintenance Manager to set the boot order so your chosen option is not the last. Either move it up the chain or delete the other options.
Prep and Install ESXi-Arm
Use a USB flashdrive to boot the RPi and install the ESXi-Arm to the ISCSI target.
Download the installer ISO from VMWare and flash it to the boot media.
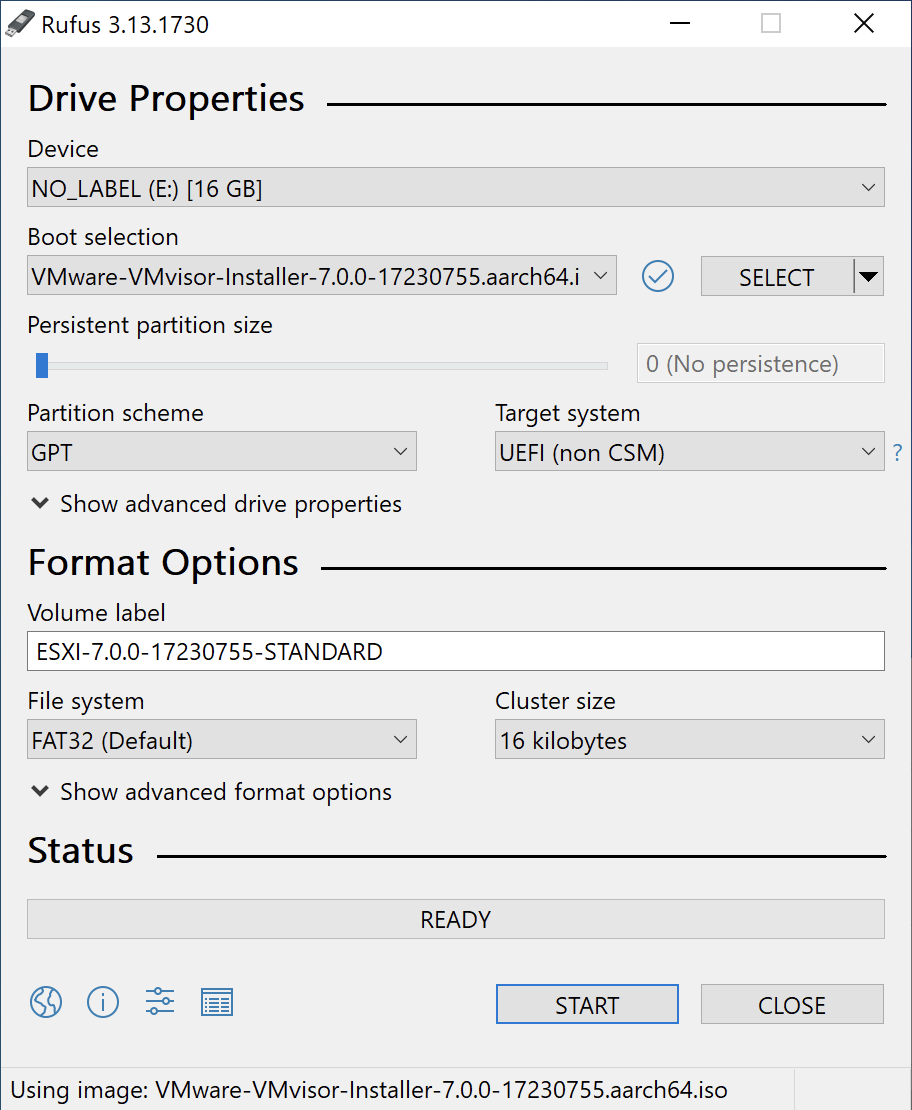
Restart the Pi with the USB flashdrive inserted and have it boot. The installer will start automatically.
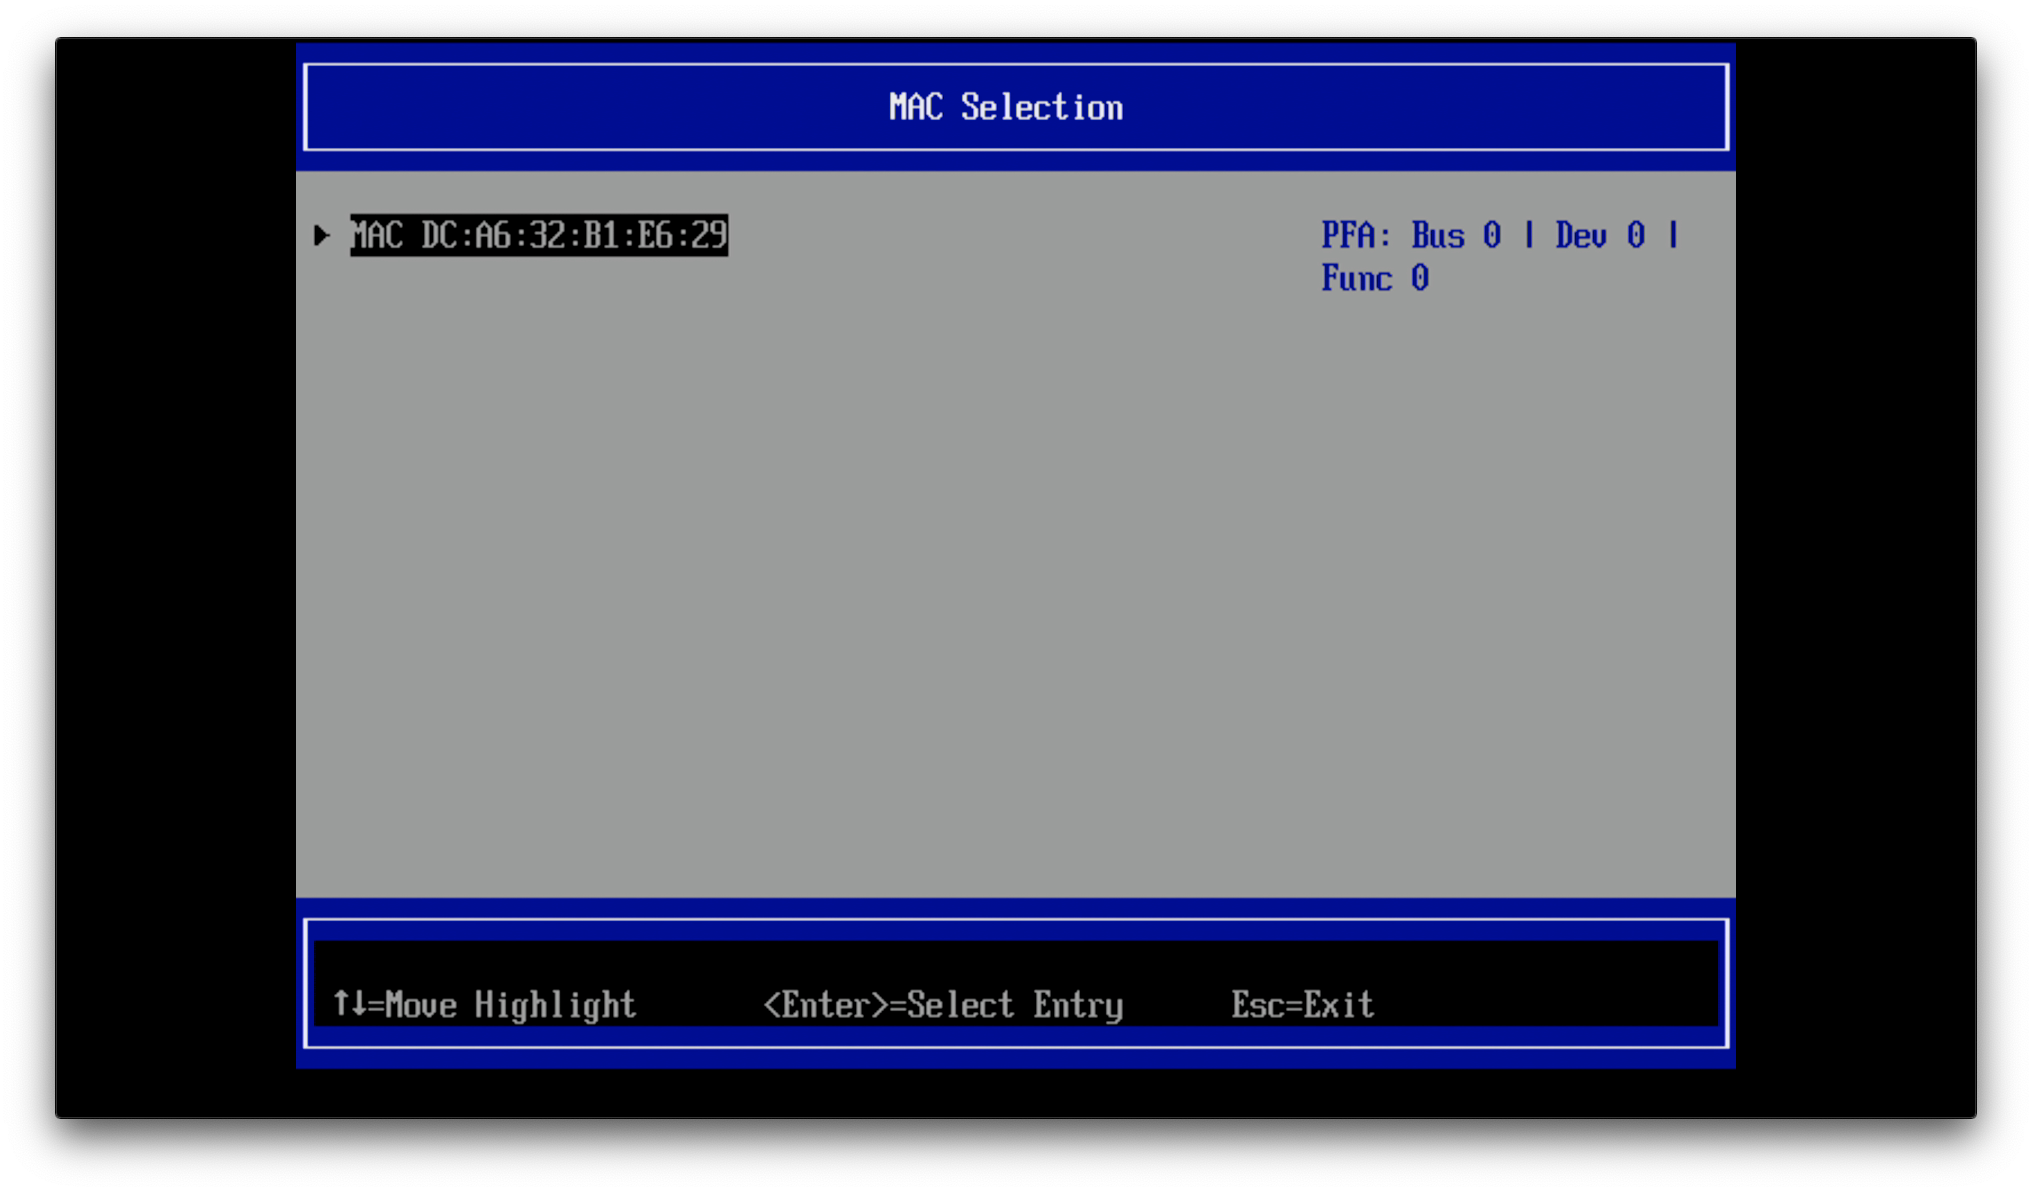
And eventually display the list of available install targets. If you wanted, you could install ESXi-Arm on the same USB as used for booting, but here we select the remote ISCSI target as the install device.
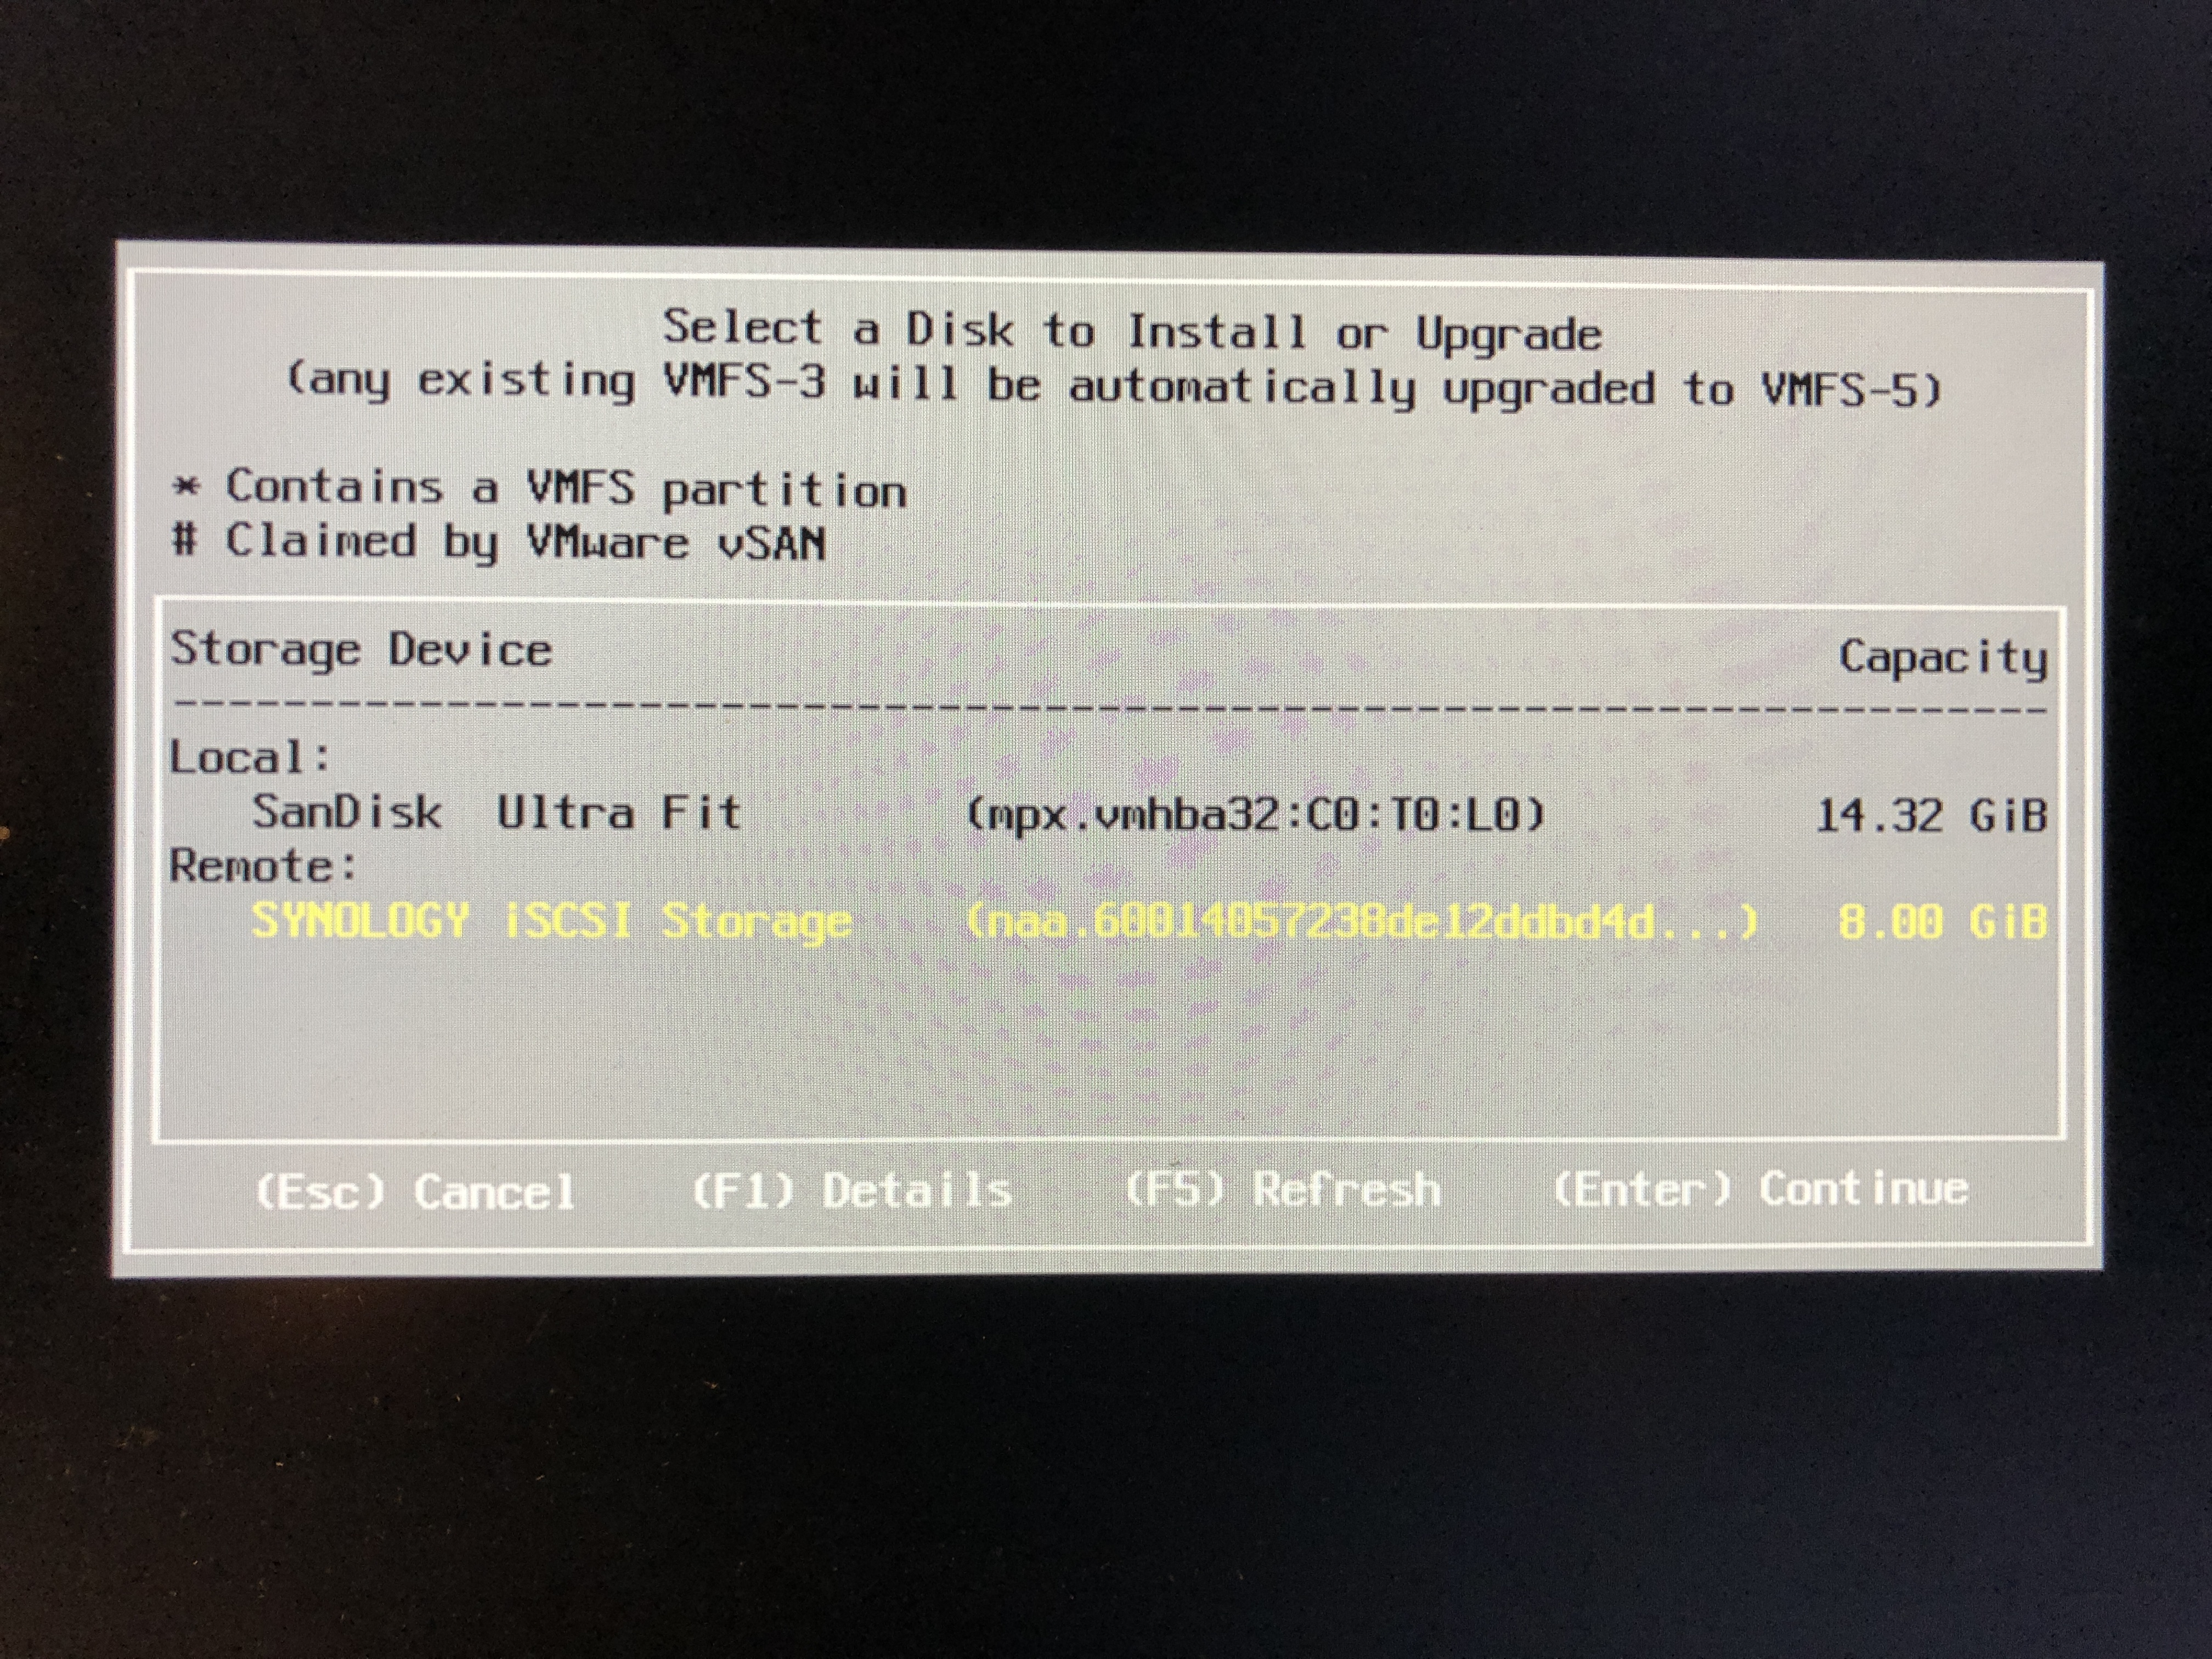
All available LUNs will be displayed on the target, here I only exposed the 8GB LUN.
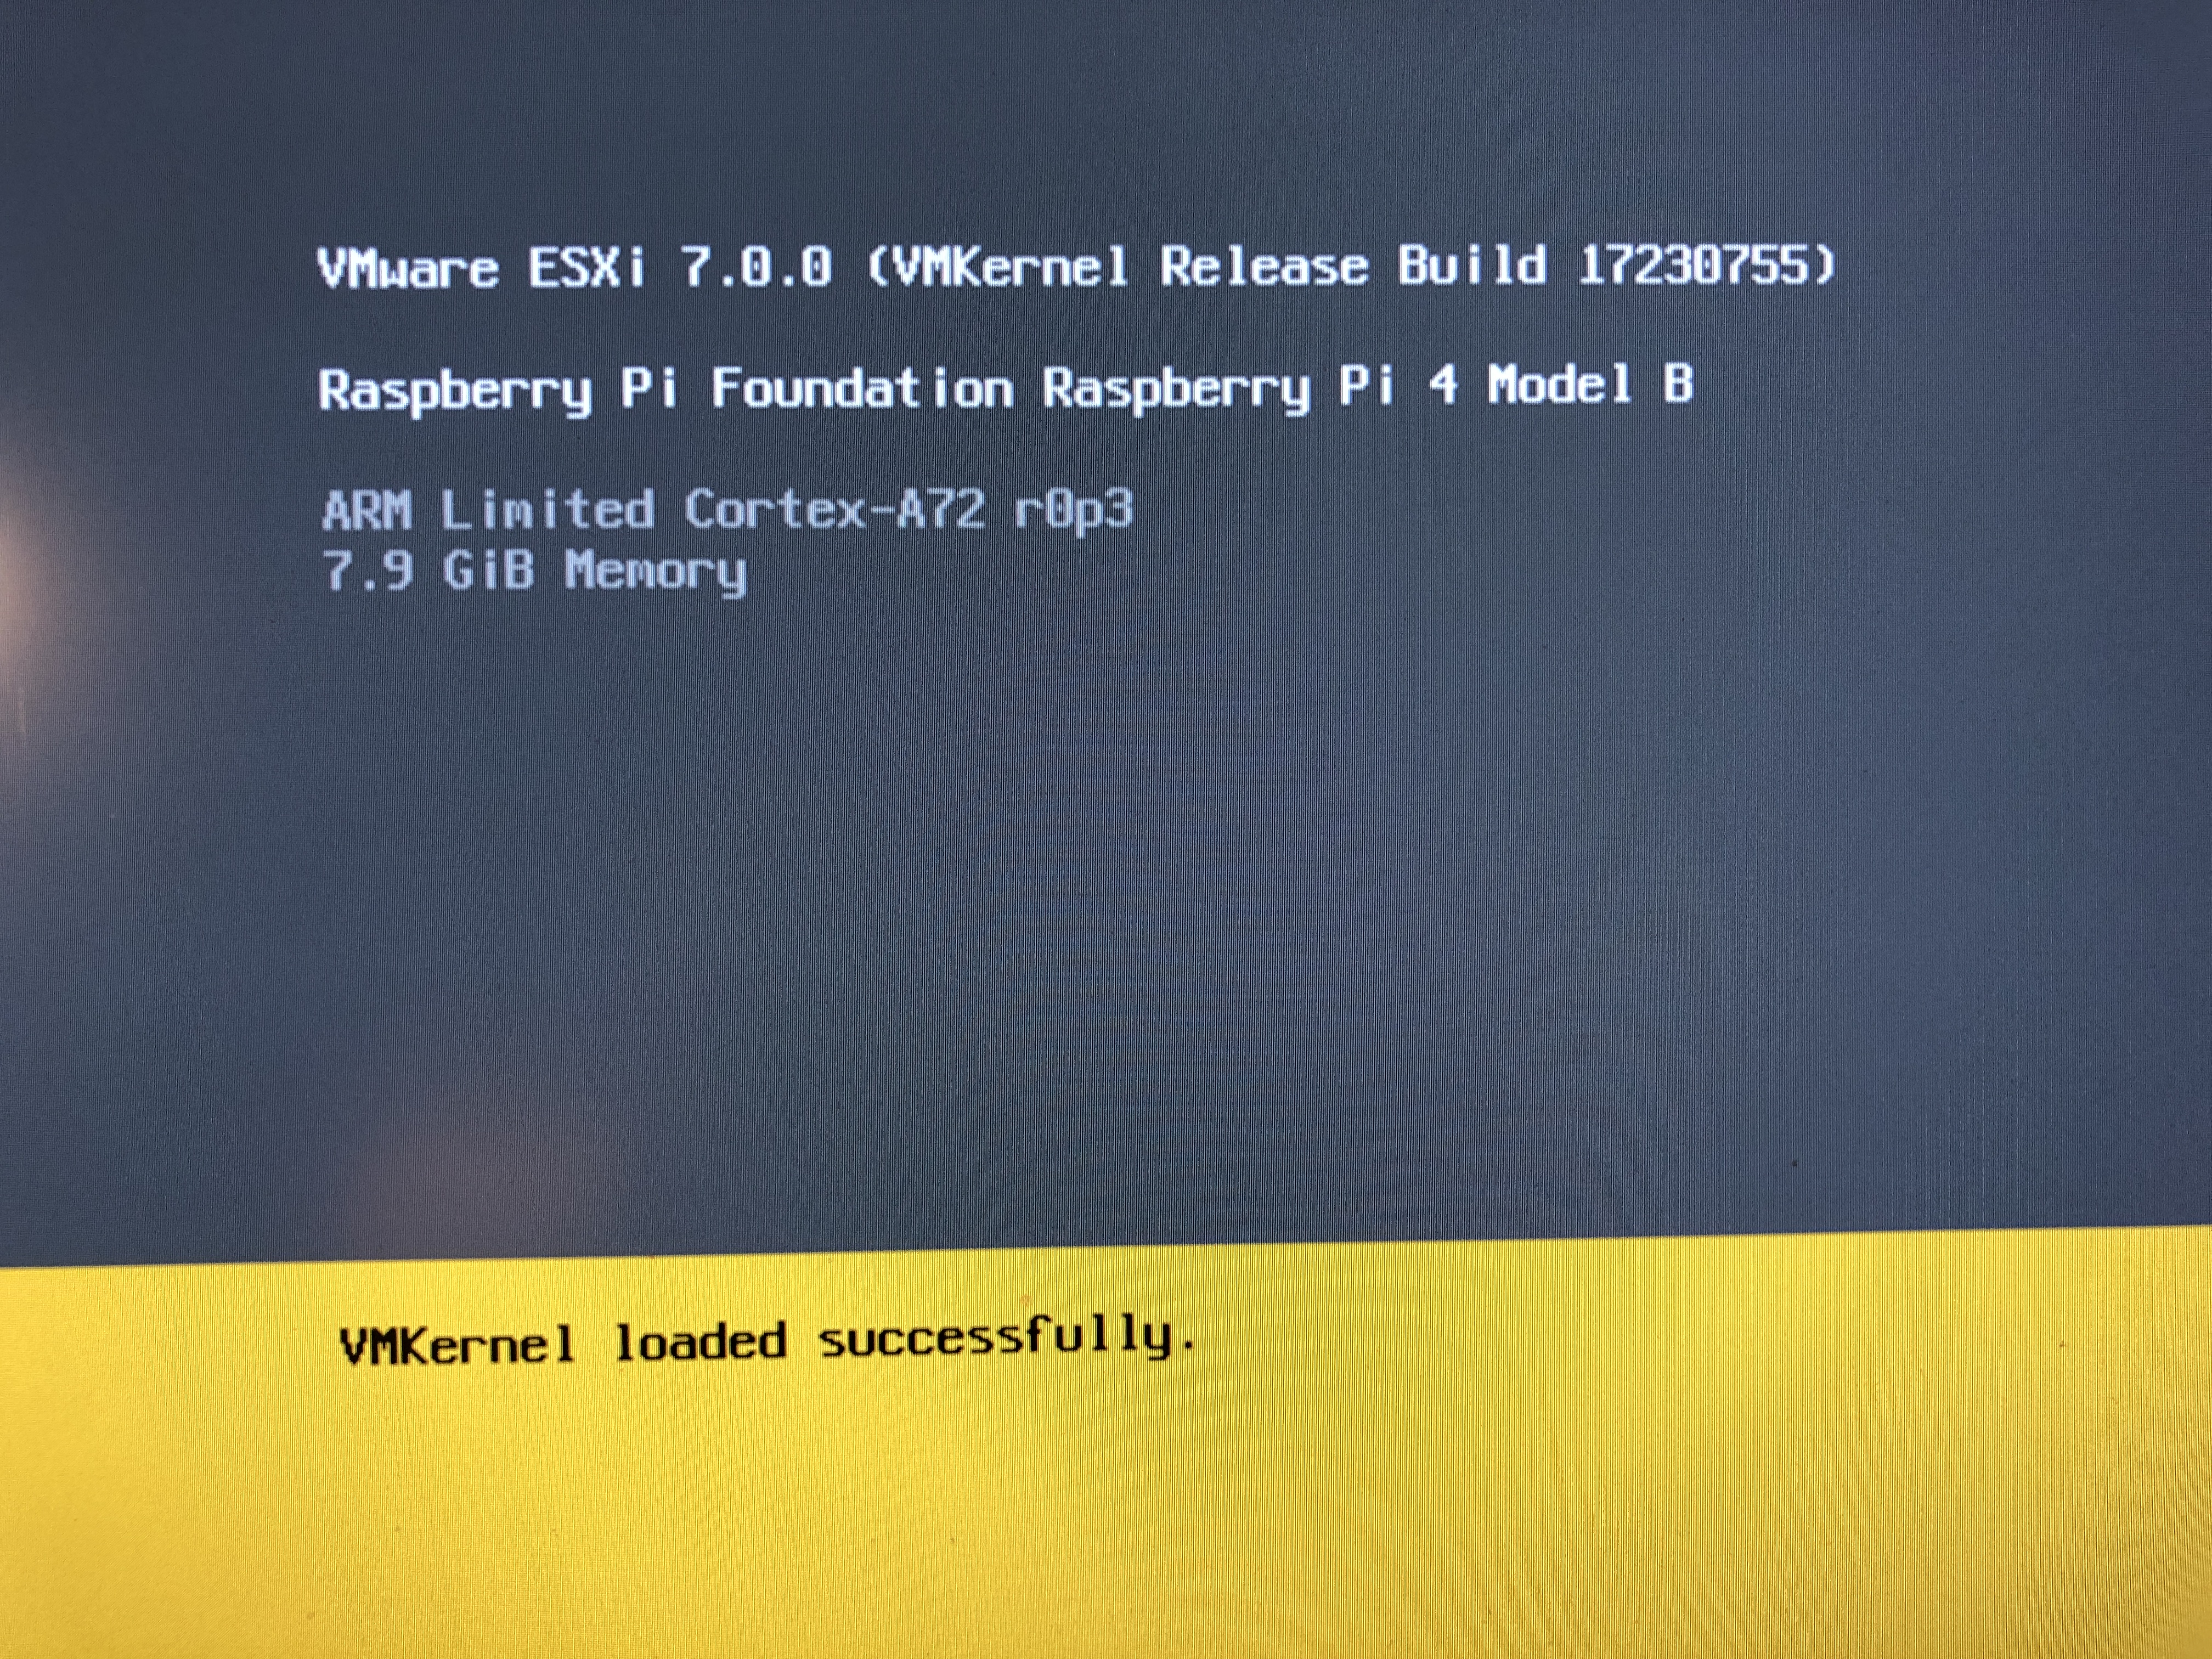
Installation is surprisingly quick
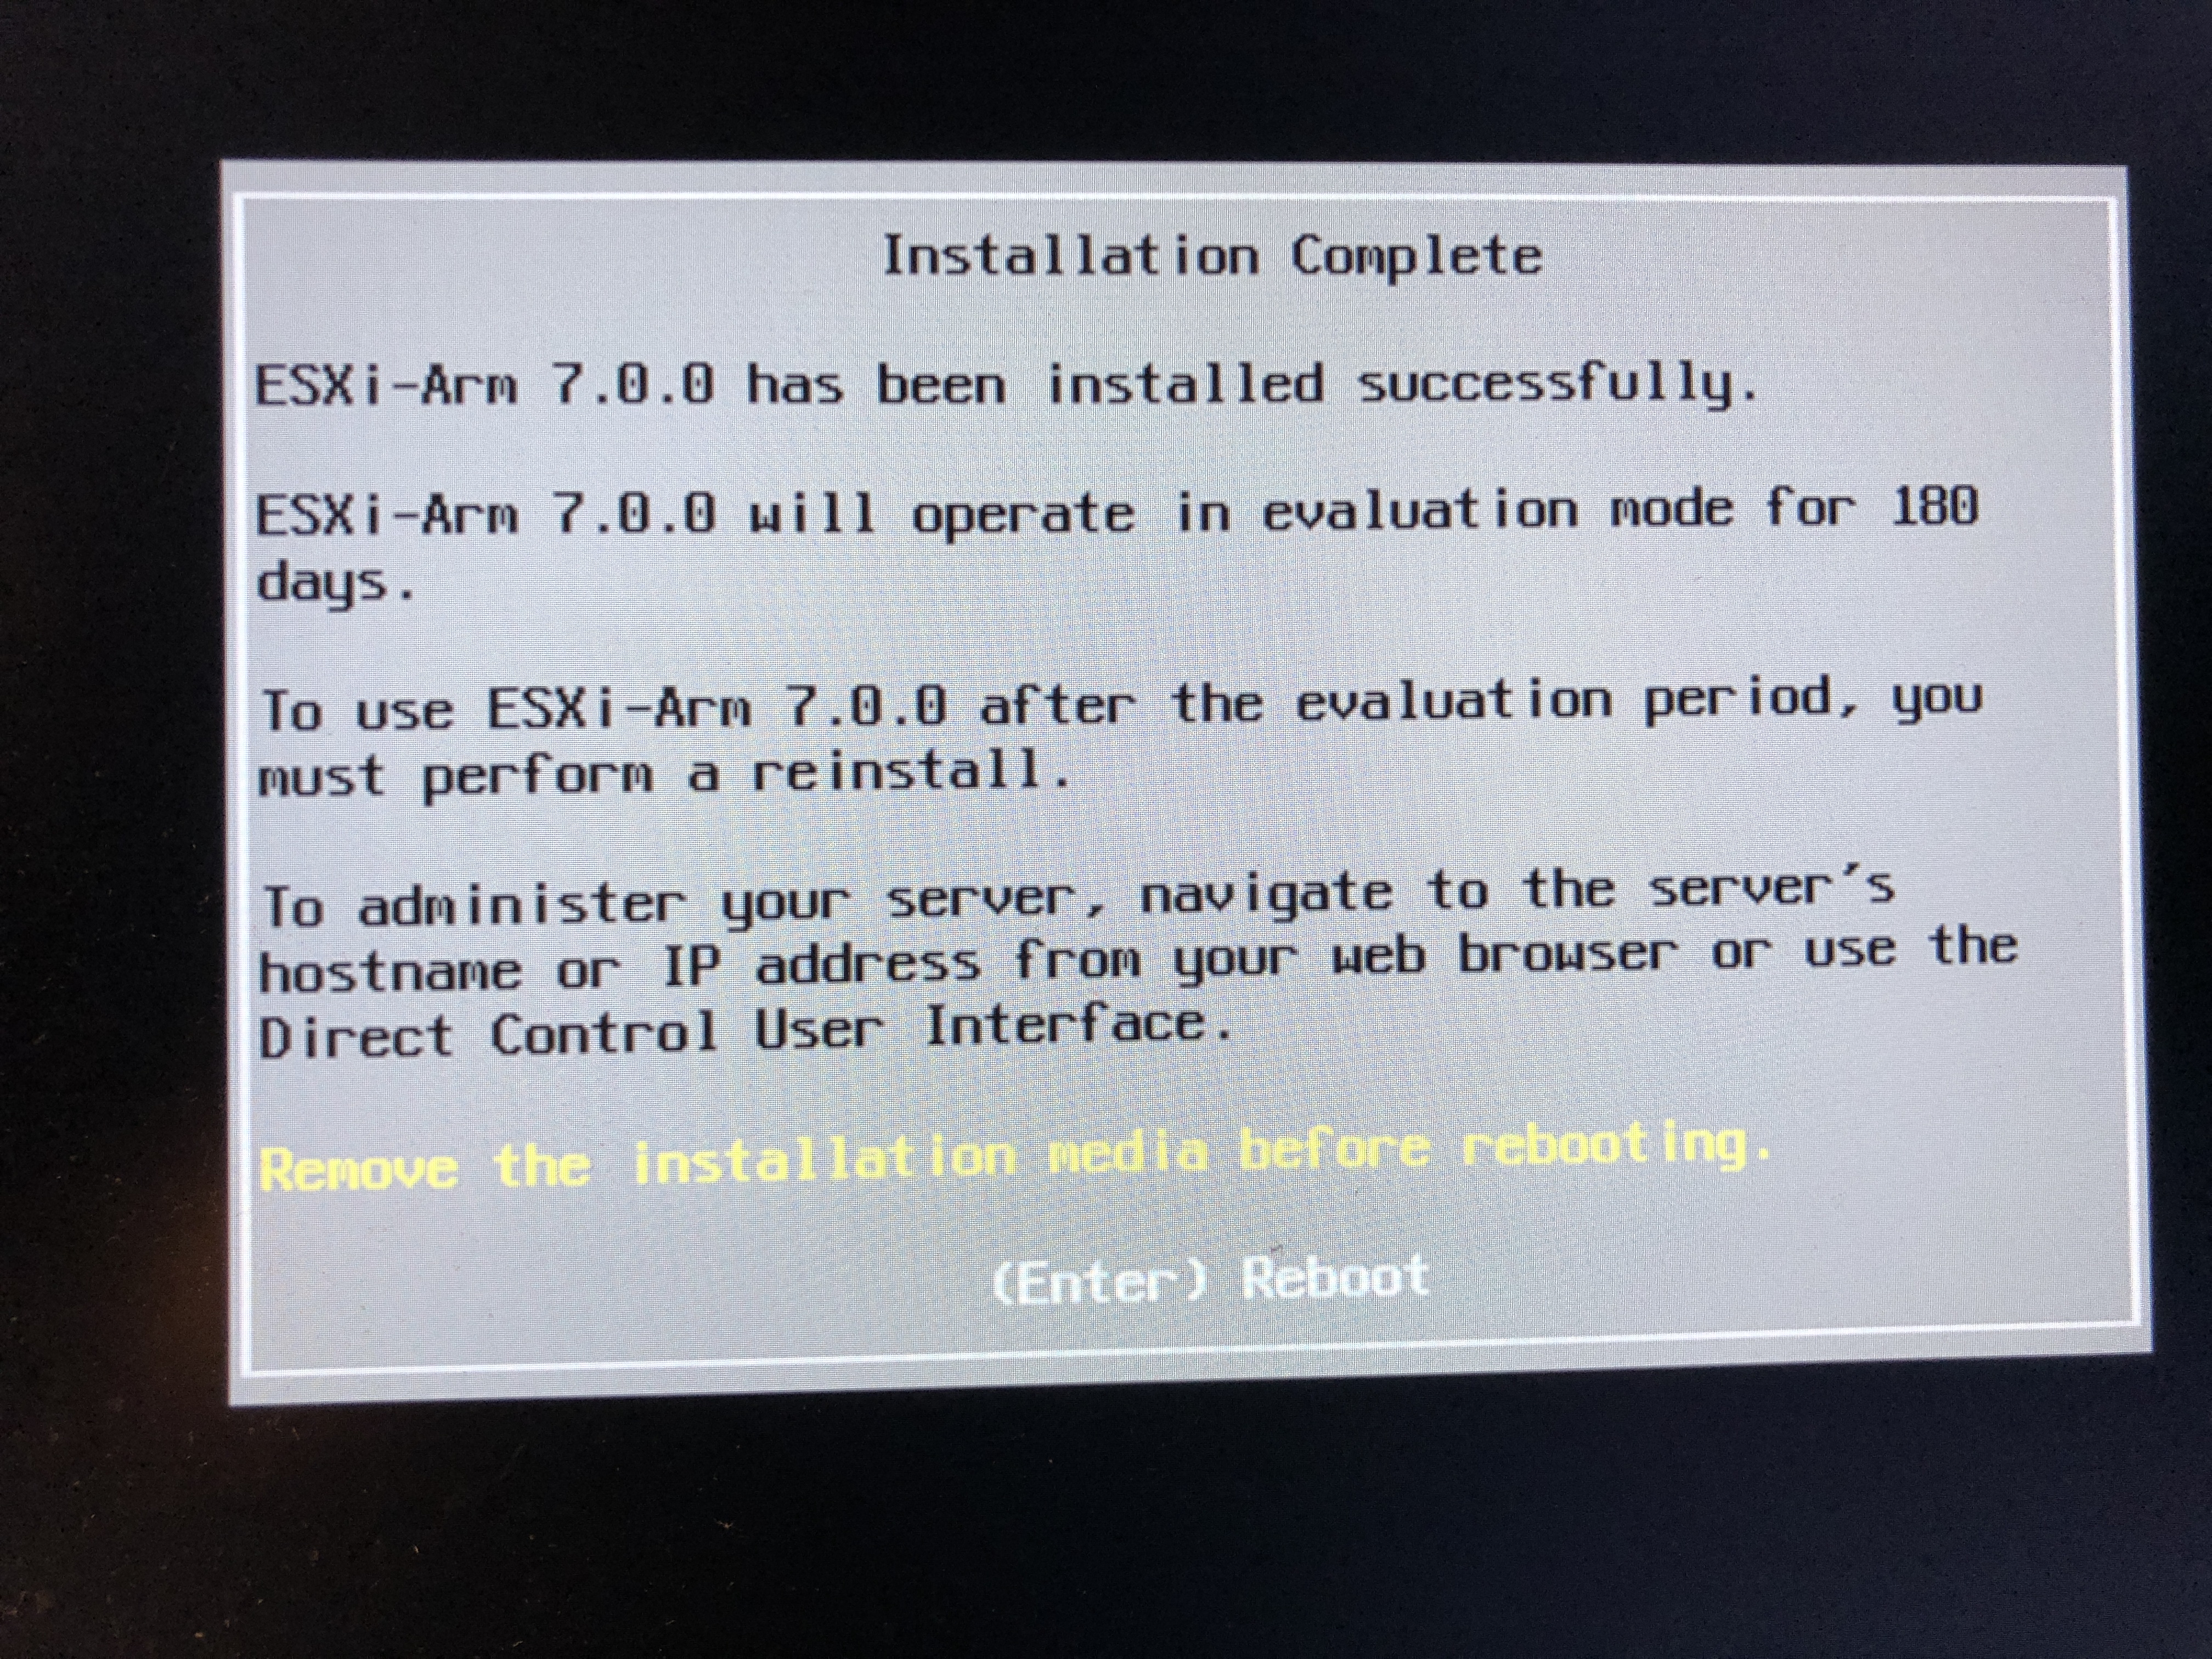
Remove the USB device so when restarted the Pi will boot using the ISCSI target.
The SD card will need to be inserted all the time, unless moving to a PXE setup.
A virgin setup requires some more tinkering in the UI
Configure NTP
As the RPi does not have an internal clock, configure ESXi-Arn to use NTP.
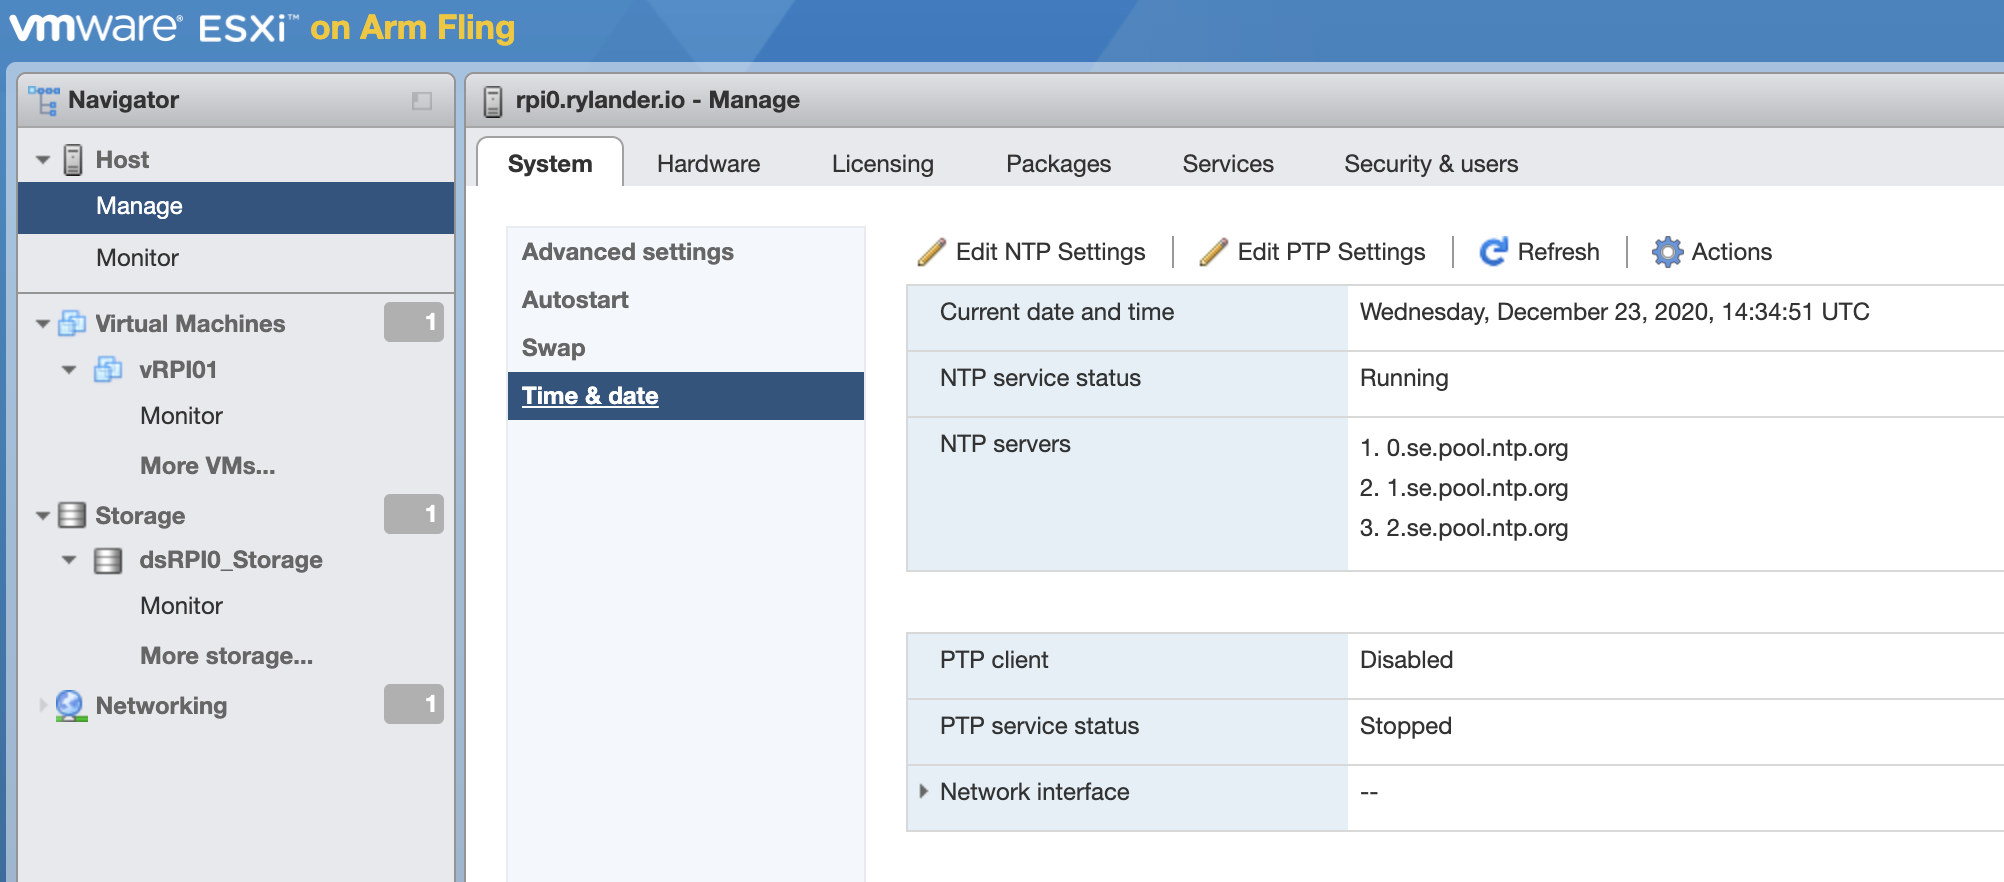
Set the service to start with the host and give it a few NTP servers. It takes a few seconds for it to come up.