If you have a consumer UPS that connects via USB, you need to use this workaround to expose the UPS to the ESXi host. I use the built in NUT server on a Synology NAS to expose the UPS to the ESXi using a vib packaged NUT client.
This is an updated guide including the Synology side as well. Find the earlier guide here.
Please note that an updated version of the library has been released. Instructions are available here: http://rene.margar.fr/2012/05/client-nut-pour-esxi-5-0/. This writeup still works, however when time permits, I’ll update this post to reflect the improved library and simplified installation.
Variables set on the ESXi NUT Client configuration
The following client parameters (as named and defined in ESXi) are needed from the NUT server, in our case it’s the Synology NUT server. These are set in two different files as described below.
UserVars.NutUpsName : UPS name on remote NUT server (ups_name@server_name), |
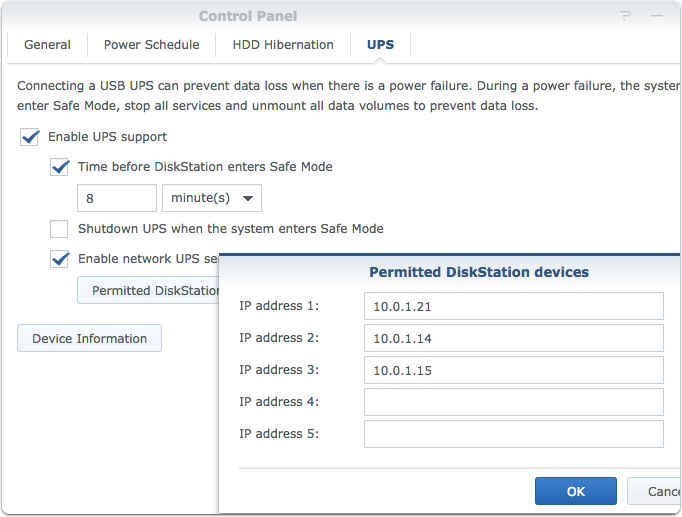
Allow ESXi clients to query upsmon on the Synology
First enable the Synology “Network UPS” and then allow other clients to query the NUT server on the Synology by entering their ip addresses.
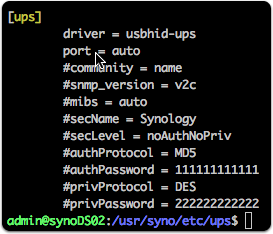
NUT configuration on the Synology
The NUT configuration on the Synology is located in the /usr/syno/etc/ups/ directory.

Synology configuration details
The named server instance is defined in the file ups.conf. The default is “ups” which is later used on the ESXi side together with the ip: ups@10.0.1.22.
sudo cat /usr/syno/etc/ups/ups.conf |
The instance name is the node, in this case “ups”. Port is set to 3493 by default (auto). If the port is non-default, you will need to make the proper changes in the firewall on the ESXi side, however the defaults are automatically applied during installation.
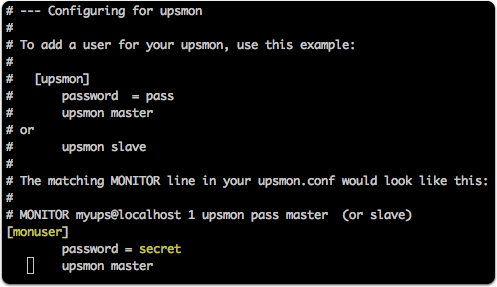
Credentials
This file is updated whenever the fw is updated on the Synology which is something to keep in mind if you want to set your own. The username and password are used on the ESXi side.
sudo vi /usr/syno/etc/ups/upsd.users |
The user is the node.
Download the NUT client vib package to the ESXi host
The NUTClient vib package has (2016-04) been updated to version 1.4 to include “NUT v2.7.4 and SSL support with embeded libressl 2.3.0”.
The NUT client package contains configuration files, installation script, firewall settings in addition to the NUT client library.
wget https://blog.rylander.io/2017/01/15/connect-a-esxi-6.5-host-to-a-ups-connected-to-a-synology-nas/NutClient-ESXi500-1.4.0.tar.gz |

Extract package
tar -xvzf NutClient-ESXi500-1.4.0.tar.gz |
Make sure to set the script files to be executable.
chmod +x upsmon-install.sh |

Update the install script
Instead of entering the configuration using the UI, you can set them to default values using the install script as well. The settings are used to create configuration files on the ESXi host, when the service is started.
!/bin/sh |

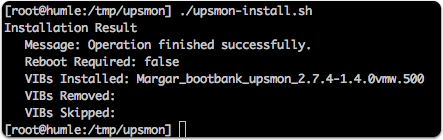
Run the installation script
The vib installation also creates firewall settings to allow the client outbound traffic on default (3493 and 25) ports. You can change these ports in the firewall ruleset configuration file.
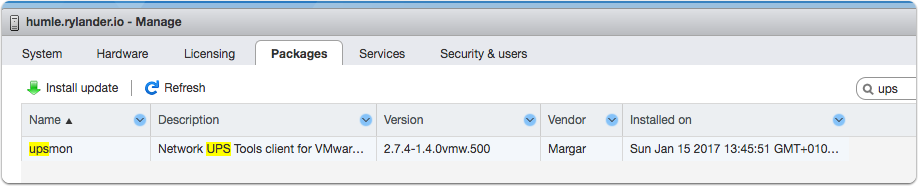
Verify installation in ESXi UI
Look in the Packages section of the UI
Reboot the ESXi host
The reboot forces the creation of the configuration files in addition to the variables being available in the advanced configuration
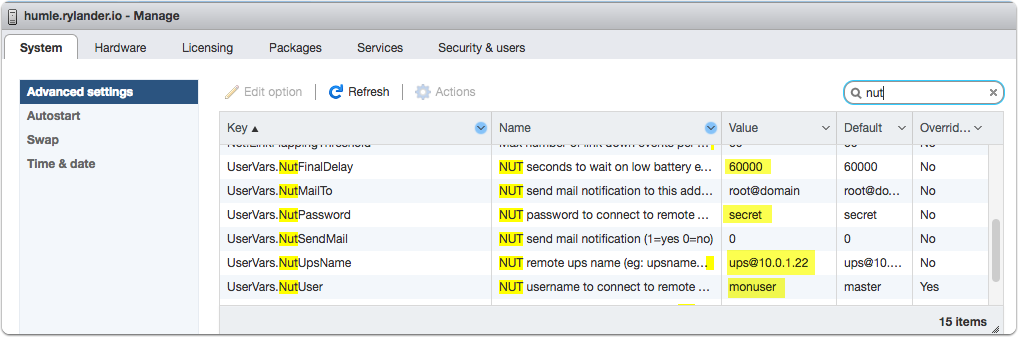
Validate the advanced settings
Make sure the settings are set as you want as these are used to generate the configuration files.
Validate configuration files in /etc/ups/
cat /etc/ups/upsmon.conf |
The actual configuration used is contained in this file.

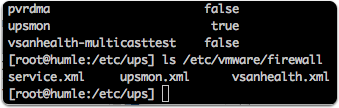
Validate firewall settings
ls /etc/vmware/firewall |
Where the file upsmon.xml is added by the package.
esxcli network firewall ruleset list |
Will list the upsmon in the list of rulesets as enabled set to true. Change the settings in the upsmon.xml file to update the ruleset.
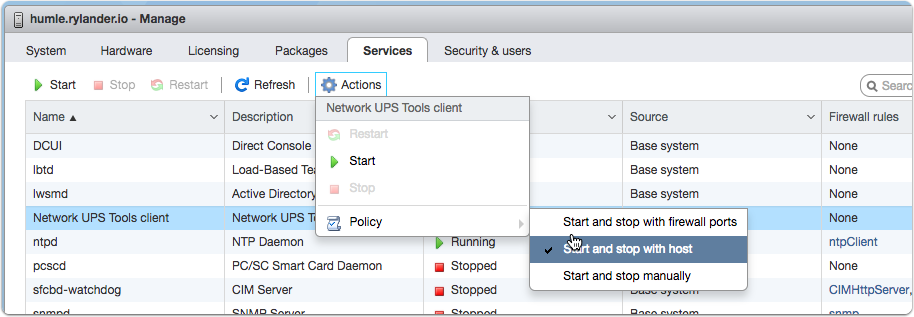
Set autostart policy on the ESXi
The default startup policy is manual so you should change the startup policy to start and stop with the host.
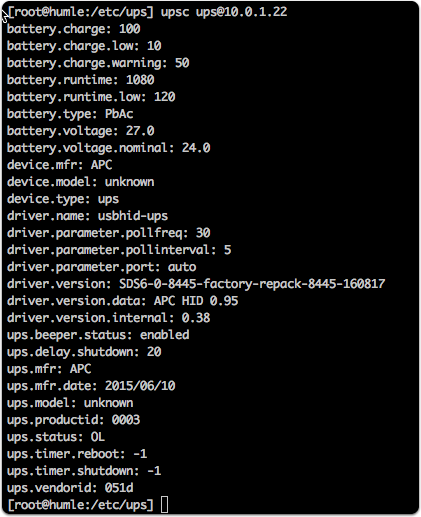
Verify the NUT client connectivity with the NUT server
upsc [email protected] |