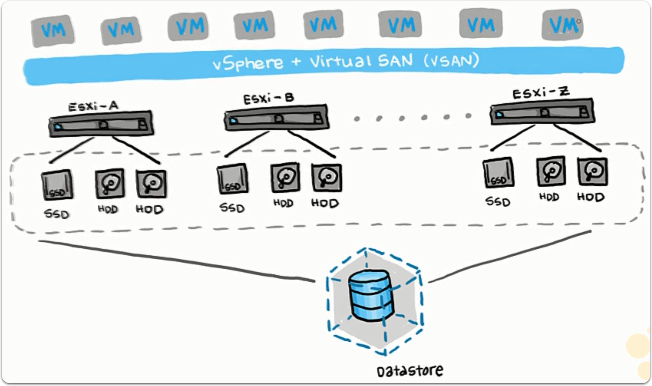
I’ve tried many different types of shared storage in my HomeLab, however I’ve never really found the “one”. The vSAN feature of vSphere has been high on the list for a long time and when I finally upgraded my hosts to the 6.5 release, I decided to also go for the vSAN.
My setup will be 1x250GB SSD coupled with 1x1TB storage on two hosts and run the witness appliance on a separate third host. I’m connecting the two datastore hosts using a 1Gb crossover cable, silently wishing for a 10Gb connection in the future. The witness traffic will be routed via the normal LAN connection.
There are quite a few 1 host vSAN guides out there and the initial setup for a 2-node is the same. The 2-nodes does add the tinkering with the data and witness network paths and joining of the nodes.
Create master vSAN cluster node
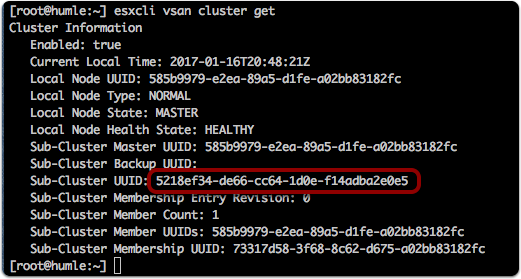
The new command creates the cluster and the get command displays the cluster information.
esxcli vsan cluster new |
The important UUID key from the sub-cluster master is later used to join the cluster.
This step is only done on the first cluster node. All other nodes are added to the cluster using the Sub-Cluster UUID.
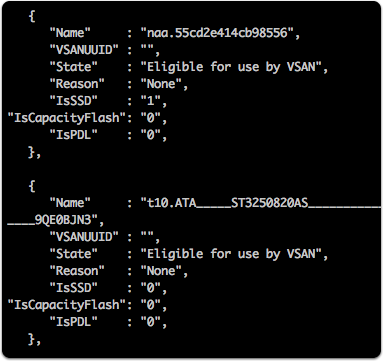
List claimable disks for vSAN
In order to be able to claim disks for vSAN, they need to contain no partitions at all. You can use partedutil to clear all partitions or from the UI on the device view. I had a disk which neither could interpret which forced me to zero out the partioning information using the dd utility.
sudo dd if=/dev/zero of=/dev/YOUR_DISK_IDENTIFIER bs=1 count=1024 |
To list eligible disks type this command:
vdq -q |
Add disk to vSAN cluster
Next step is to add physical disks for VSAN usage. VSAN requires one SSD and one, or multiple HDDs. Use the esxcli vsan storage add command with the options -d HDD1 -d HDD2 -s SDD. You can add them individually as well.
esxcli vsan storage add -d t10.ATA_____ST3250820AS_________________________________________9QE0BJN3 -s naa.55cd2e414cb98556 |
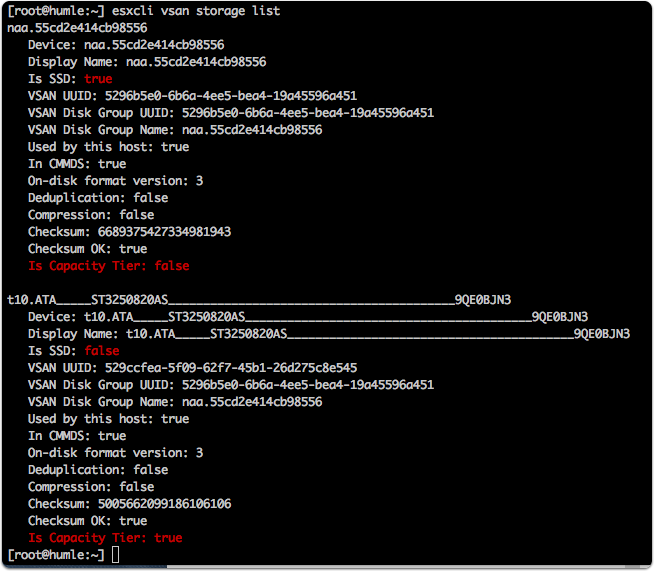
List disks in vSAN node
esxcli vsan storage list |
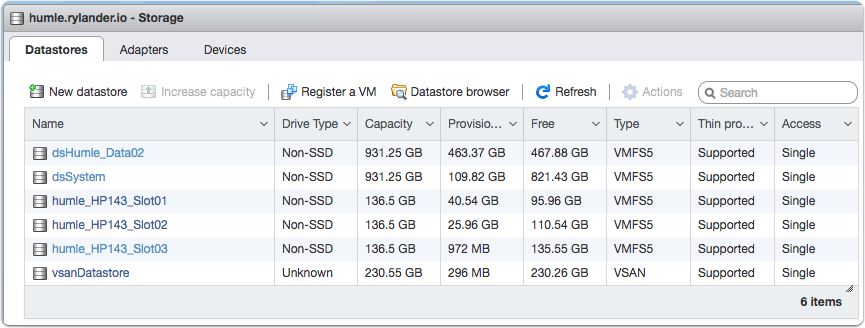
List datastore in the UI
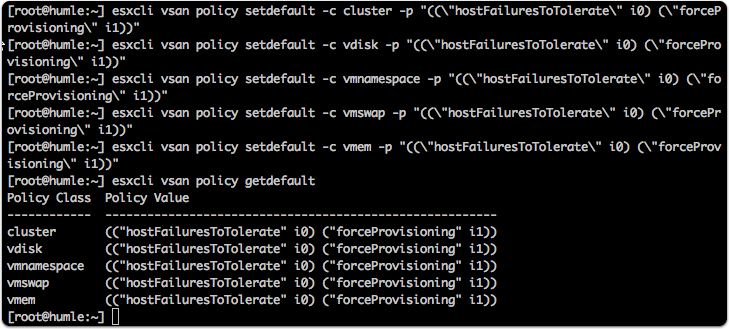
Change storage policy to allow one node operation
In order to be able to write to the single node vSAN cluster, you need to change the policy. This is only neccessary if you want to setup a single node cluster.
esxcli vsan policy setdefault -c cluster -p "((\"hostFailuresToTolerate\" i0) (\"forceProvisioning\" i1))" |
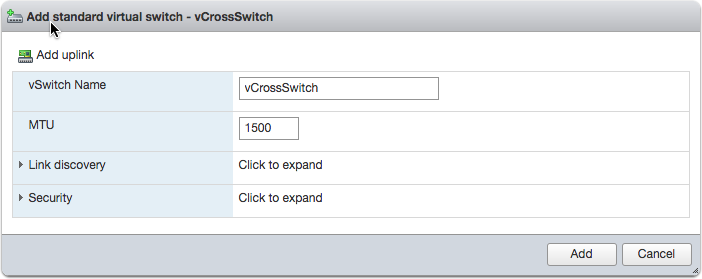
Configure networking for vSAN traffic
First step is to create a virtual switch which we will bind to a vmk# nic. The same network configuration is done on all data nodes. The witness appliance does not require anything specific.
Add VMkernel NIC for crossover connectivity
A way to check connectivity is to ping the ip address from each host.
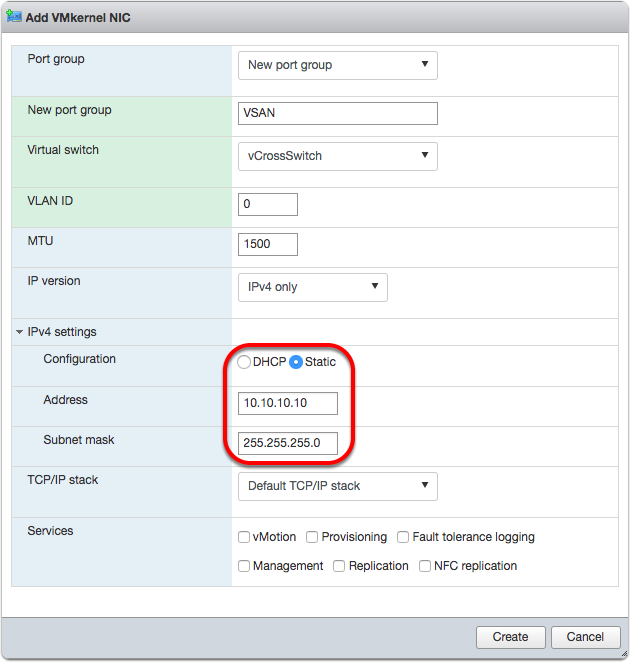

Add networking for 2-node data replication traffic
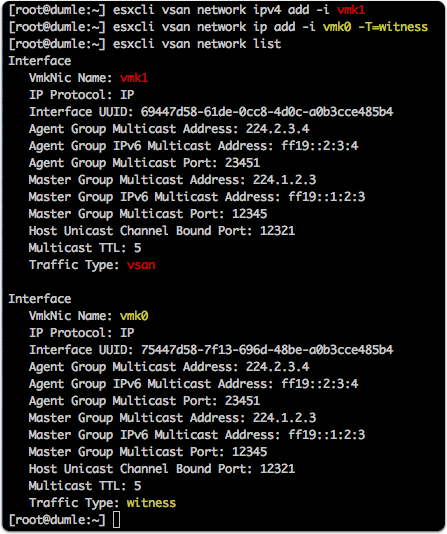
The data traffic will flow using a crossover cable and the witness traffic will flow via the normal LAN connection.
We need to tag which vmk will handle what vSAN traffic. Make sure to specify the -T flag to specify witness traffic. Make sure to select the correct vmk# for your normal traffic, in my case vmk0.
esxcli vsan network ipv4 add -i vmk1 |
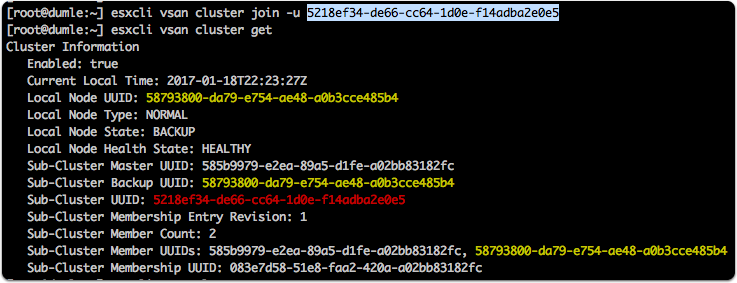
Join a data node to the vSAN cluster
Join using the sub-cluster UUID from the master cluster node earlier.
esxcli vsan cluster join -u 5218ef34-de66-cc64-1d0e-f14adba2e0e5 -w |
esxcli vsan cluster get |
Get default faultdomain
In order to join the witness appliance, you need to specify the fault domain.
esxcli vsan faultdomain get |

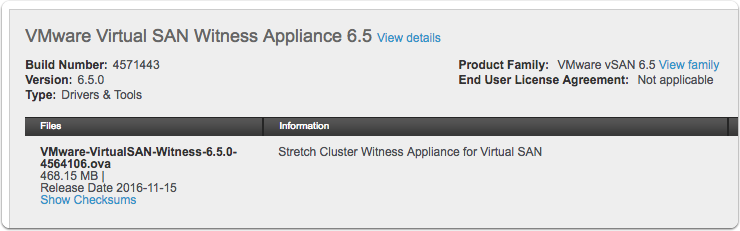
Download and install the vSAN witness appliance
This appliance is actually the nested ESXi 6.5 appliance pre-configured for witness traffic. It can be installed from ESXi 5.5 and onwards and should run on a third host, though it will work perfectly fine to install it on one of the vSAN data nodes.
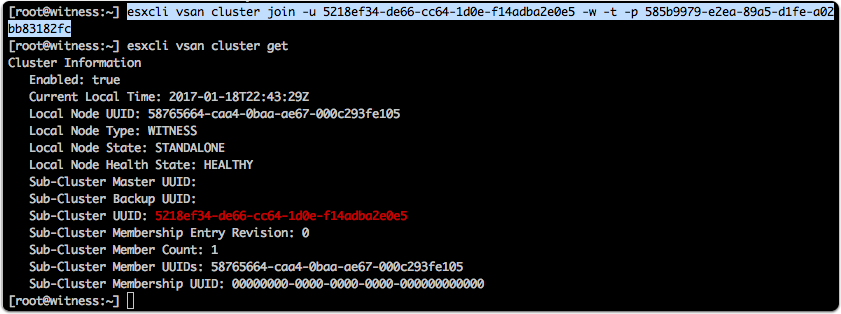
Join witness appliance to vSAN cluster
Join the witness node specifying the same sub-cluster UUID as earlier (in this screenshot the UUID is different due to multiple setups). Also specify the fault domain id.
esxcli vsan cluster join -u 5218ef34-de66-cc64-1d0e-f14adba2e0e5 -w -t -p 585b9979-e2ea-89a5-d1fe-a02 |
Create symlink shortcuts
The root directory of the vSAN datastore is non-writable, unless you use the osfs tooling. These are good to use if you want to delete stray content as well. Symlinking may save you some hairs.
ln -s /usr/lib/vmware/osfs/bin/osfs-mkdir /usr/sbin/osfs-mkdir |
